x10 Free hosting for the masses since 2006!
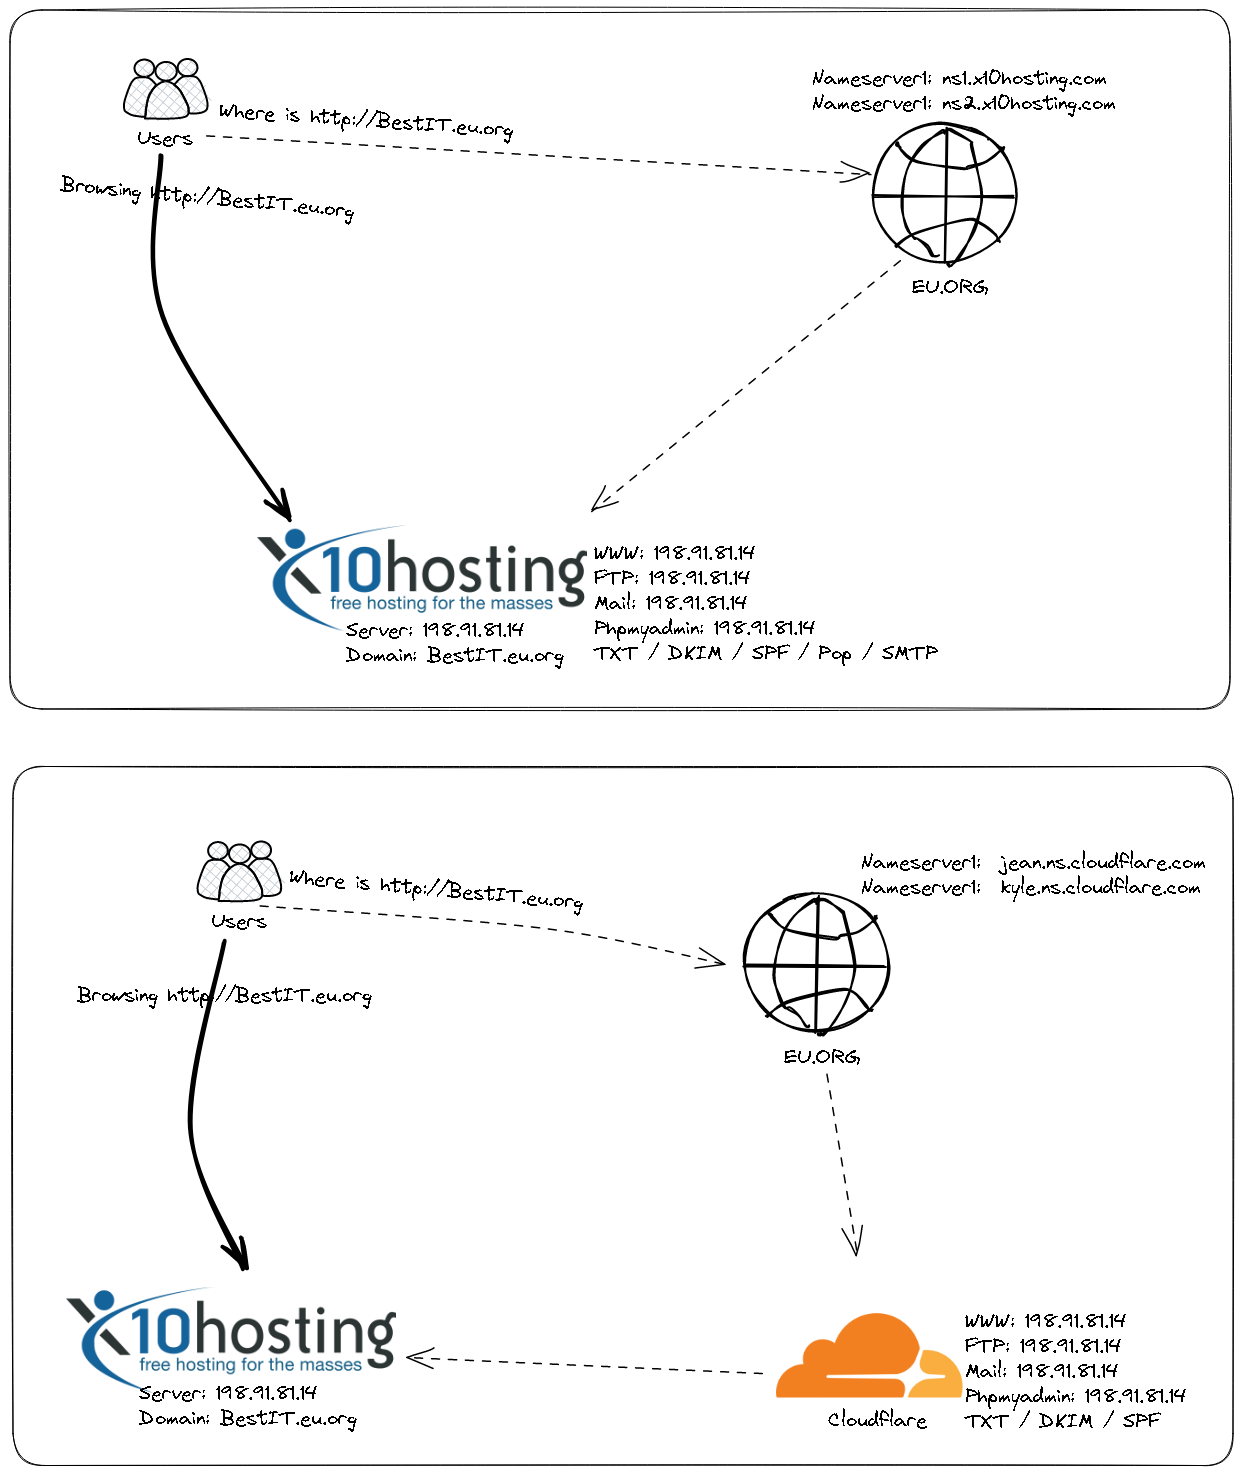
Domain Integration Diagrams There are two ways you can integrate your domain with x10hosting.
I am using EU.ORG (Domain Registrar) and Cloudflare (DNS Managing Providor) as an example.
Different ways will cause a different way to generate your SSL certificate for your website, either you can generate certificate directly from x10hosting DirectAdmin control panel or from Cloudflare then copy into DirectAdmin control panel.
Get an Account With Just an Email Just an email, and no more information required. Standard process as other popular free hosting providers.
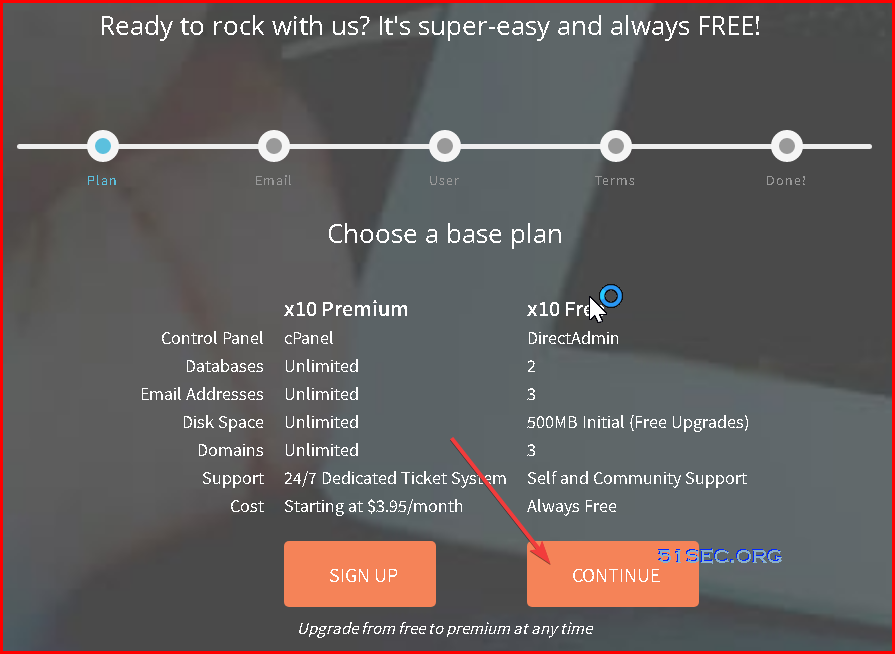
Features for x10 Free Plan Following feature lists are from x10 website or control panel. Pretty similar feature list as others. Some even have tighter limitation than Byet or Infinity.
x10 Free
Control Panel
DirectAdmin
Databases
2
Email Addresses
3
Disk Space
500MB Initial
Domains
3
Support
Self and
Cost
Always Free
Extensive :
Storage Space: 500 MB (can be increased after 7 days)
Inode (File and Folder) Count: 50,000 Inodes
Max File Size: 10 MB
Bandwidth: Unmetered
MySQL Databases: 2
FTP Accounts: 3
Domains: 2
Subdomains: 2
Domain Pointers: 1
Email Addresses: 3
Features: Softaculous auto installer, PHP version select
Cost: Free!
Steps to Create a WordPress Site
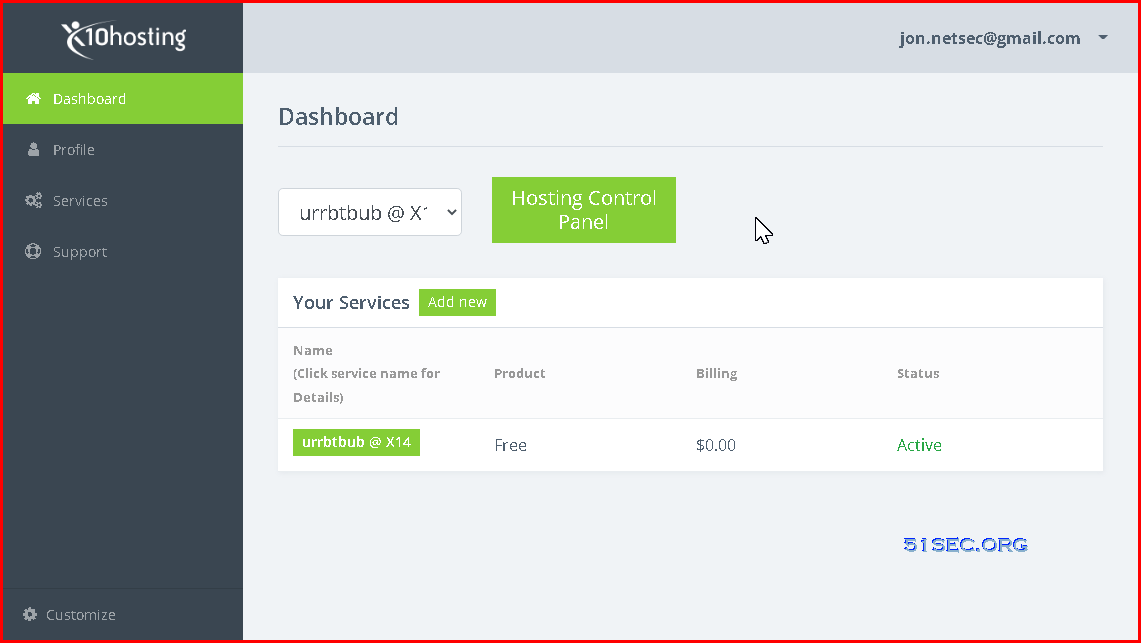
1 Create your first service. You will be only able to create one service.
Infinity Free services are limited to 1 per account and this account already has 1 active.
One should be enough for your small project. You always can use another email to get youself another account to play with it if needed.
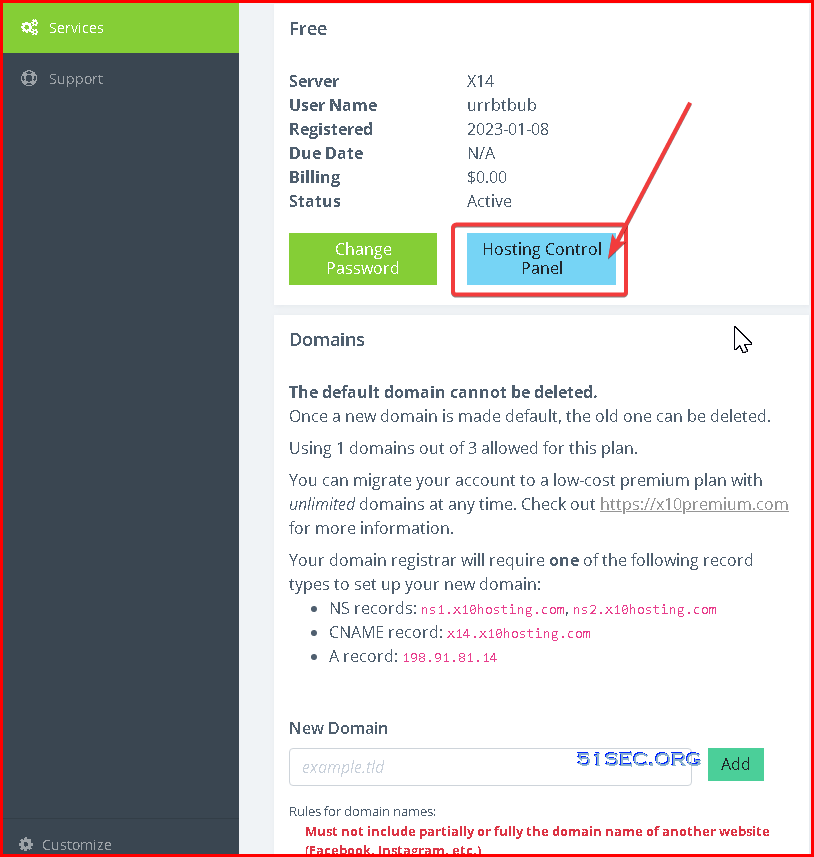
2 Hosting Control Panel
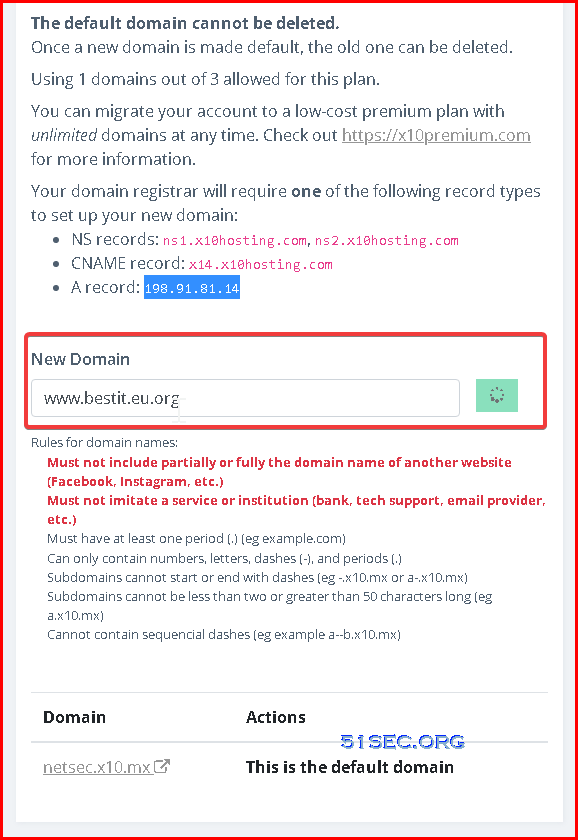
Create a new subdomain or add a new custom domain:
Add an A record from your domain registrar website (in my case, it is Cloudflare) based on the information gives on the above service page
Add new domain into your service.
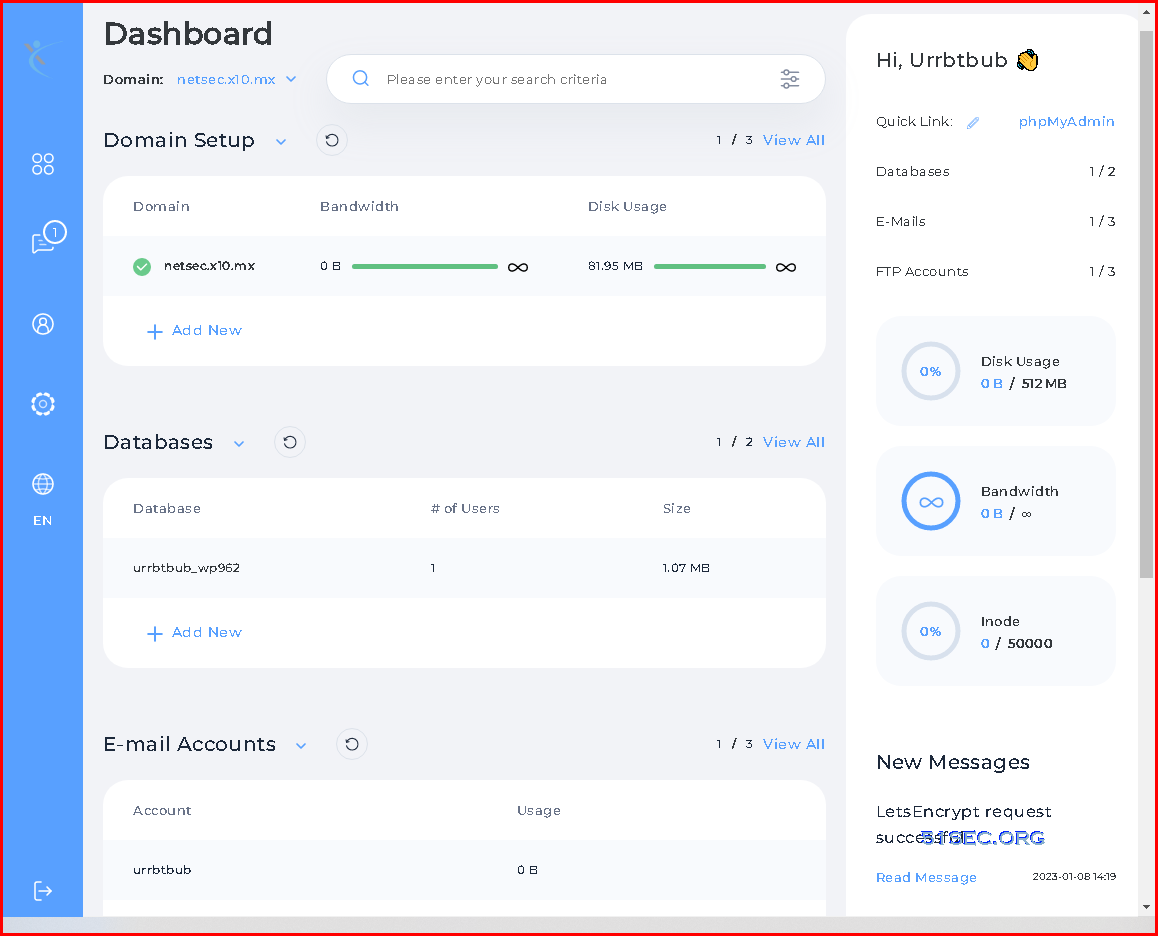
3 Dashboard
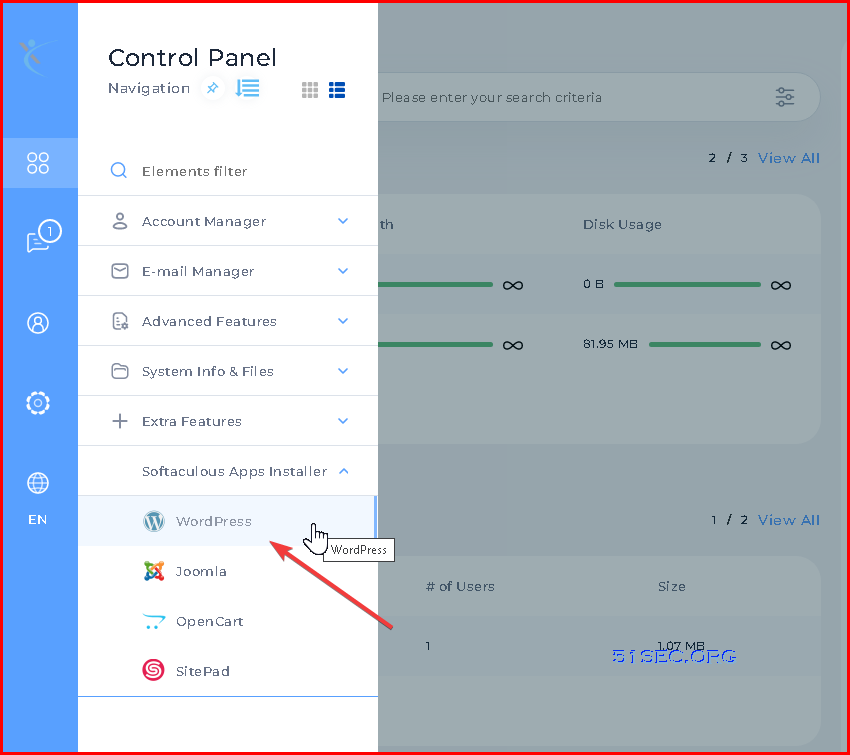
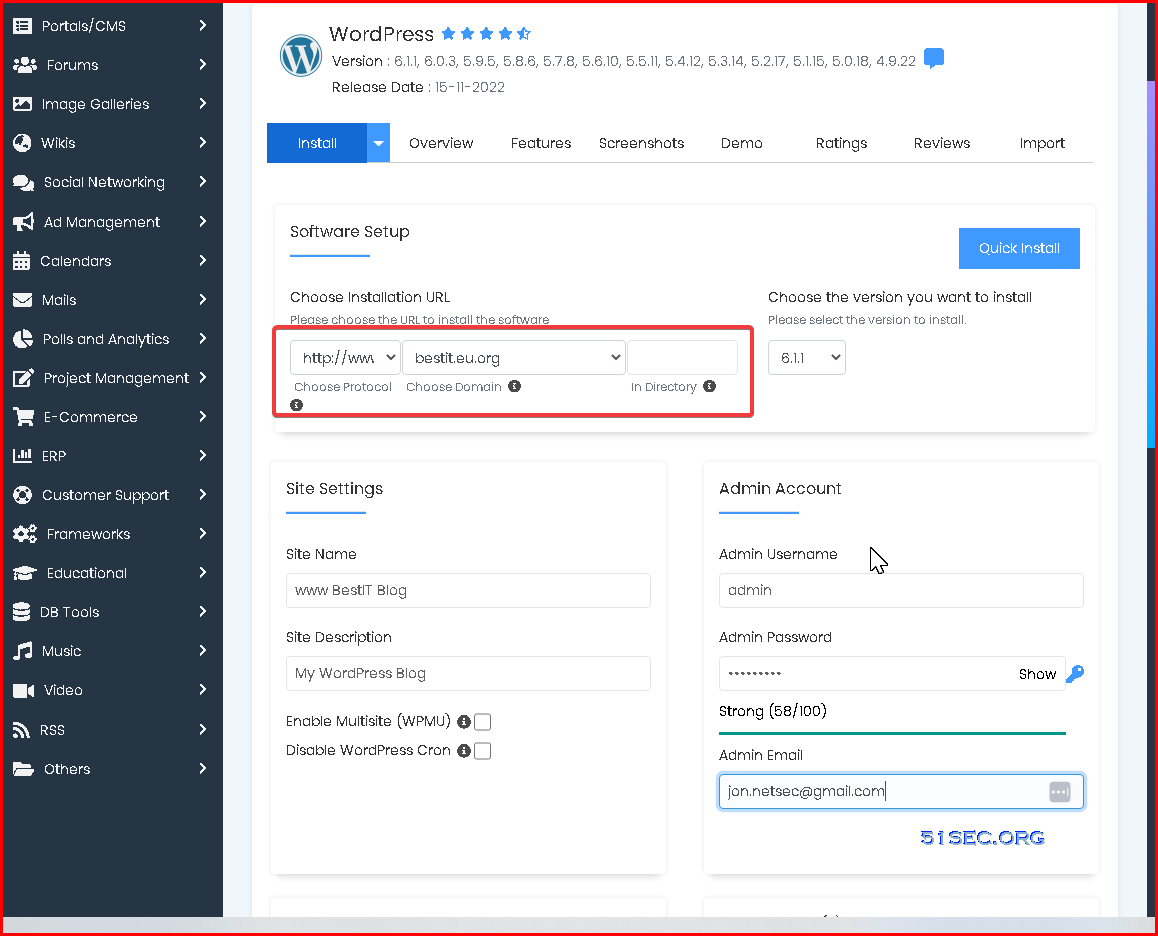
4 Install WordPress
5 Click install, in less than 10 seconds, you should be able to get your WordPress site up and running.
Enable SSL with integrating with Cloudflare If you are using third party company, such as Cloudflare, to manage your DNS, here are the steps you can take to enable SSL for your website.
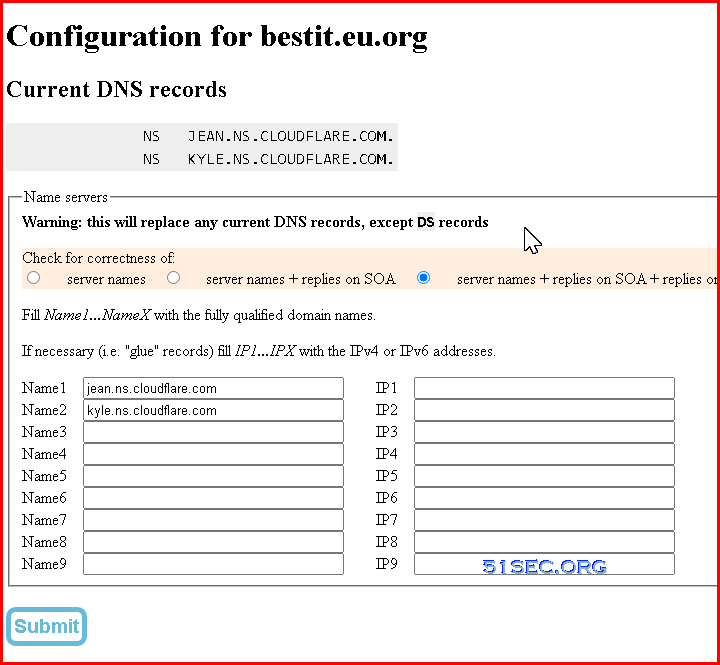
In following steps, I am assuming your domain registrar has point your domain to cloudflare’s nameservers as show below.
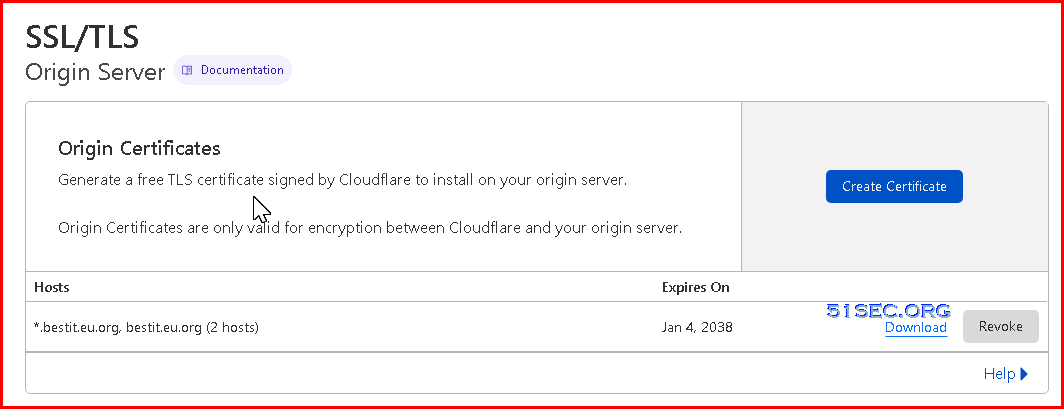
1 Generate Origin Server Certificate from Cloudflare
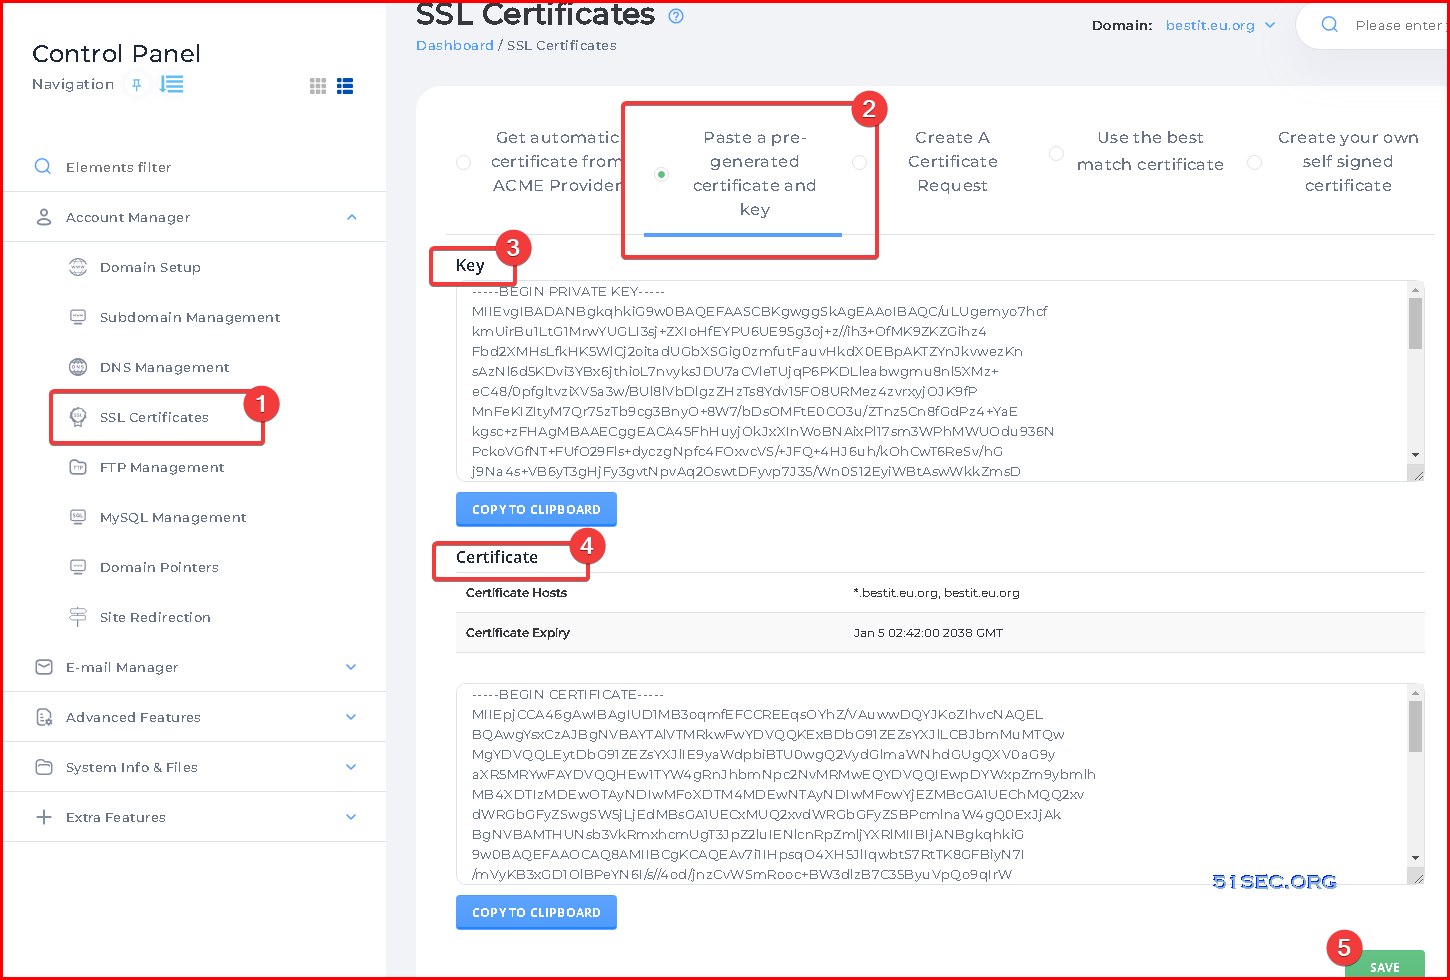
2 Copy / Paste Key and Certificate into x10Hosting’s DirectAdmin SSL Page
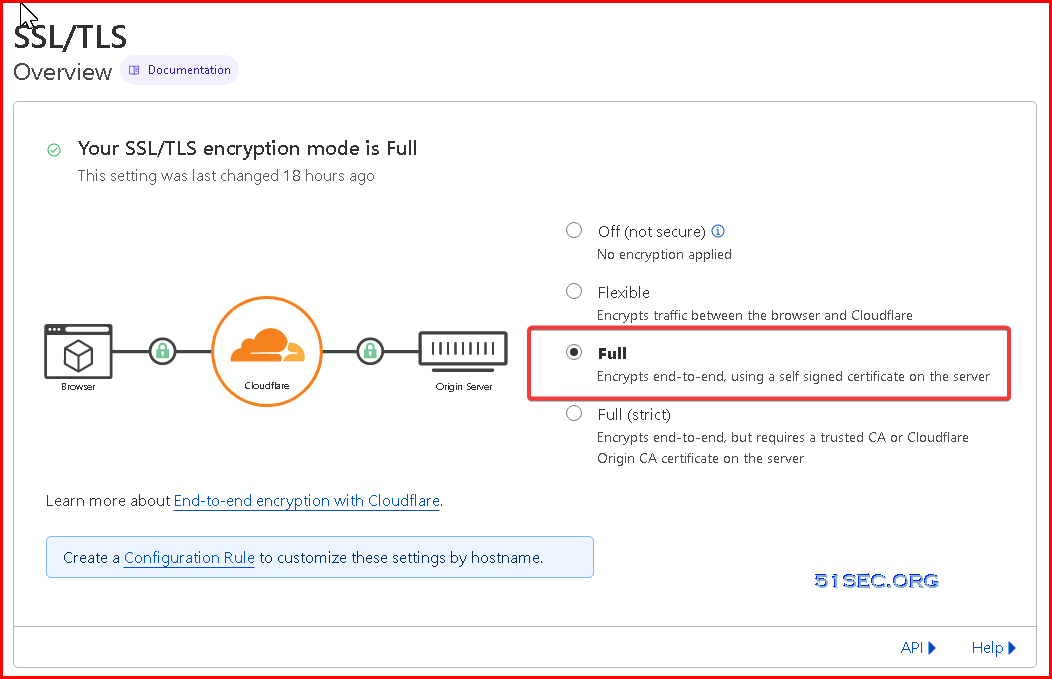
3 Enable Full SSL/TLS encryption mode for our website.
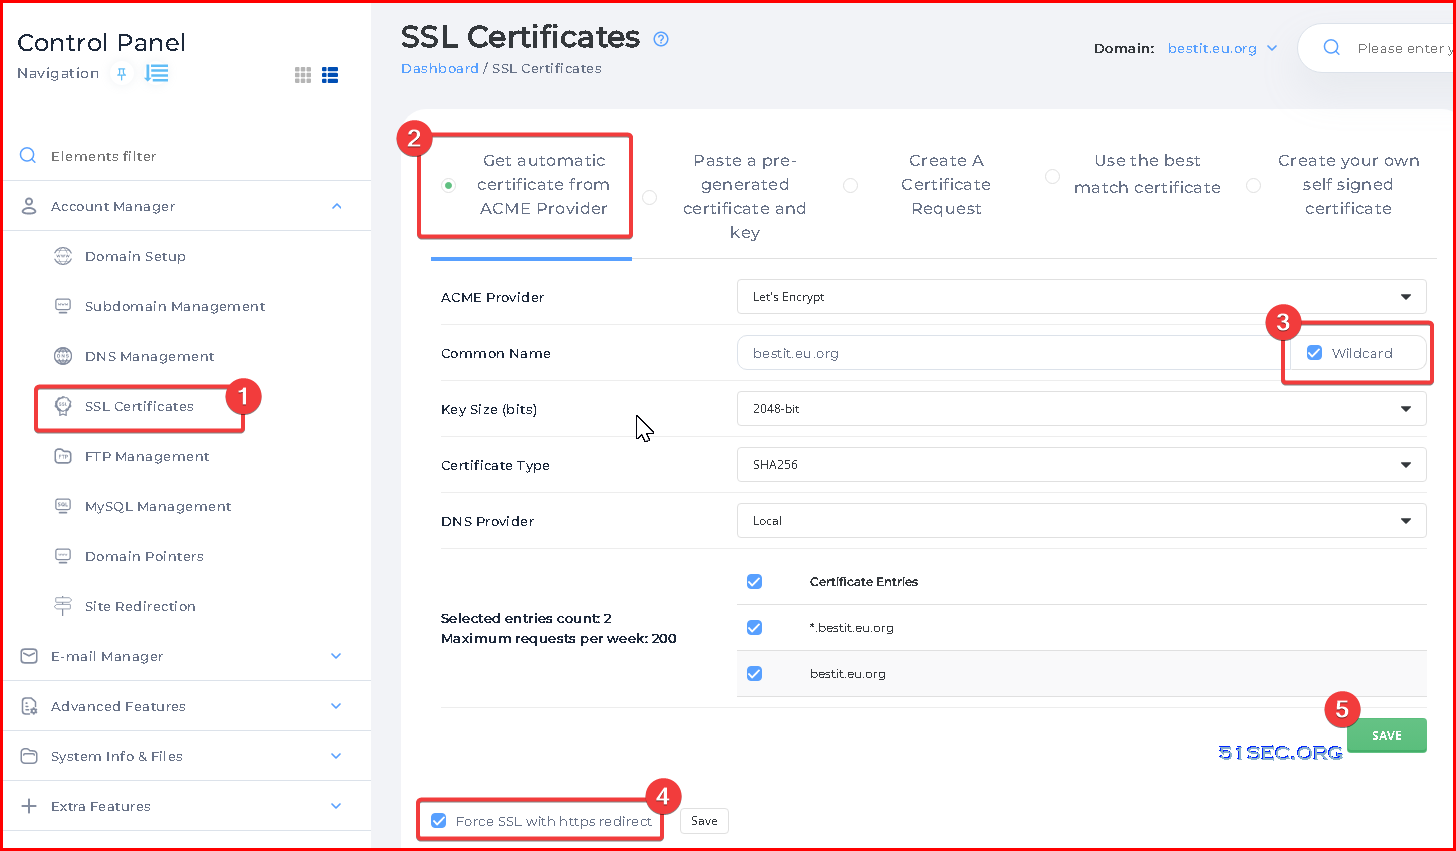
4 Https access will be automatically enabled if you enabled Force SSL with https redirect.
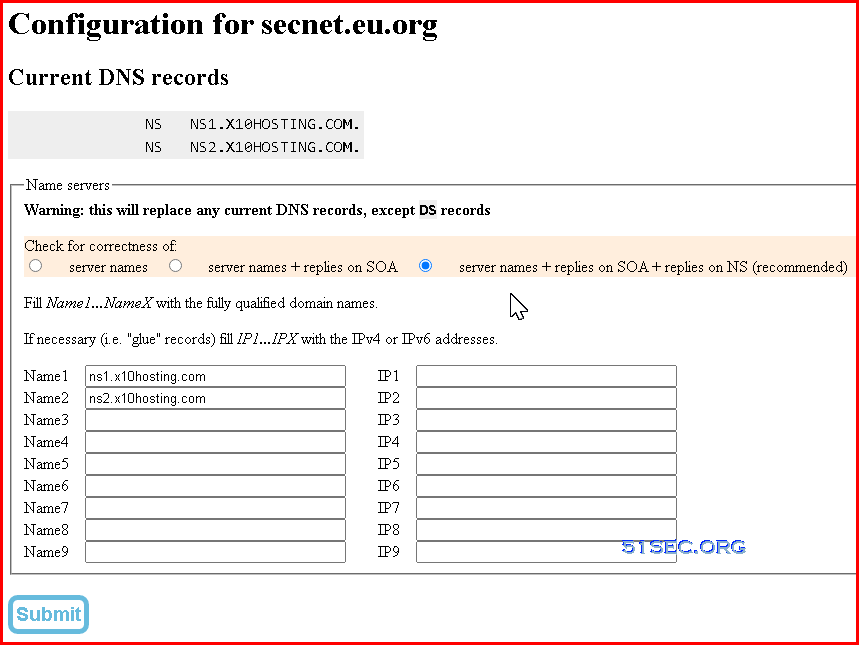
Enable SSL Using DirectAdmin to Manage DNS If your domain registrar directly point the domain to x10hosting’s nameservers, you can use following steps to activate SSL on your website.
1 Depending on your domain registrar, the configuration page is different.
Here is an example for eu.org, which shows domain secnet.eu.org has pointed to x10hosting’s nameservers.
If you just changed it, it will take a couple of hours to broadcast this change to all DNS root servers.
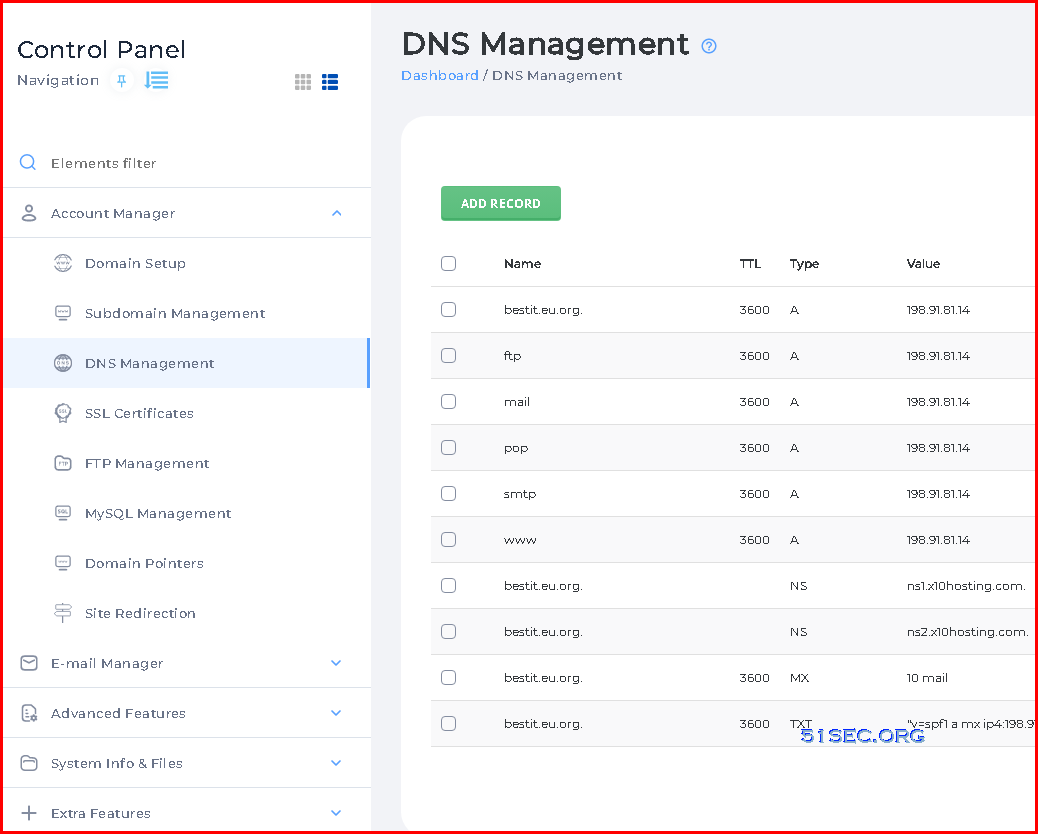
2 Check x10hosting’s DirectAdmin’s DNS Management page
By default, it will be populated with some typical A records for you already, no matter if it is used to manage your DNS records.
3 Generate your SSL certificate for your WordPress website
4 Https access testing.
Videos
VIDEO
References
Like this: Like Loading...
Related
Post navigation
