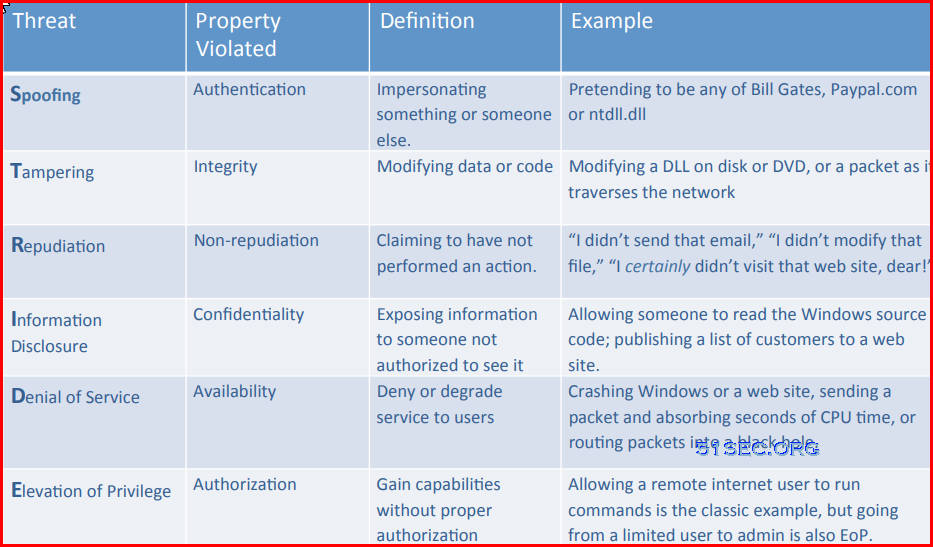
The Threat Modeling Tool is a core element of the Microsoft Security Development Lifecycle (SDL). It allows software architects to identify and mitigate potential security issues early, when they are relatively easy and cost-effective to resolve. STRIDE is a model for identifying computer security threats[1] developed by Praerit Garg and Loren Kohnfelder at Microsoft.[2] It provides a mnemonic for security threats in six categories.[3]

The threats are:

Related Posts:

Download Microsoft Threat Modeling Tool

Launch the Threat Modeling Tool
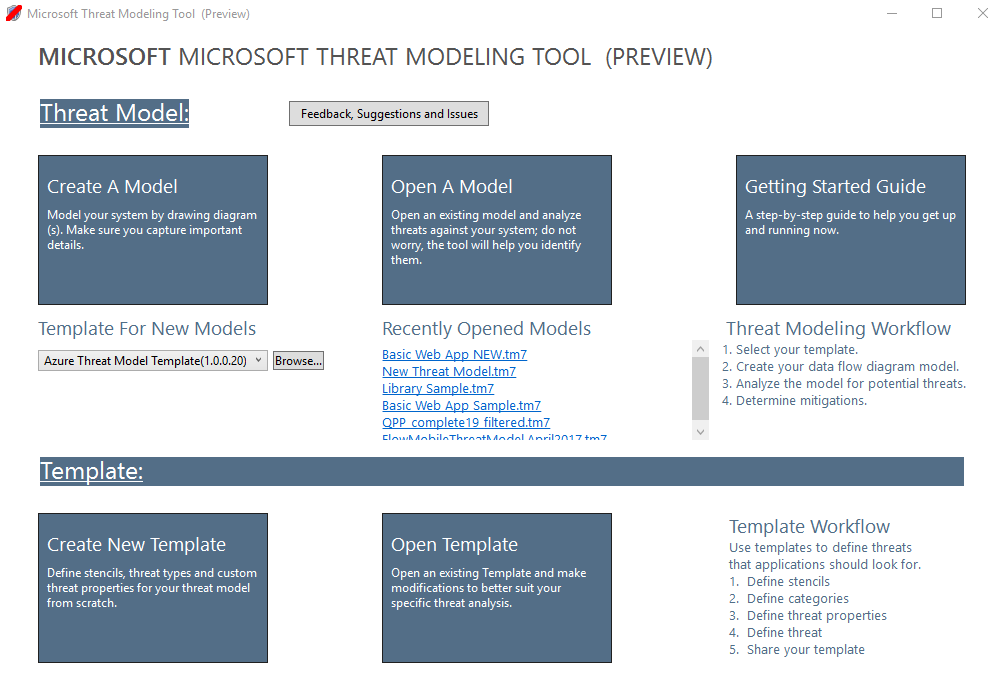
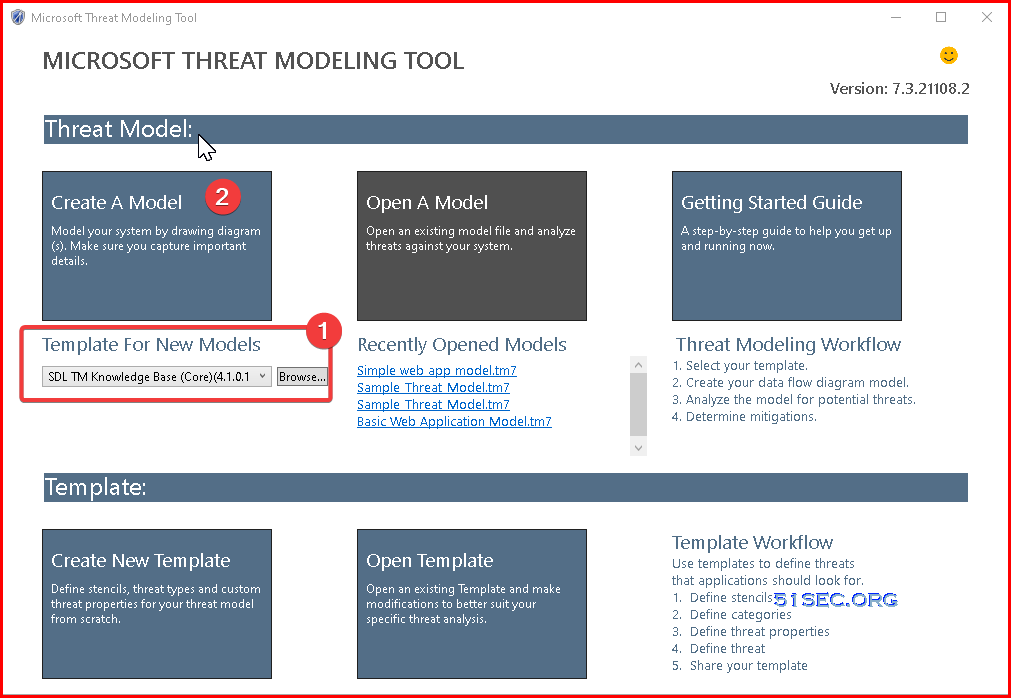
When you launch the Threat Modeling Tool, you’ll notice a few things, as seen in the picture:

Blank Start Page

Template:
You must select which template to use before creating a model. Our main template is the Azure Threat Model Template, which contains Azure-specific stencils, threats and mitigations. For generic models, select the SDL TM Knowledge Base from the drop-down menu. Want to create your own template or submit a new one for all users? Check out our Template Repository GitHub Page to learn more
To do a proper threat modeling, it might involve multiple teams and departments with multiple steps. Here is a simple four steps for us to start a quick thread modeling task for a simple web application. 
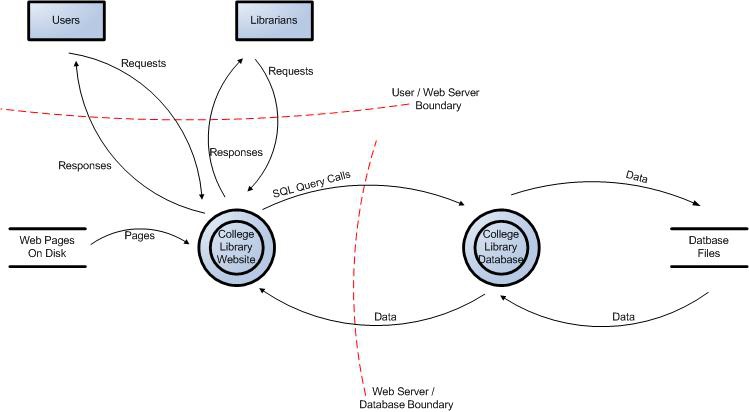
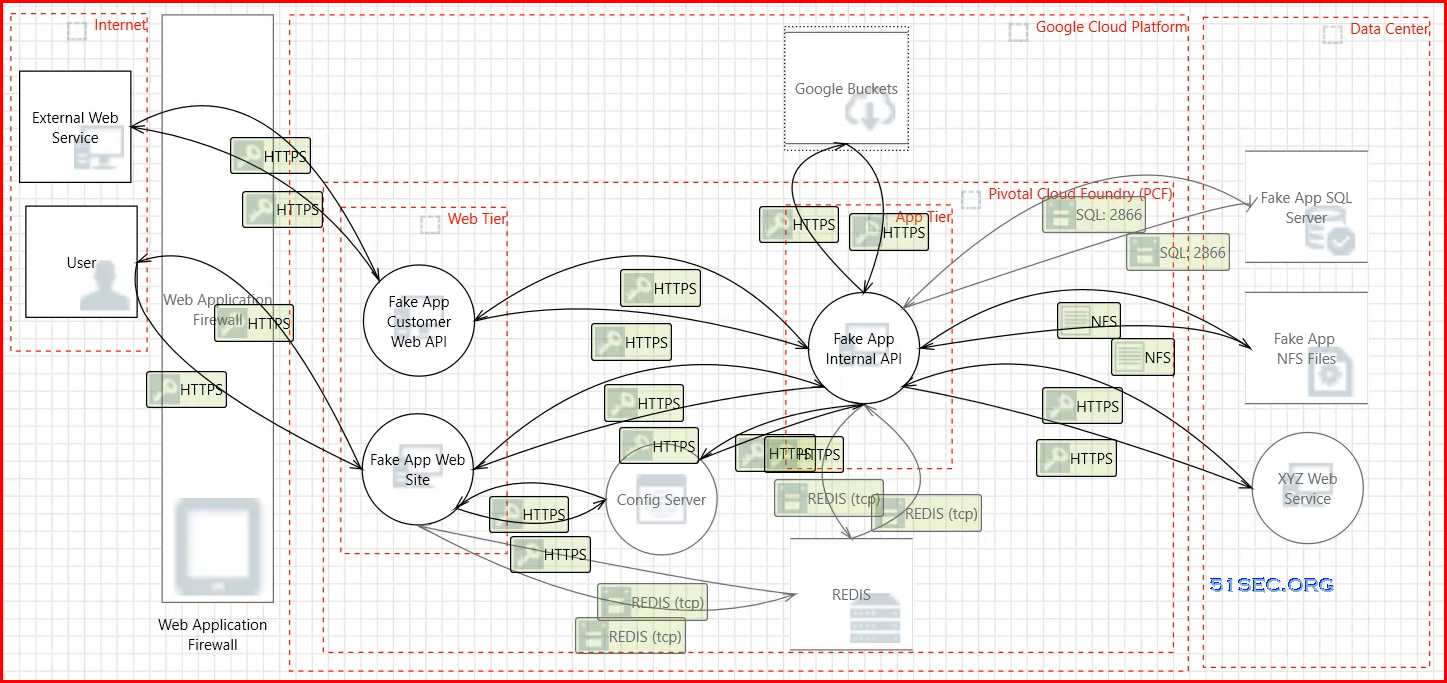
A typical Web server application topology will look like this:

Now, we are going to use STRIDE tool to help us find out the threats we are going to face:

Step 1: Diagram – DFD – What are we building?

Step 1 is to create Data Flow Diagram (DFD) or Process Flow Diagram (PFD) to visualize different componets that make up your system and how traffics flow through them. 
 1. Choose proper template for new models:
Usually, SDL TM Knowledge Base (Core) is the common one to use for a general threat model.
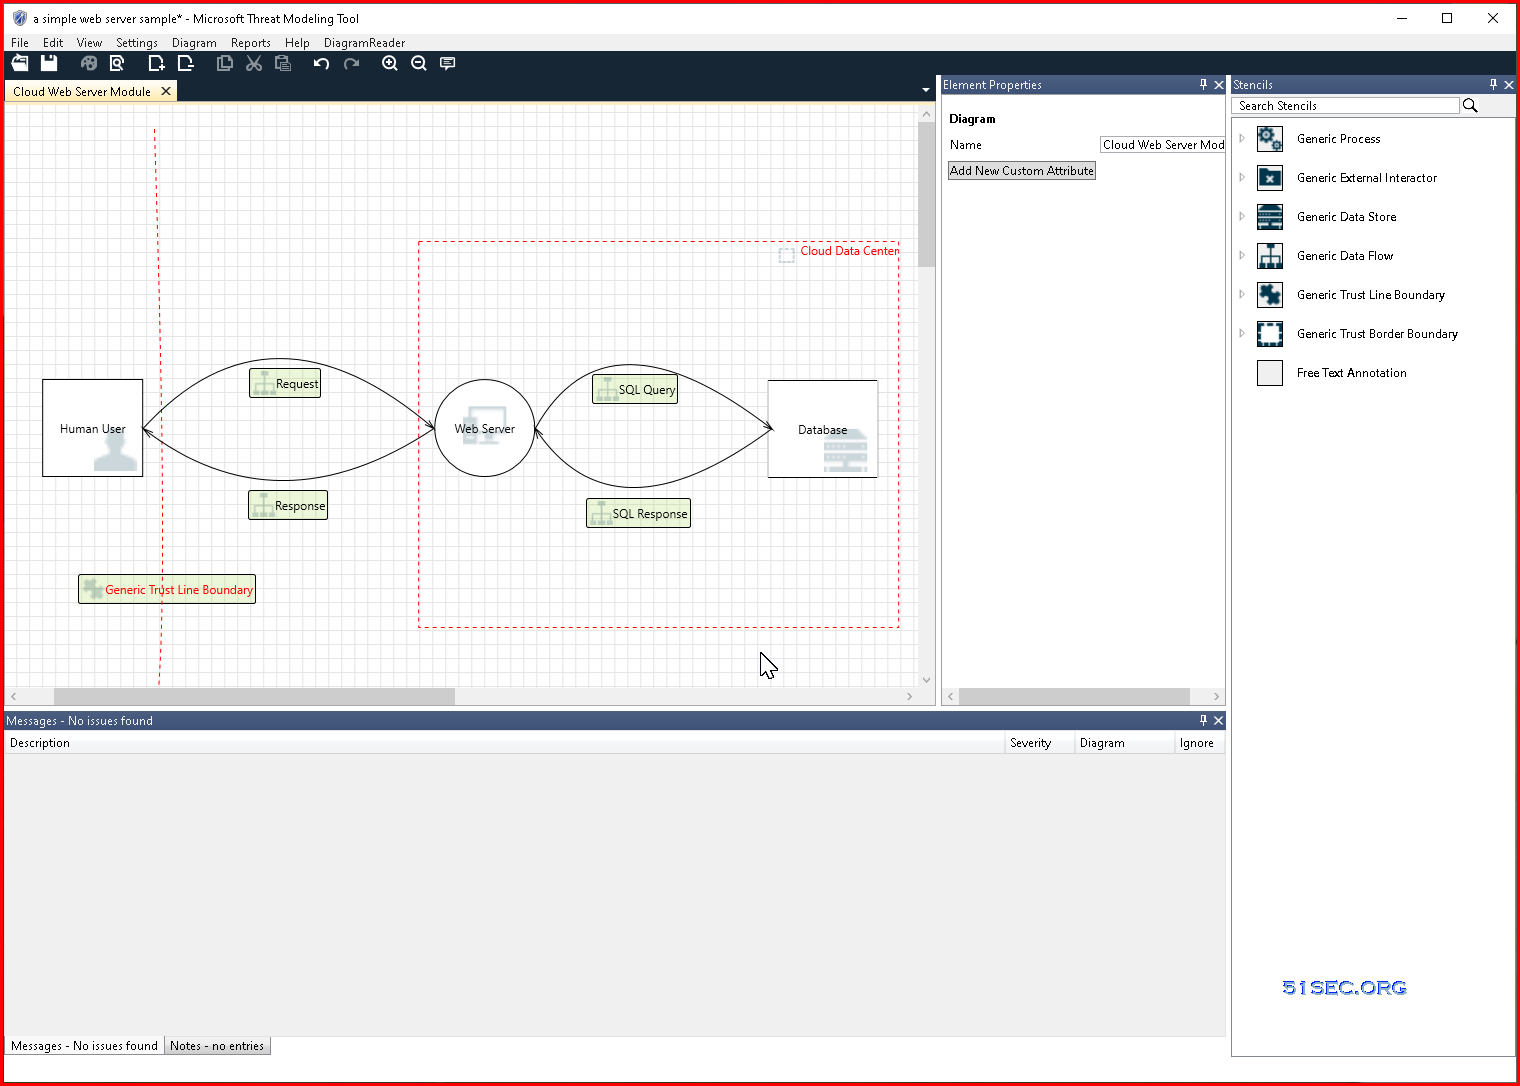
2. Design view – Create your DFD (Data Flow Diagram)
Place your compnents into the diagram. For a simple web server, you might use following stencils
– Generic Data Store
– Web Server
– Human User
– Geneic data flow
– Generic Trust Border Boundary

Step 2: Identify – What can go wrong?

This step baiscally is to identify the threats. In this step, we will need to analyze step1’s diagrams to understand the actual threats, which is to answer the question, what can go wrong?. 

Basically, at this stage, you need to figure out the various ways in which your assets can be compromised and who the potential attackers are.
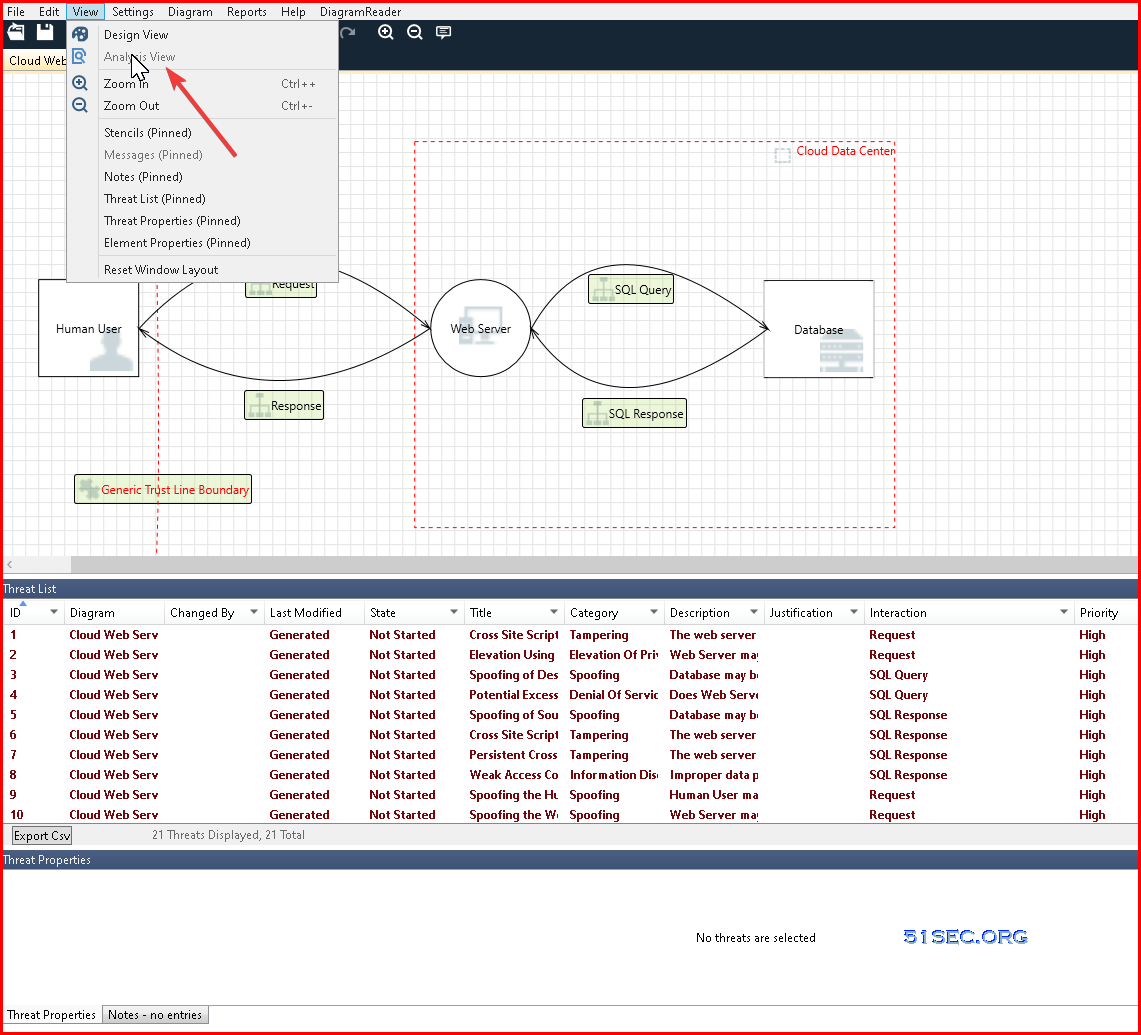
Click Menu view – Analytic View
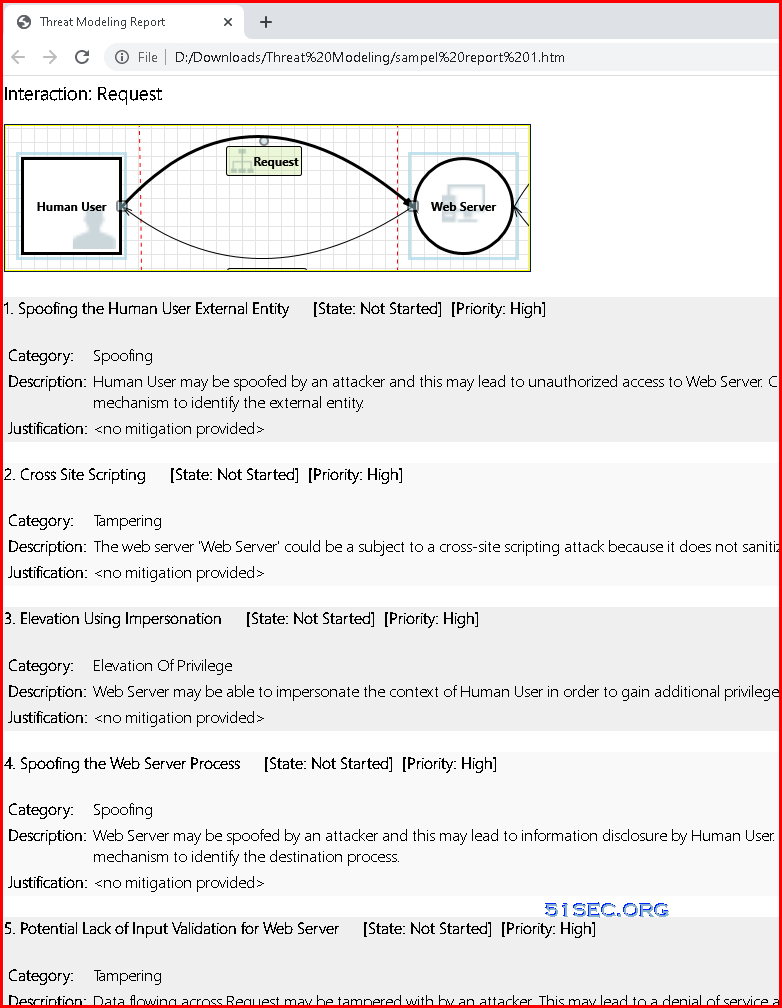
Create Reports:
Reports Sample:

Step 3: Mitigate – What are we going to do about that?

Once you’re done identifying threats, you will end up with a master list or library of threats associated with each asset and its operations and a list of possible attacker profiles. Now you need to figure out which of these threats your application is vulnerable to.

Once vulnerabilities have been mapped out, you need to analyze the risks associated with each of them. Based on this risk analysis, you can deal with the vulnerabilities in the following ways: 
  • Don’t do anything (too low risk or too difficult to make the associated threat)
  • Remove the feature associated with it
  • Turn the feature off or reduce the functionality
  • Bring in code, infrastructure, or design fixes

You will also be creating a log of vulnerabilities to be subsequently addressed in future iterations.
 

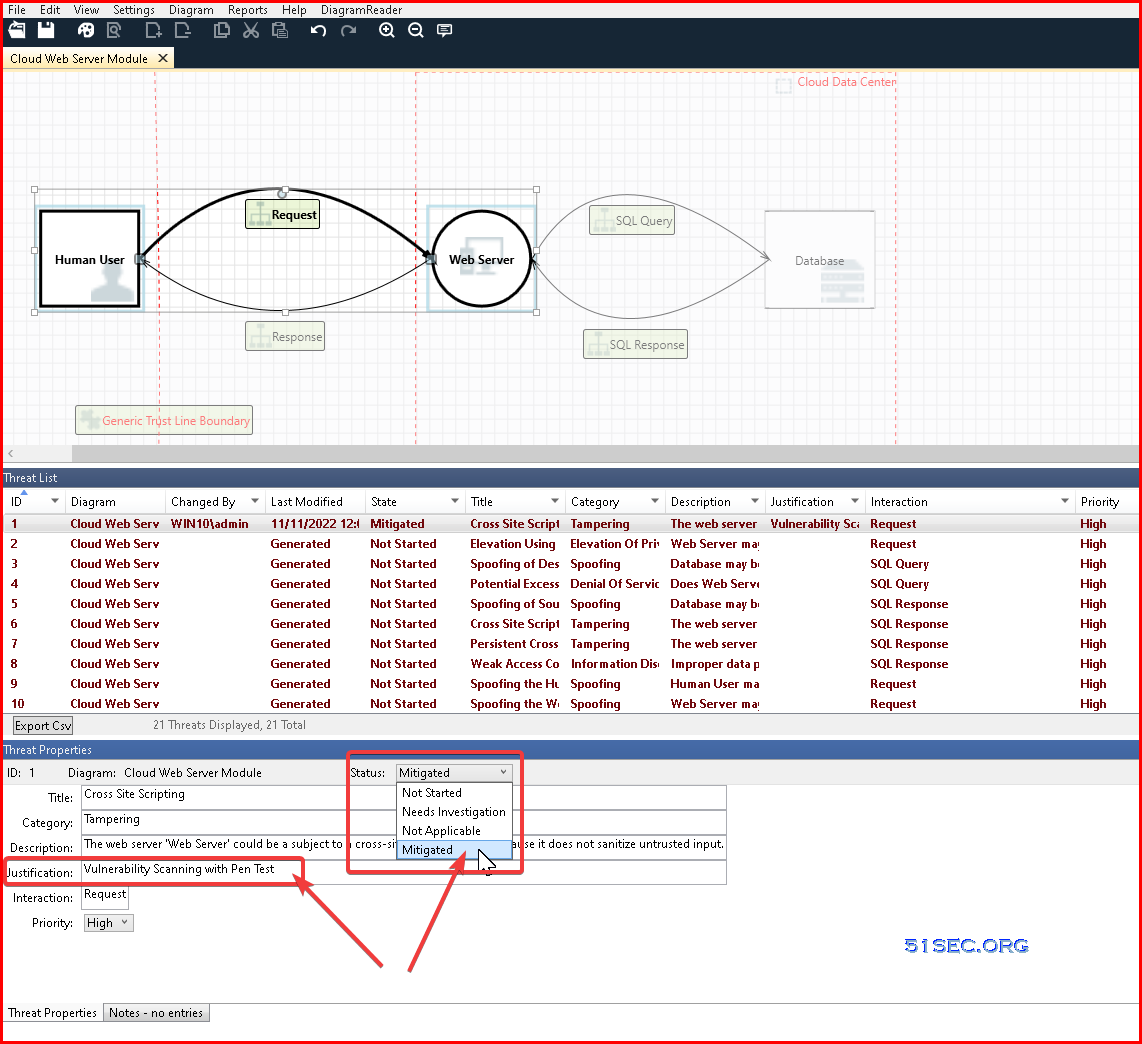
Once you have decided what action will be for your thread, you can go back to your STRIDE software to click each threat from threat list, you will modify Threat Propertis to reflect your actions. Based on your review result, change status of that threat and justification. 

Step 4: Validate – Did we do a good enough job?

During validation, you check if all vulnerabilities have been addressed. Have all the threats been mitigated? Are the residual risks clearly documented? Once this is done, you need to decide the next steps to manage the identified threats and decide when the next iteration of threat modeling will be. Remember that threat modeling is not a one-time activity. It needs to be repeated either at scheduled intervals or during specific milestones in the application development.

How? 
We will use vulnerability management tools / vulnerability scanner to execute another scan to find out if there are any potential vulnerability will be found.   

Examples


1  Example 1

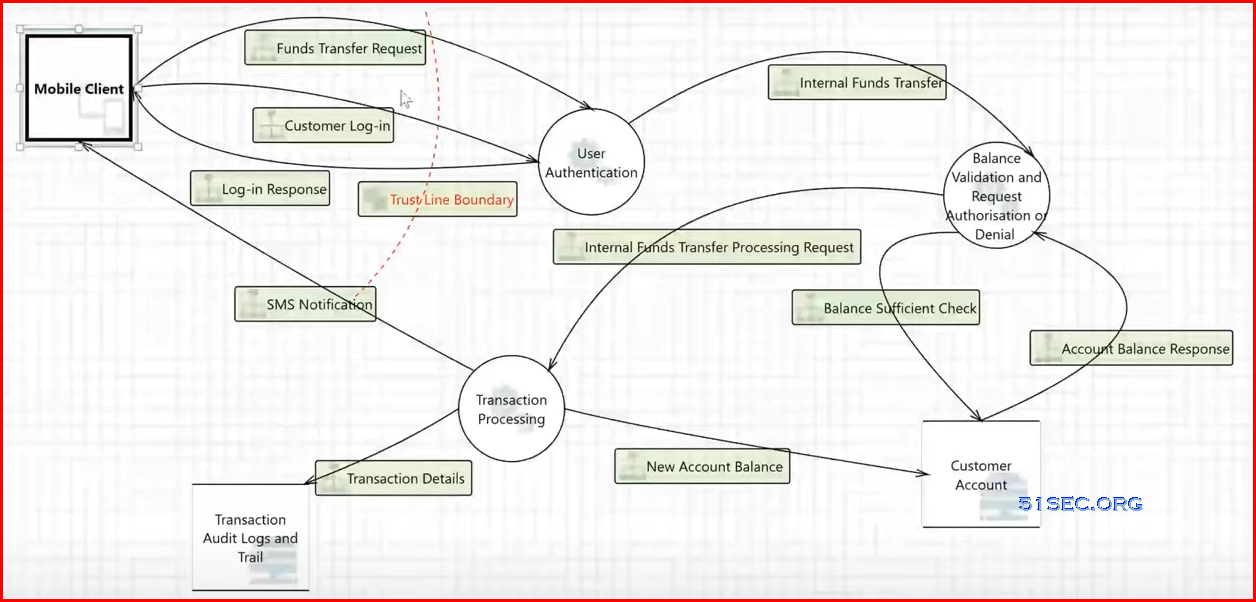
Example Diagrams (from OWASP)

Image:Data flow1.jpg

Example 1: Data Flow Diagram for the College Library Website.


2 Example 2
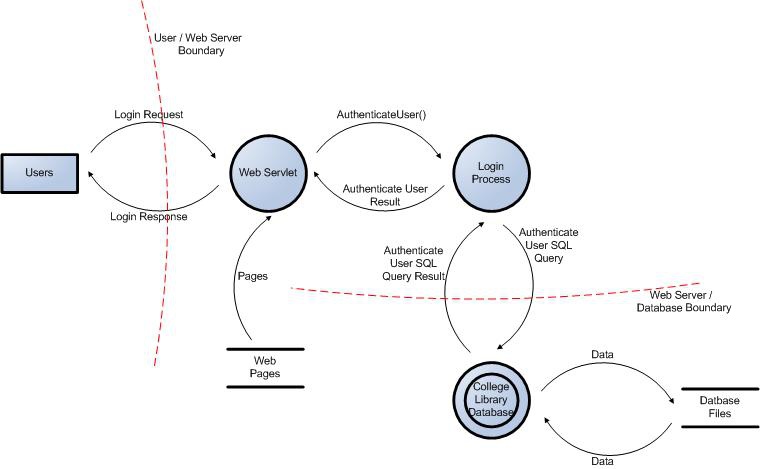
Image:Data flow2.jpg

Example 2: User Login Data Flow Diagram for the College Library Website.

3 Example 3
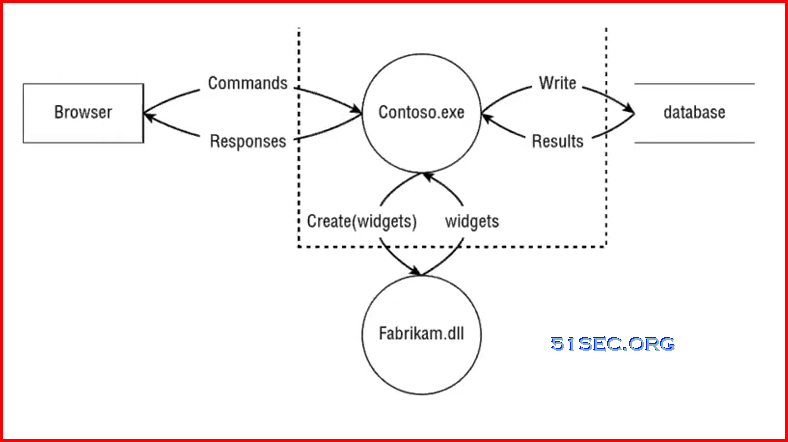
Example 3: One Website Widget Create Diagram
4 Example 4 
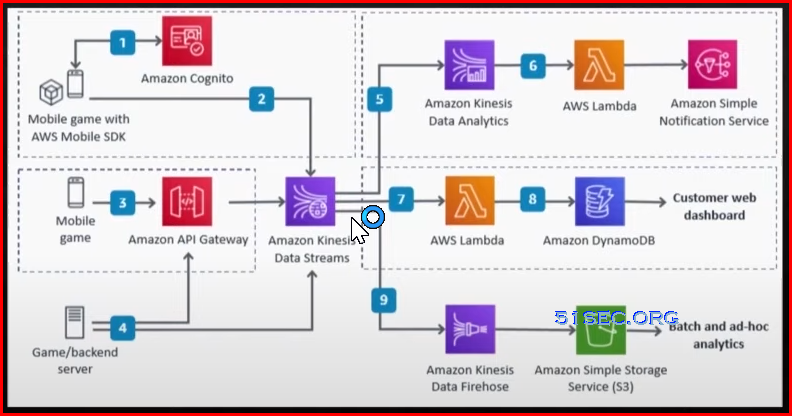
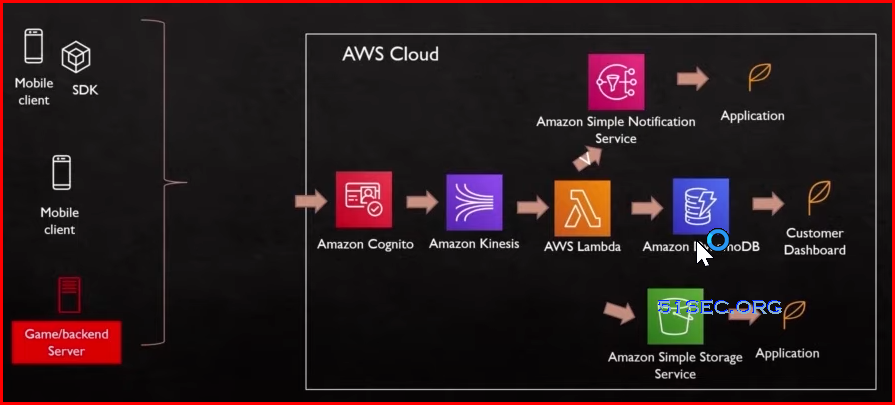
This example is extracted from YouTube video: https://www.youtube.com/watch?v=gB835cOzKjY
4.1 Sample example from AWS serverless real-time analytics for Mobile Gaming. 
4.2 DFD – Simplified orginal application diagram to standard data flow diagram
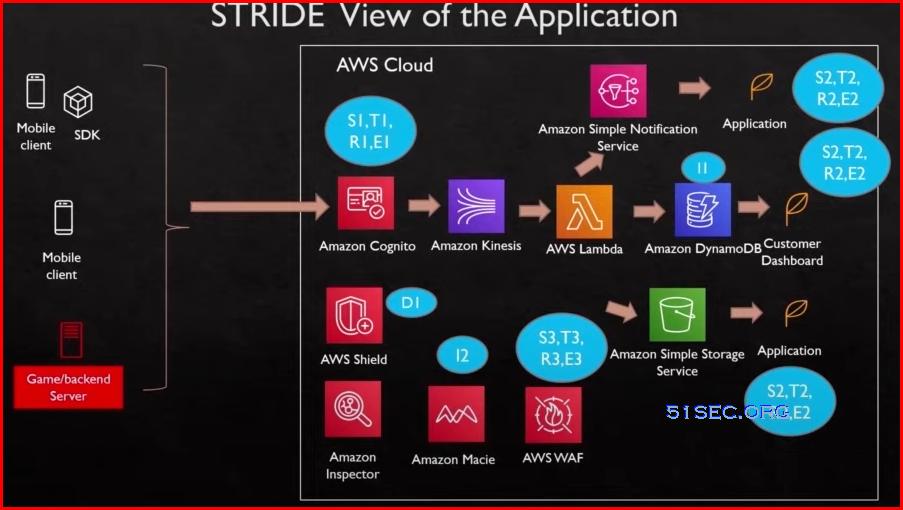
4.3 STRIDE vidw of the application
Notes: 
Blue circle is the one identified threat and can be compensated by securty product.
You also can have Red Circle is the one identified threat but no compensation product.
D1 is DDoS, not in the flow, but also identified as a threat. 

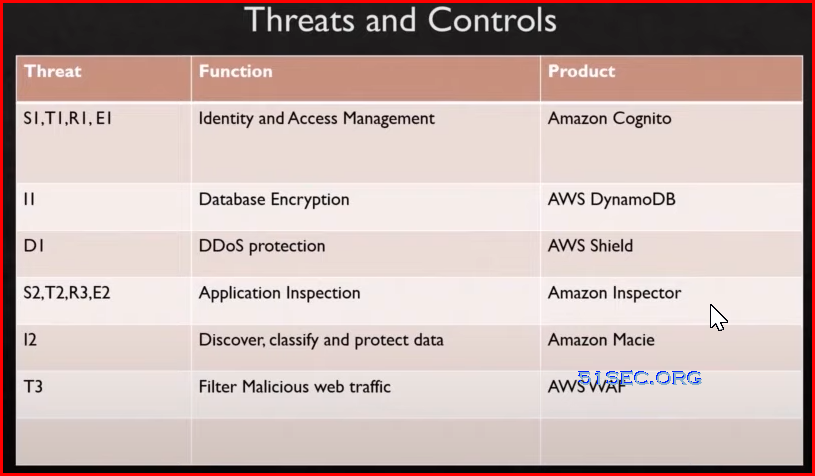
4.4 Threats and Controls (Product)

Example:
Example

Software Issues

 1. Can not resize the shape

I got this problem a few times. I were able to resolve it by close the diagram and reopen it. Not sure why. But it does happen to others as well. 

Videos


By netsec

Leave a Reply