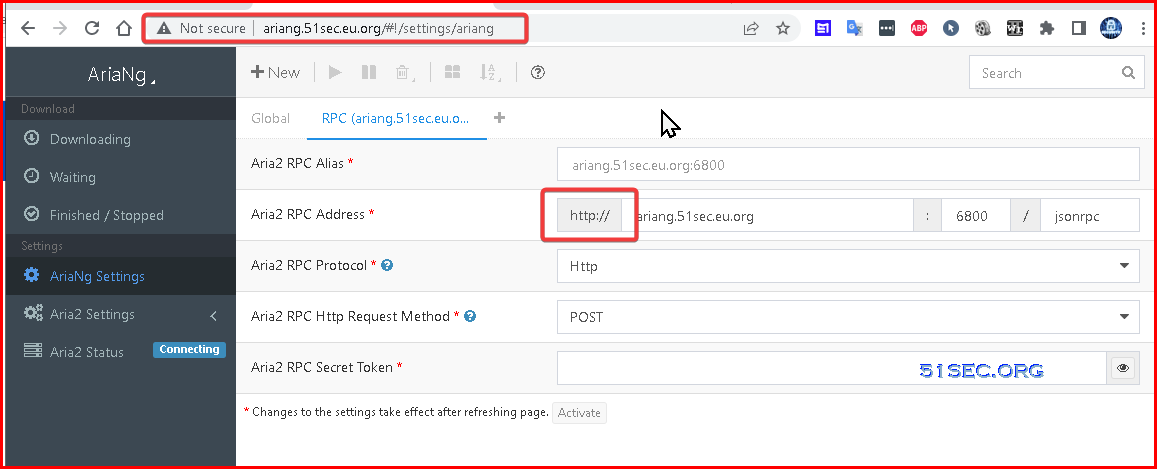
AriaNg is a modern web frontend making aria2 easier to use. AriaNg is written in pure html & javascript, thus it does not need any compilers or runtime environment. There are lots of ways to deploy AriaNg. In this post, I summarizes some typical ways to do that especially for https configuration on some Serverless platforms such as Cloudflare.
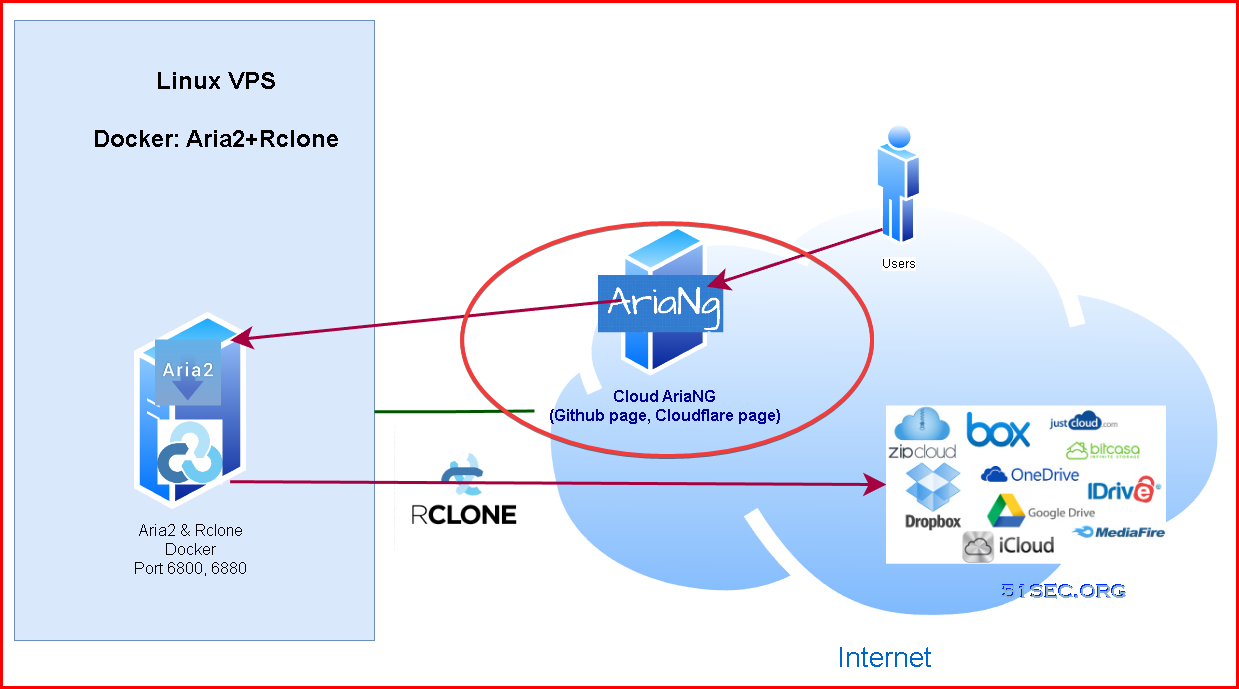
Diagram
Cloud AriaNg (No Need Deployment)
- http://ariang.mayswind.net/latest
- http://ariang.js.org
- http://ariang.eu.org
- http://p3terx.gitee.io/ariang
- http://download.51sec.org
- https://ariang.51sec1.eu.org
Docker
docker run -d \
    --name ariang \
    --log-opt max-size=1m \
    --restart unless-stopped \
    -p 6880:6880 \
    p3terx/ariang
docker exec -it ariang bash
Other docker commands:
- docker restart aria2-pro
- docker rm -f aria2-pro
- docker rmi p3terx/aria2-pro
- rm -rf ~/aria2-config
- docker pull p3terx/aria2-pro
- docker run <…>
- Realtime logs:
- docker logs -f –tail 30 aria2-pro
- Export logs
- docker logs aria2-pro > ~/aria2-pro.log
https – Github Page
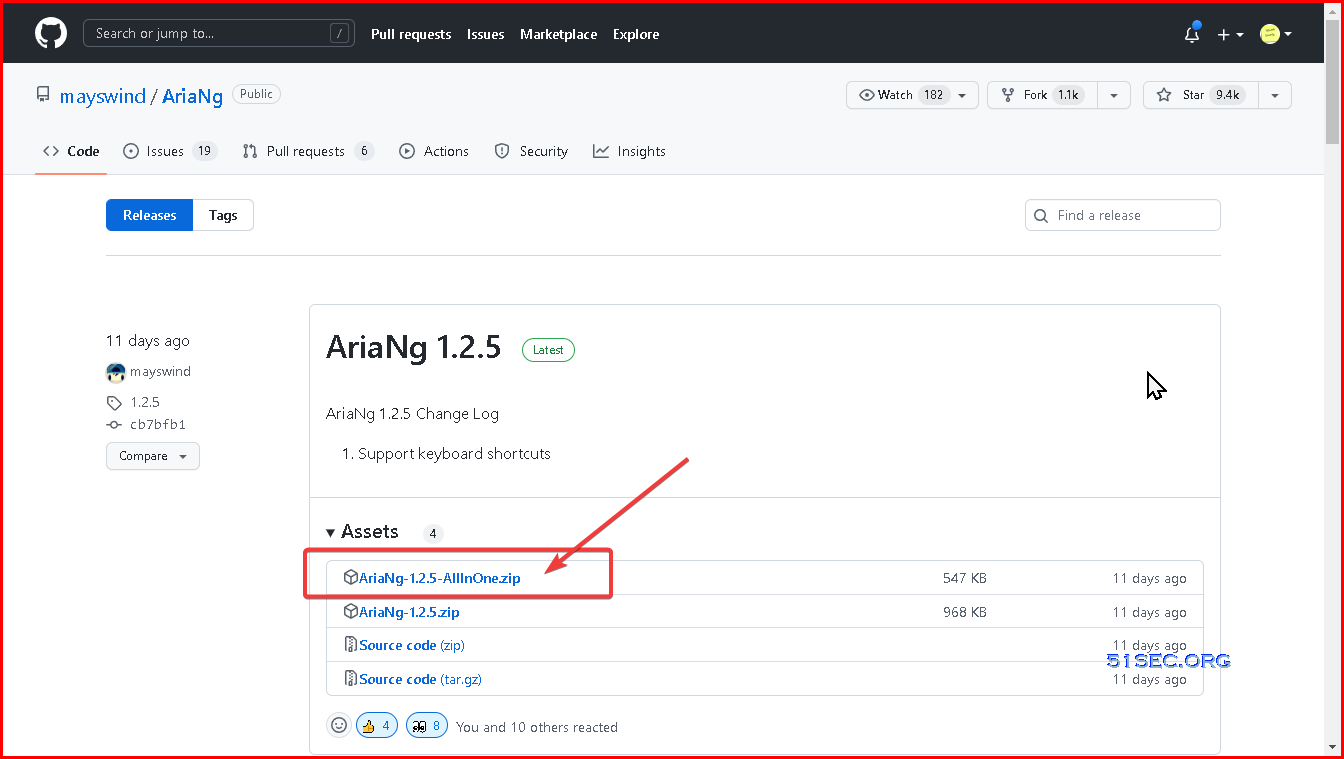
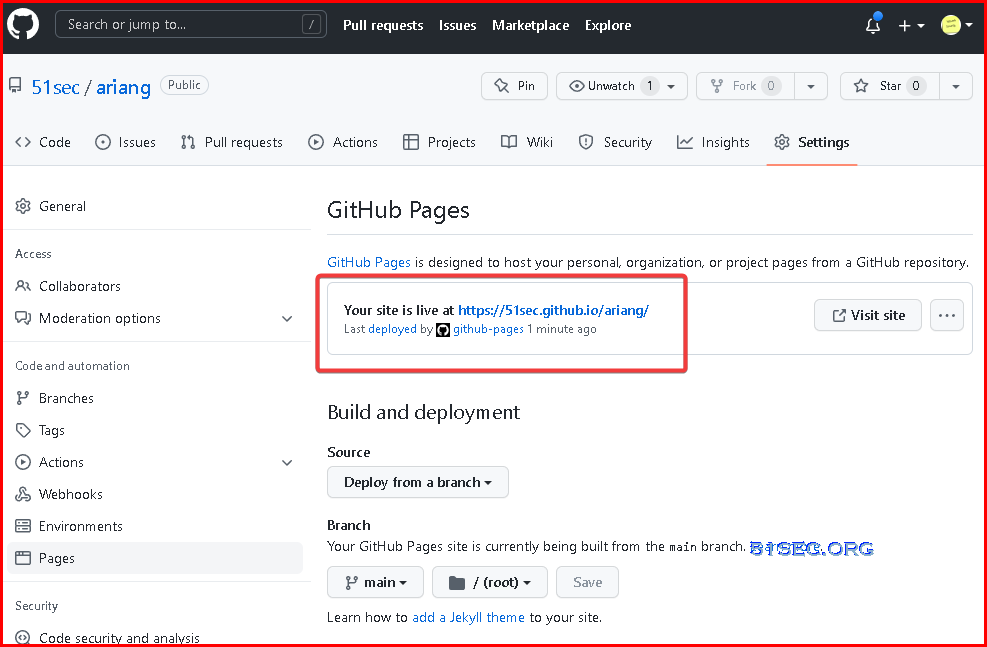
1 Go to AriaNg’s official Github site to download AriaNg-AllInOne zip file from url : https://github.com/mayswind/AriaNg/releases
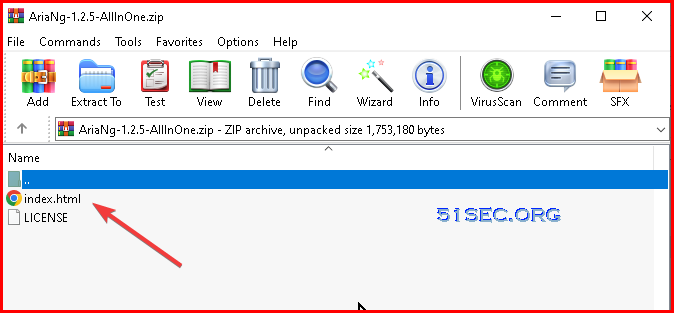
2 Unzip and get index.html file
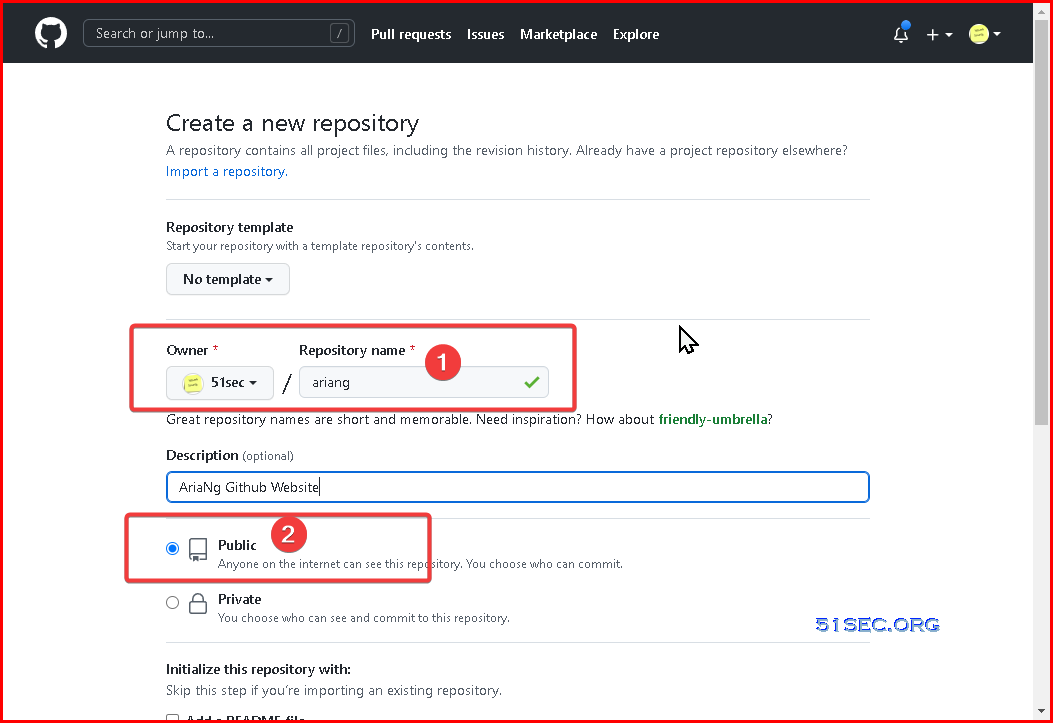
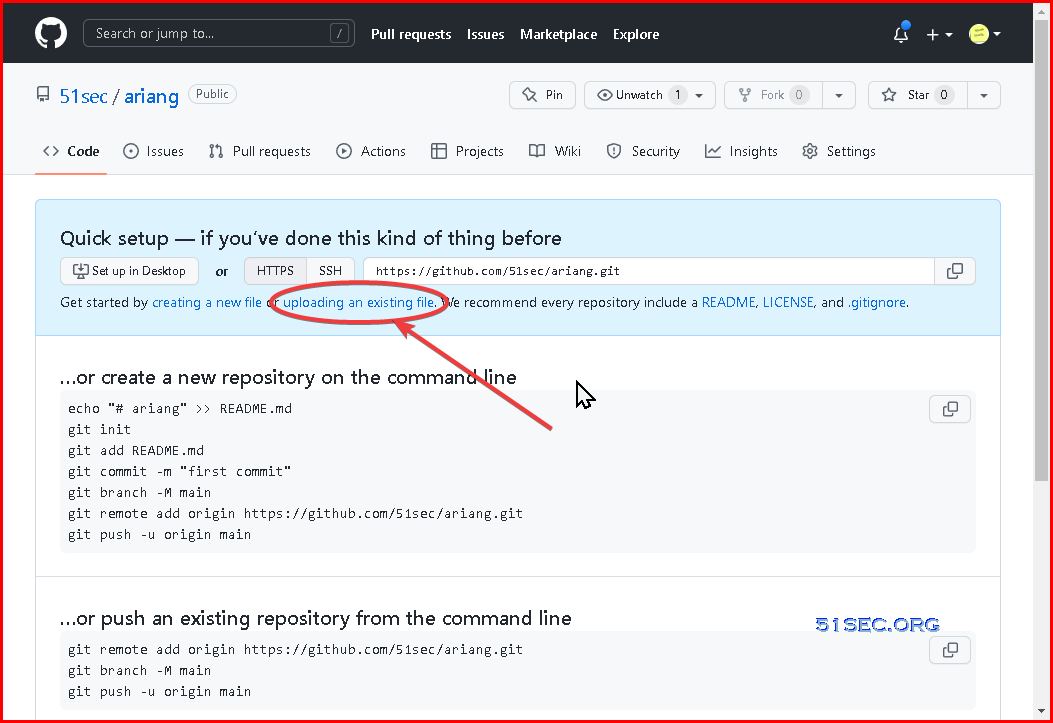
3 Create a new Github repository
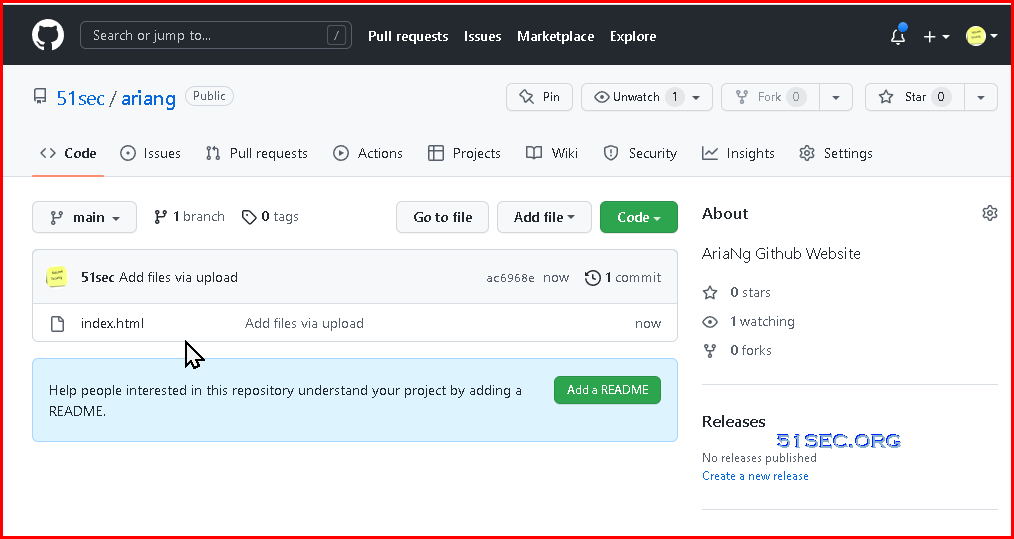
4 Upload unzipped index.html file to this repository
5 That is only file you will need to add. You might want to add another readme file to describe your repository and usage.
http – Github Page with Custom Domain
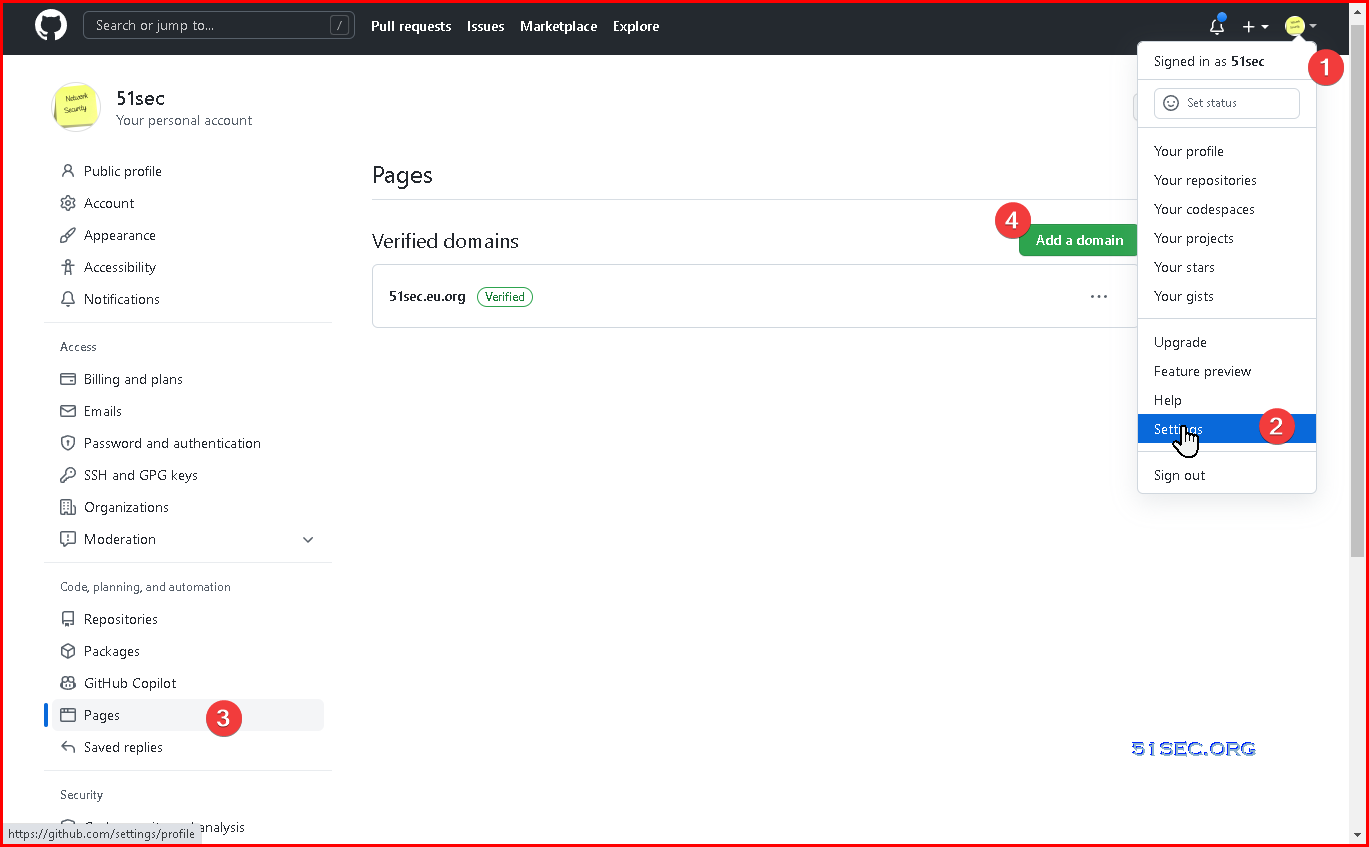
1 Verify your own domain
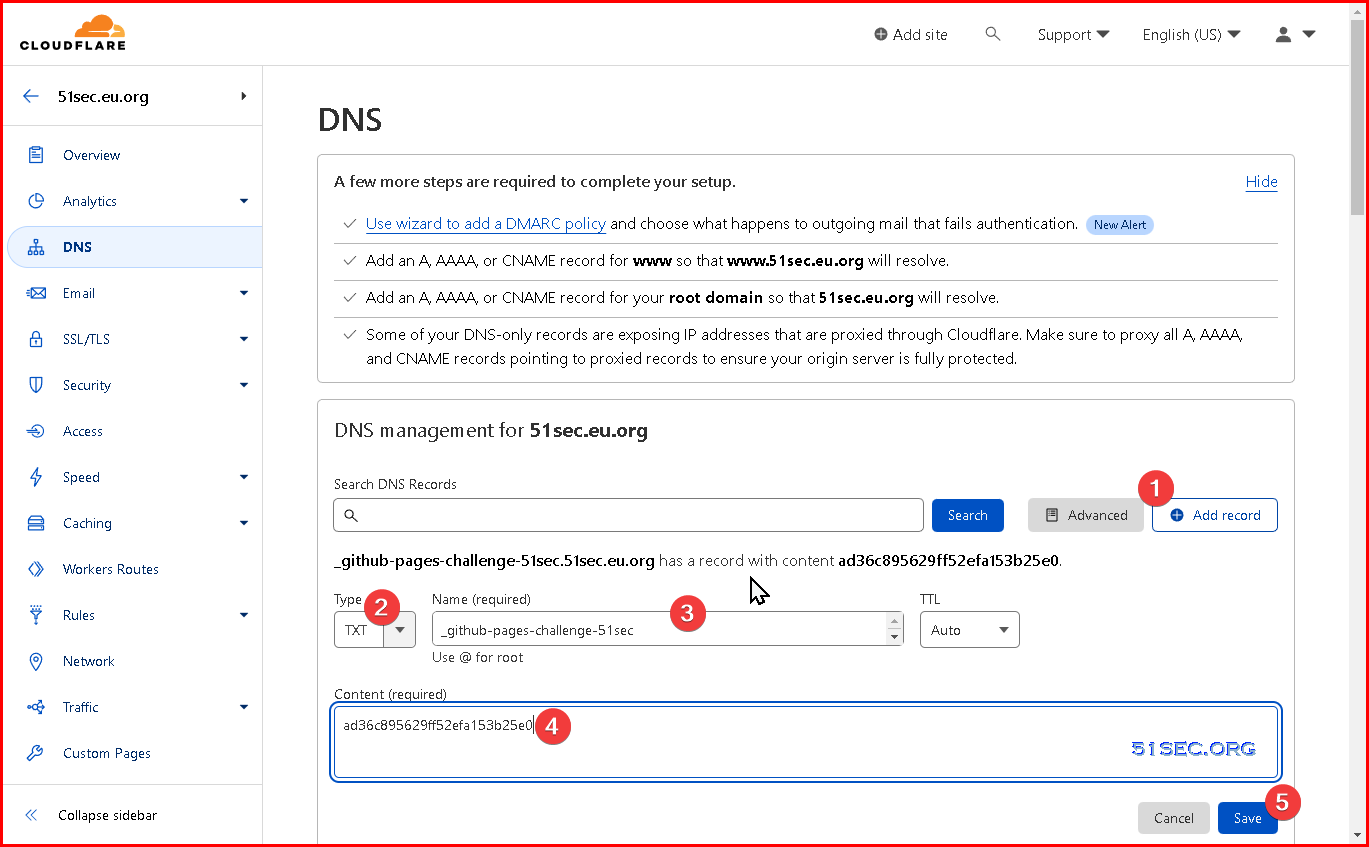
You will need to add a txt record in your domain provider. In my case, it is Cloudflare.
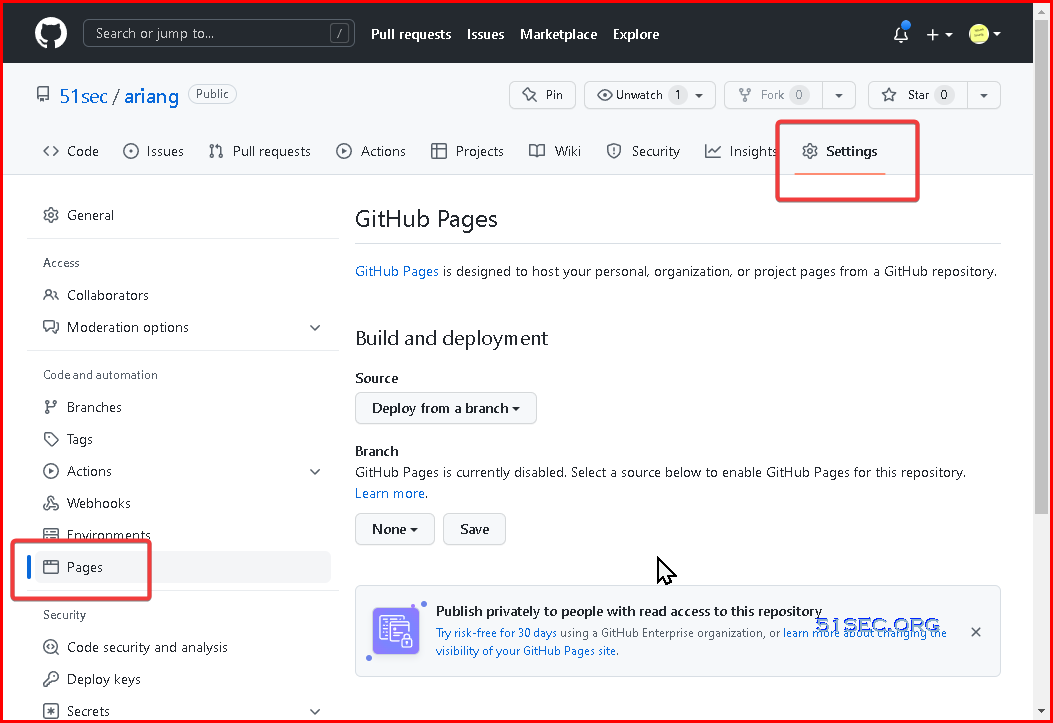
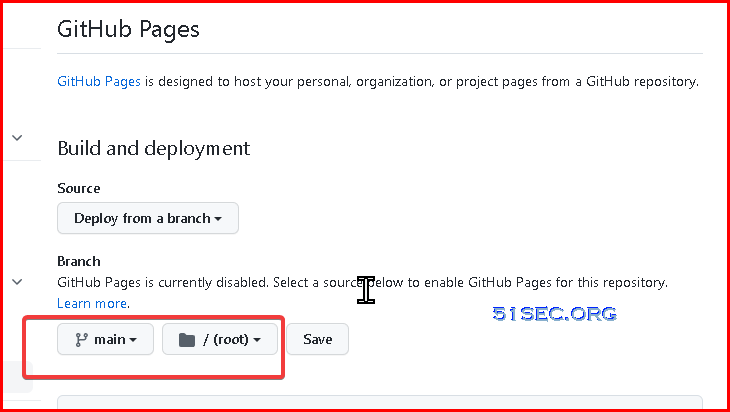
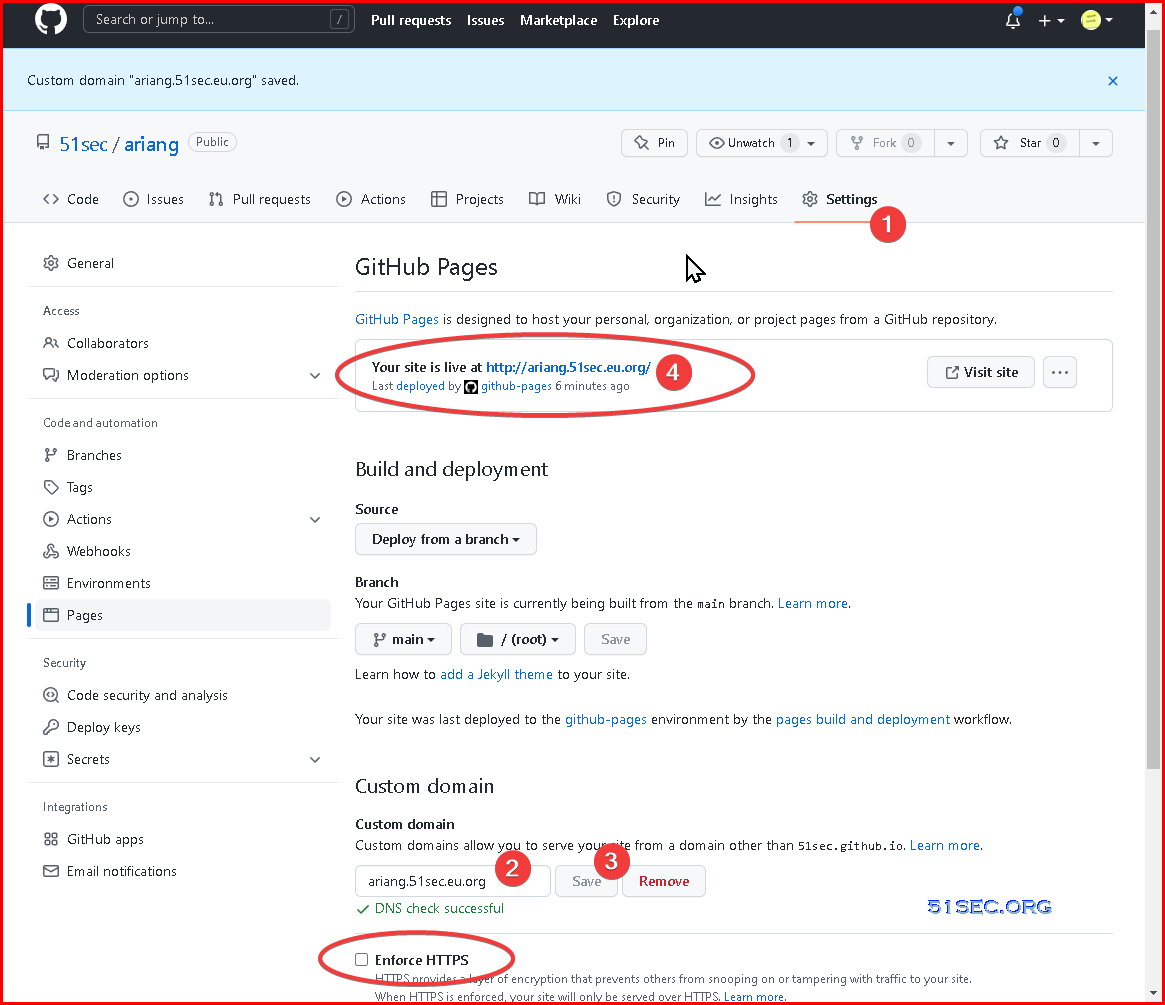
2 After verified your domain for your github account, you can add custom domain into your repository’s page:
Tips: Don’t enable https for your page since you want to access your AriaNg page on http.
3 add a cname record in Cloudflare (that is my domain provider).
4 Visit your new Github Ariang page on http:
https – Cloudflare page and certificates
1 Create
2 Create
3 Create
4 test
https – Docker + NPM (Nginx Proxy Manager)
1 Create
2 Create
3 Create
4 test
Videos
