There are lots of limitation for you to deploy Azure marketplace’s Fortigate VM , such as VM size requirement, license requirement, also only for Pay As You Go subscription. For my lab, not for test drive, I might need to deploy a Fortigate firewall into 1vCPU, 1GB Ram B1S size VM, and I will need to use my azure credit or student subscription to play with it.
That won’t be able to happen if you are using Marketplace’s product.
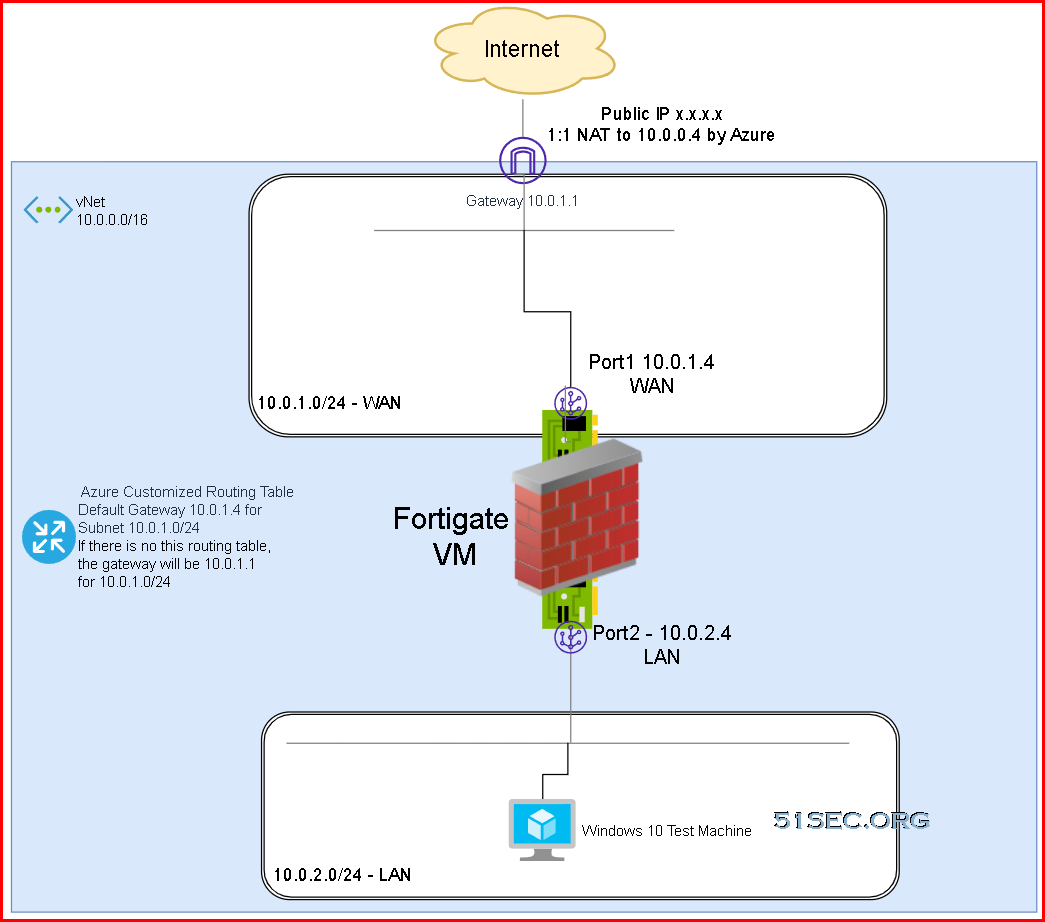
Topology
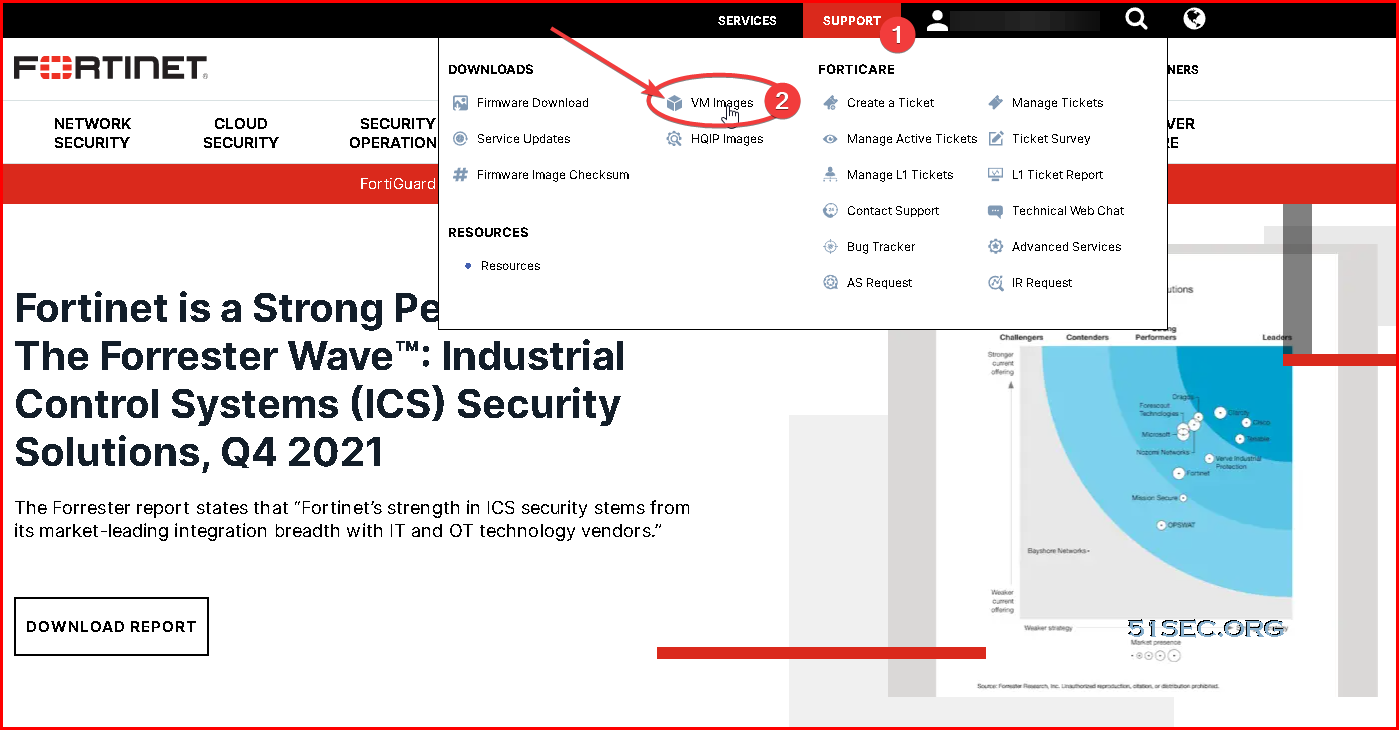
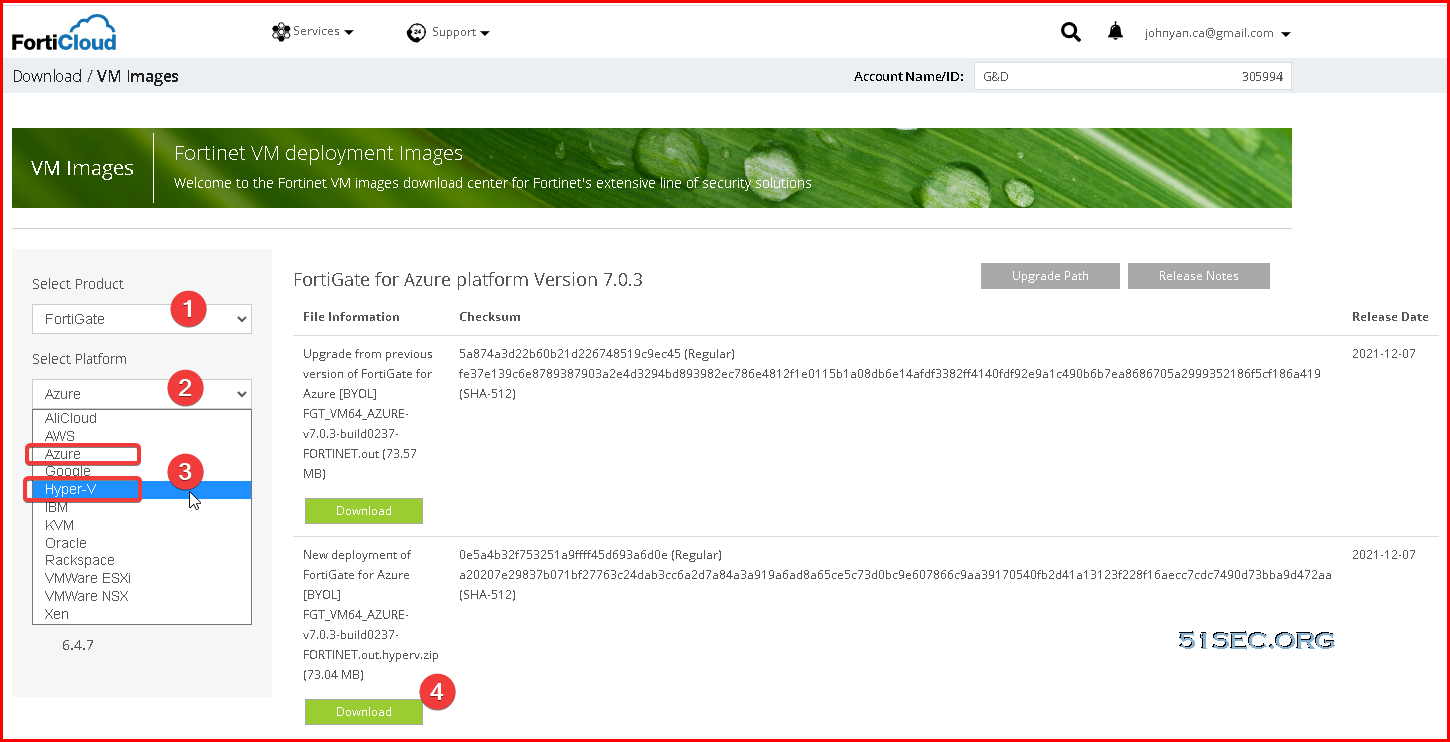
Download Fortigate VM
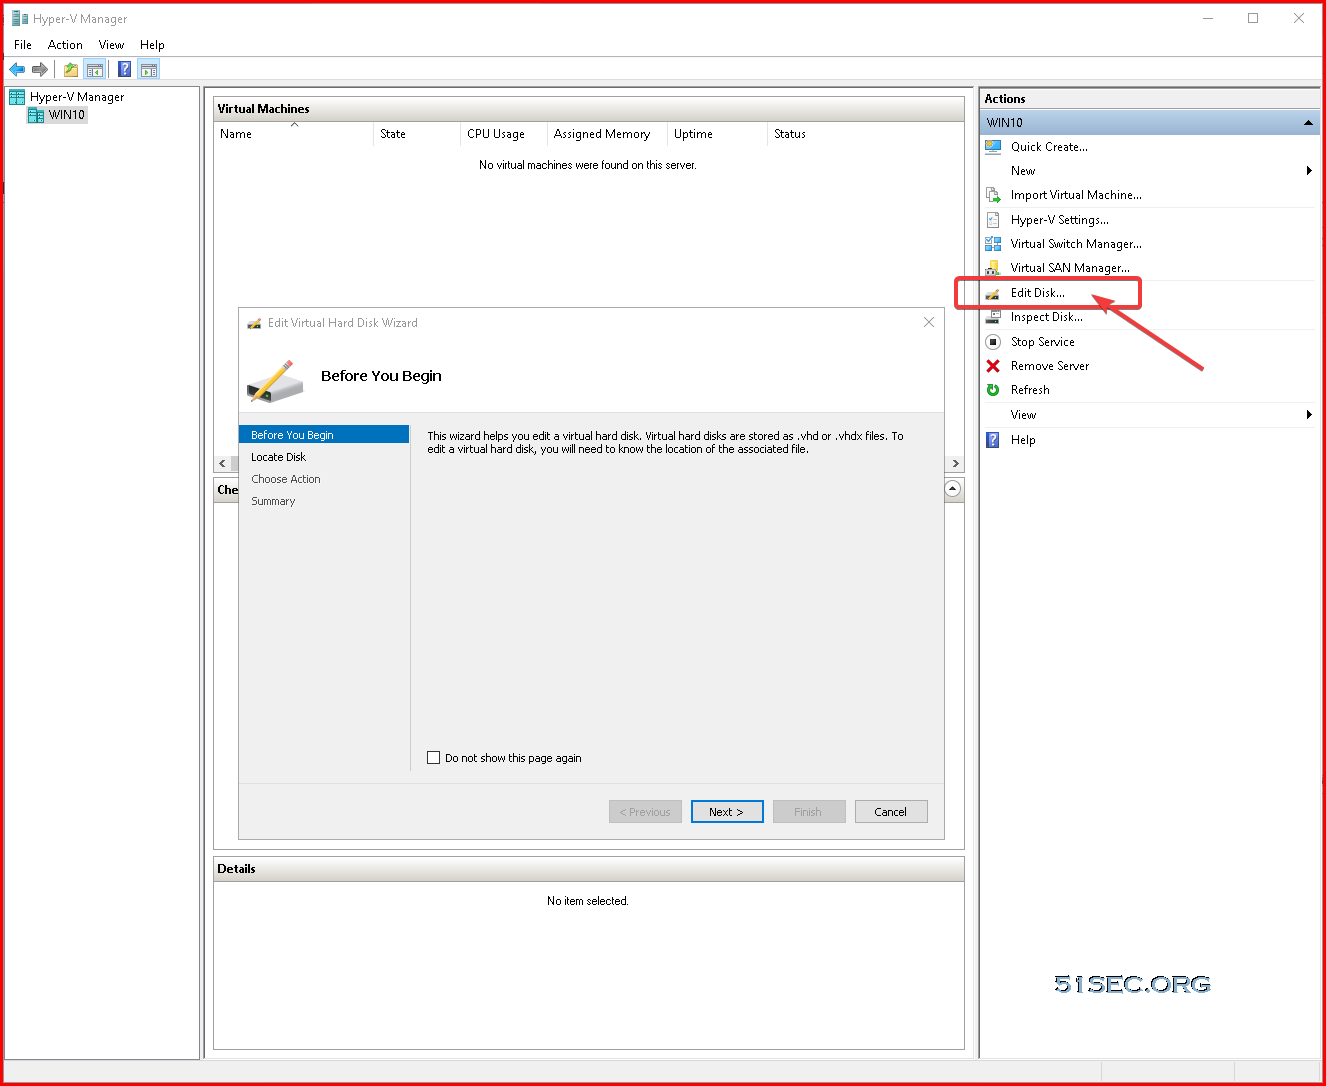
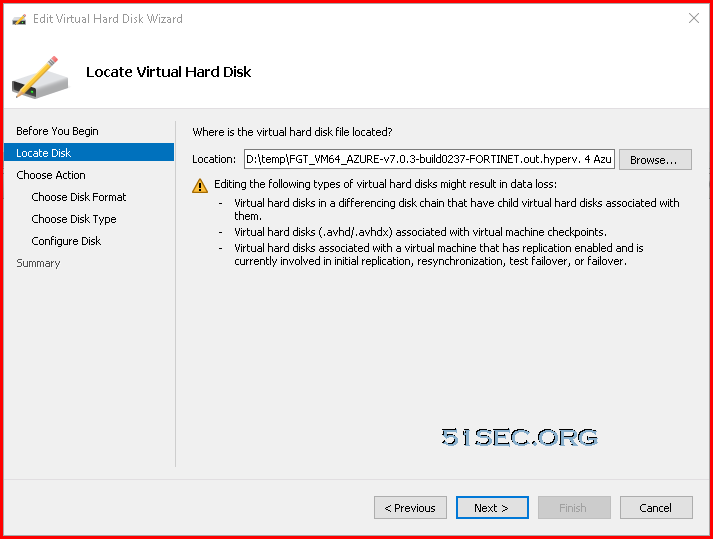
Covert Dynamic Disk to Fixed Size Disk
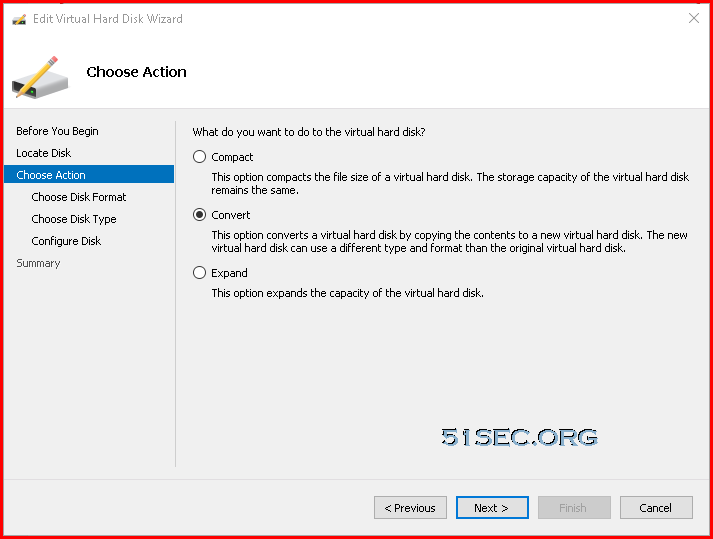
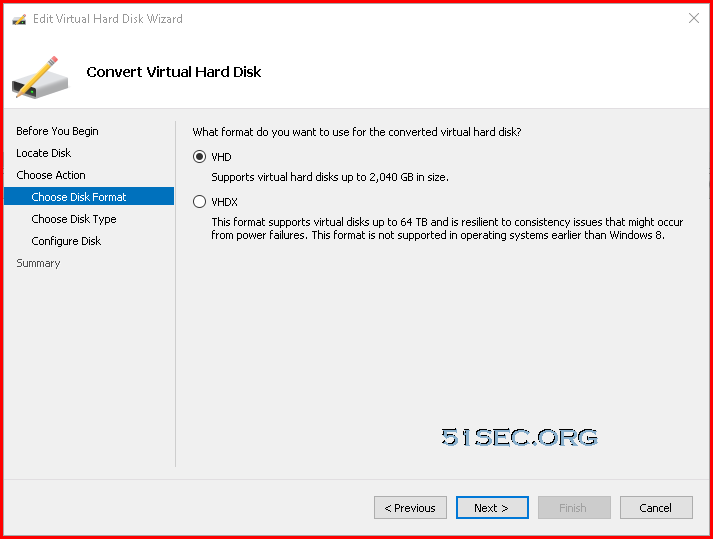
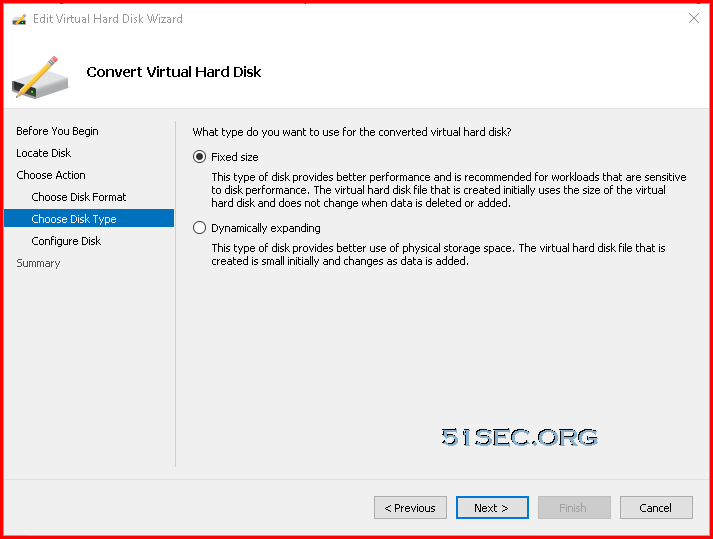
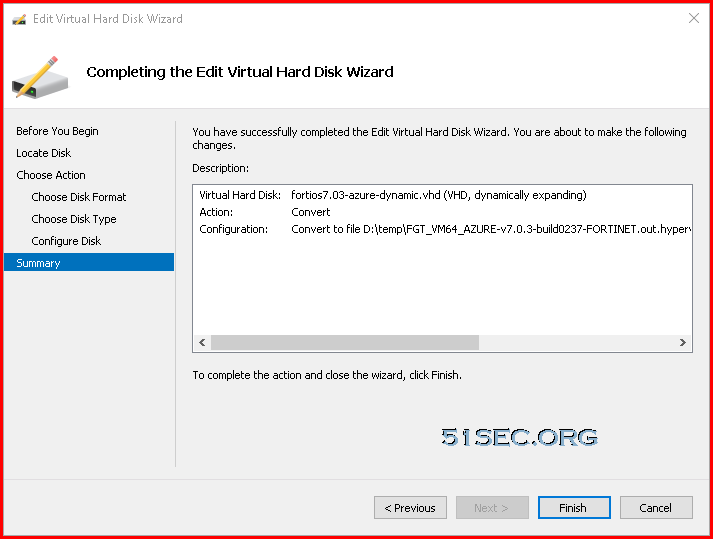
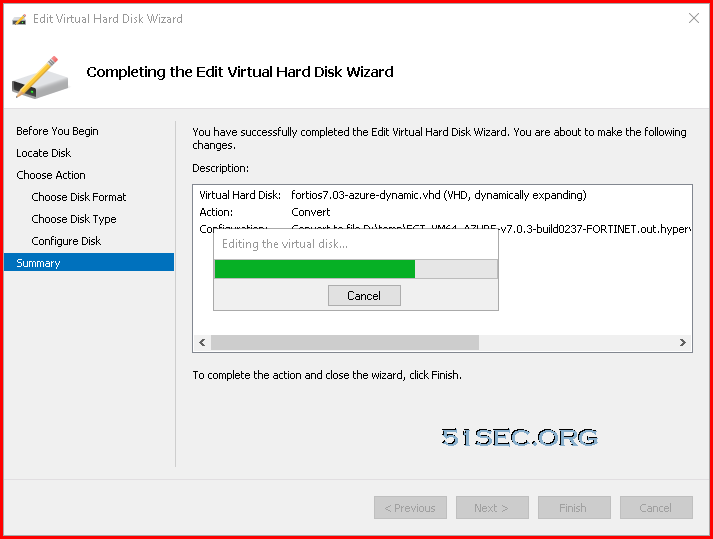
Since the downloaded VM image only has dynamic disks inside it, we will need to convert it to fixed size disk. That can be done by Hyper-V manager.
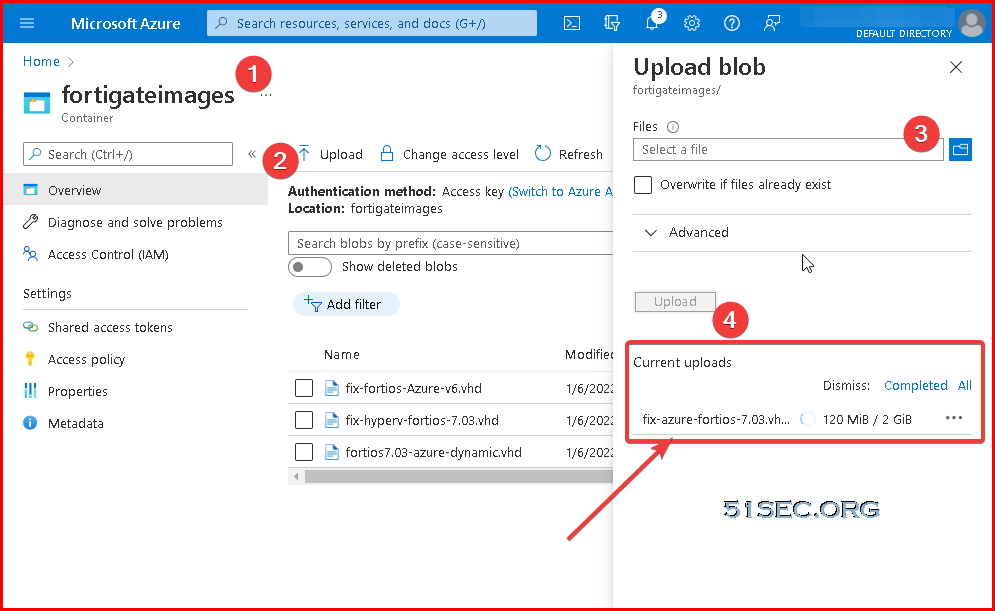
Upload 2GB VHD File to Blob Container
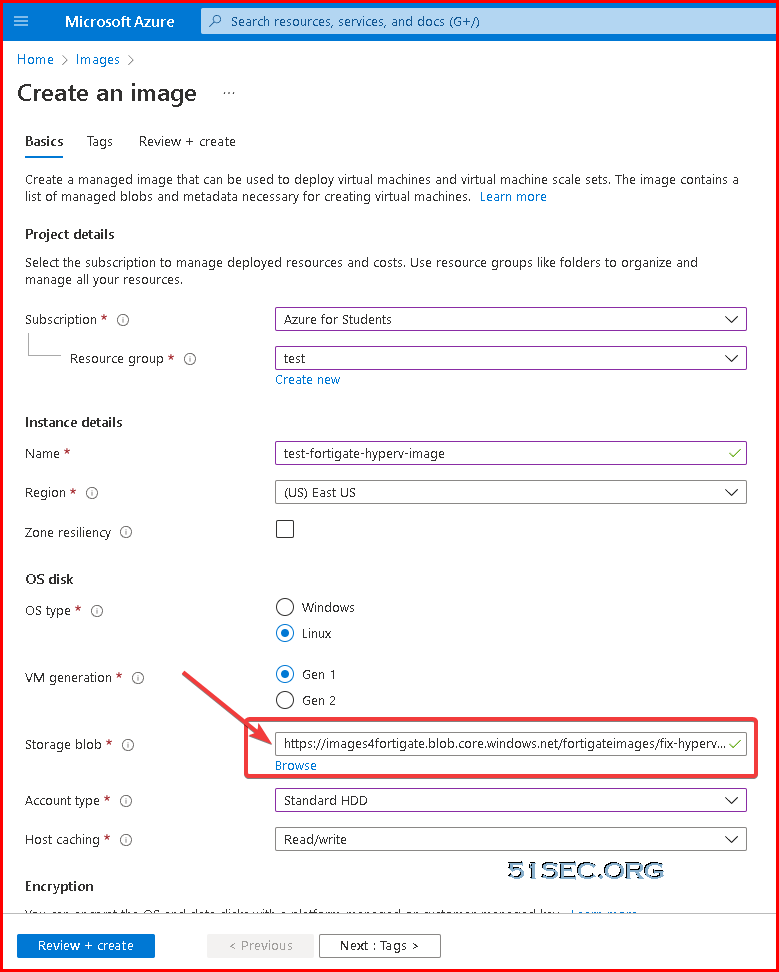
Create Image Based on 2GB VHD
Search Images service and create an image based on the VHD file uploaded to Blob.
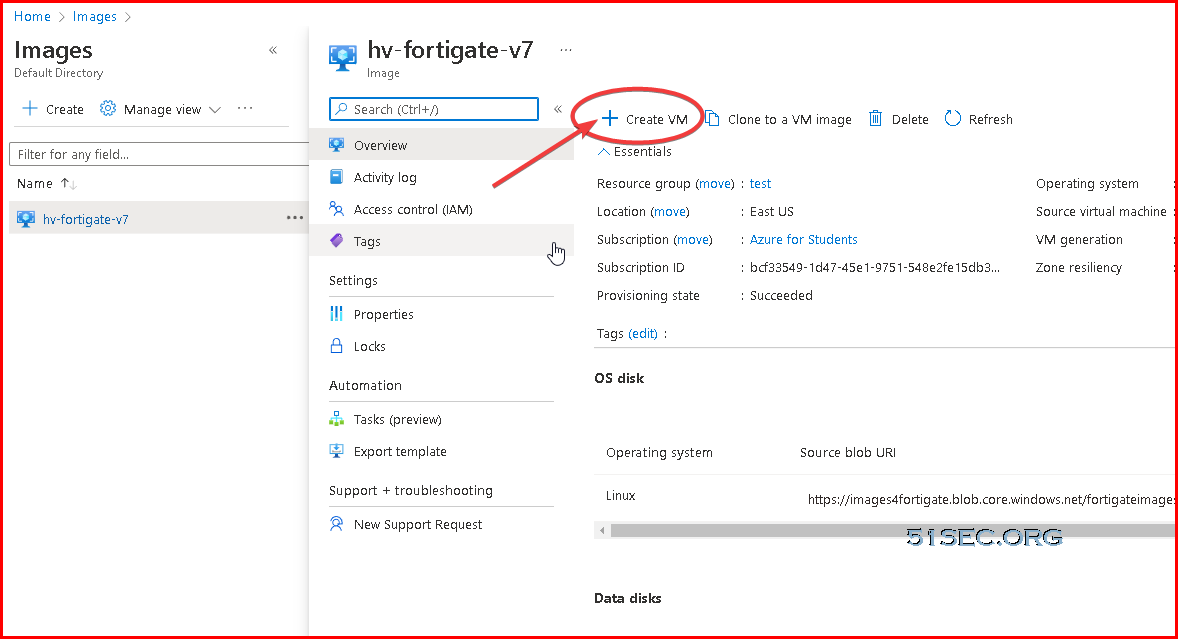
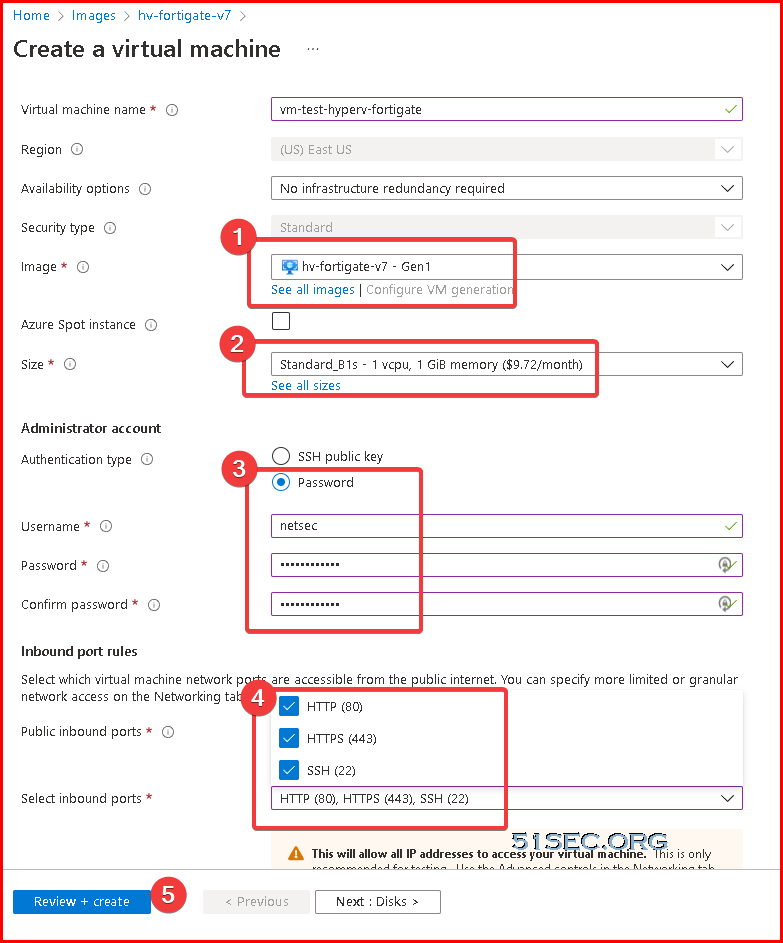
Create VM using new image
Access Fortigate VM
Once VM deployed using the image, you will get a public ip to access your vm.
If you are using Azure Fortigate VM, you will have following wo ways to access it, either using browser to open url https://<public ip> or using SSH client to ssh to it.
If you want to view Fortigate DHCP address (from CLI)
The syntax required is;
config system interface
edit ?
The username and password is the one you put in during creating VM.
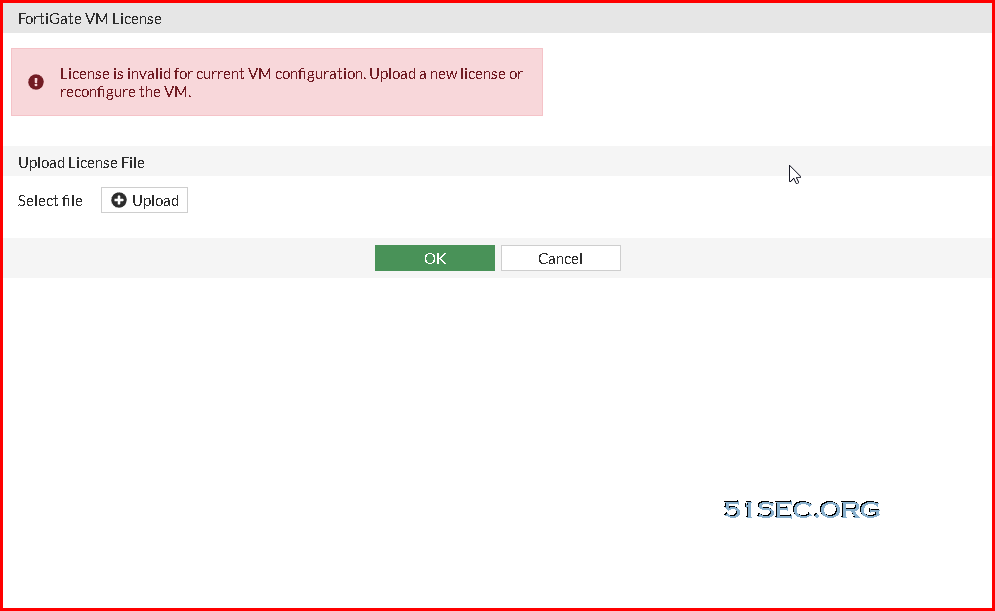
From browser, after you logged in, you will get a license invalid error and it will not allow you continue until you uploaded a valid license.
I will suggest to use Hyper-VM VHD file (version 6.4.8) to create image , then create VM. In that case, you will have default username and passoword : admin/null
SSH into VM first, then you will need to open HTTP port to access URL.
For system interface port1, add http to be allowaccess.
config system interface
edit port1
append allowaccess http
end
After that, you will be able to access http web gui from your browser.
But you will automatically load with a trial license for 15 days.
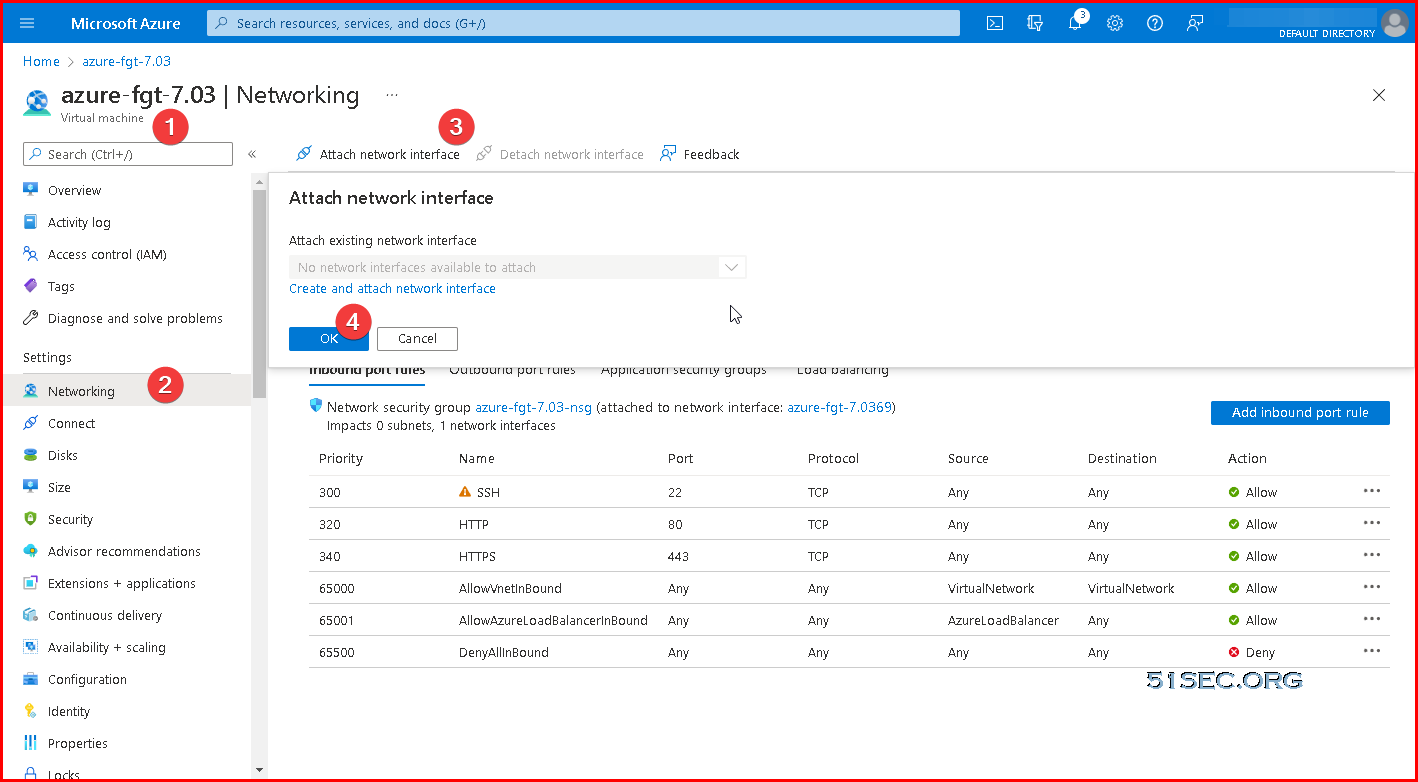
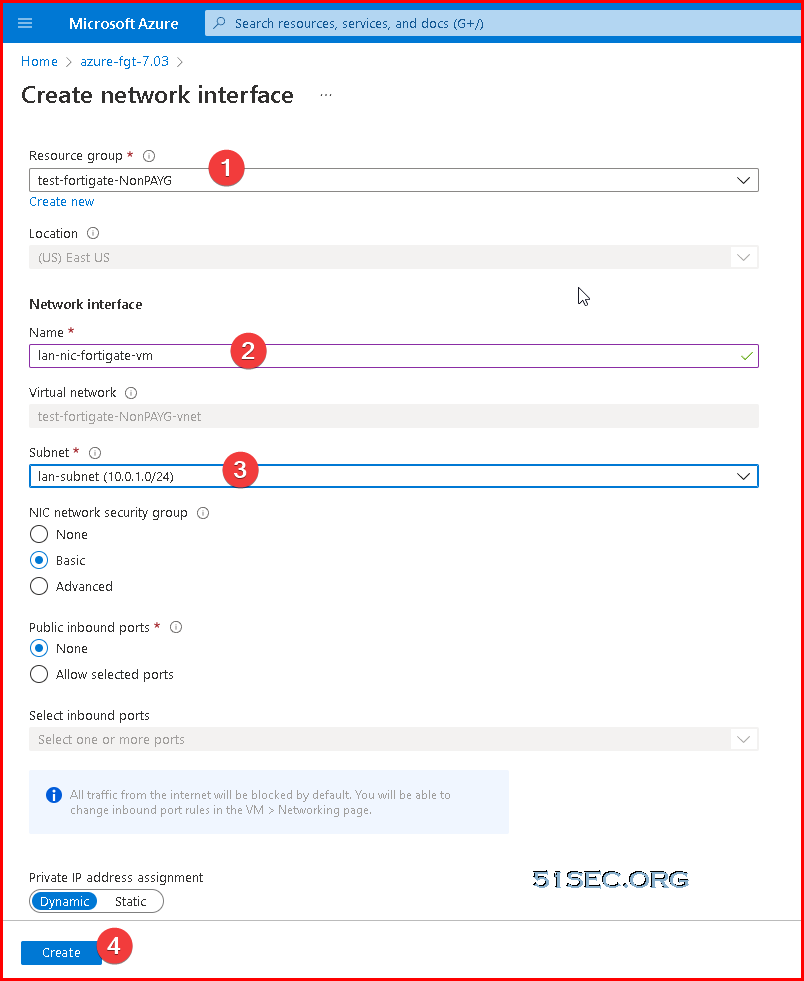
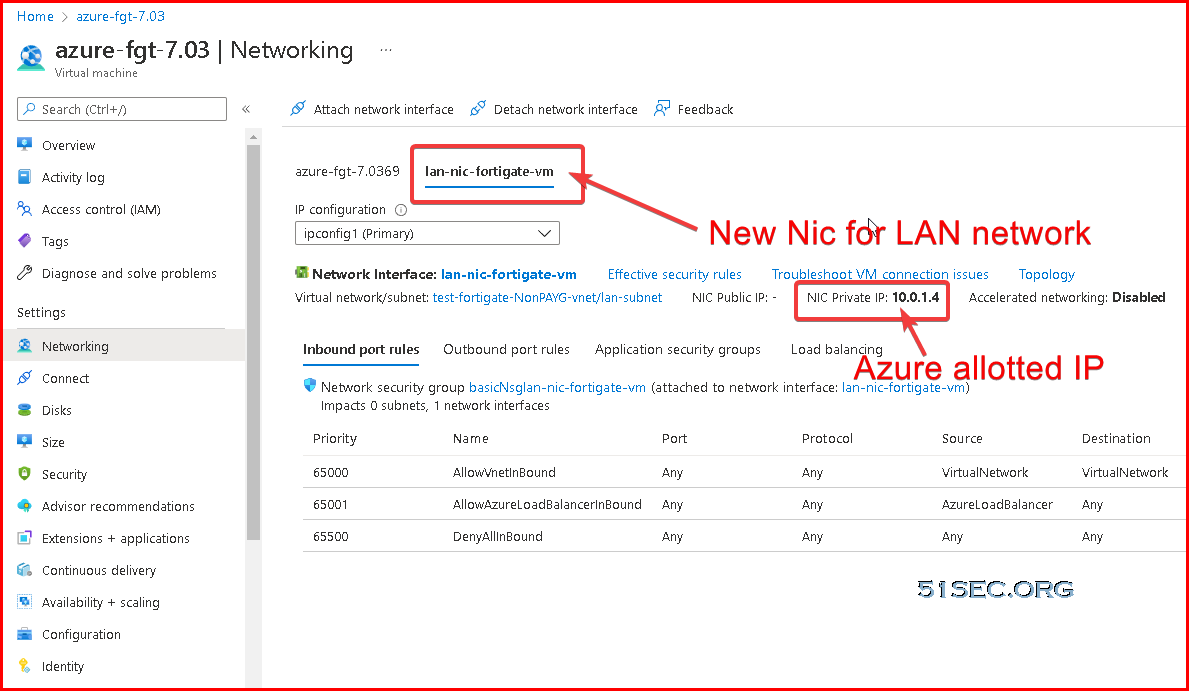
Adding Second NIC on VM
A subnet is a range of IP addresses in the virtual network. You can divide a virtual network into multiple subnets for organization and security. Each NIC in a VM is connected to one subnet in one virtual network. NICs connected to subnets (same or different) within a virtual network can communicate with each other without any extra configuration. By default all Azure subnet traffic will go to Azure default gateway for that subnet, which is .1 ip address.
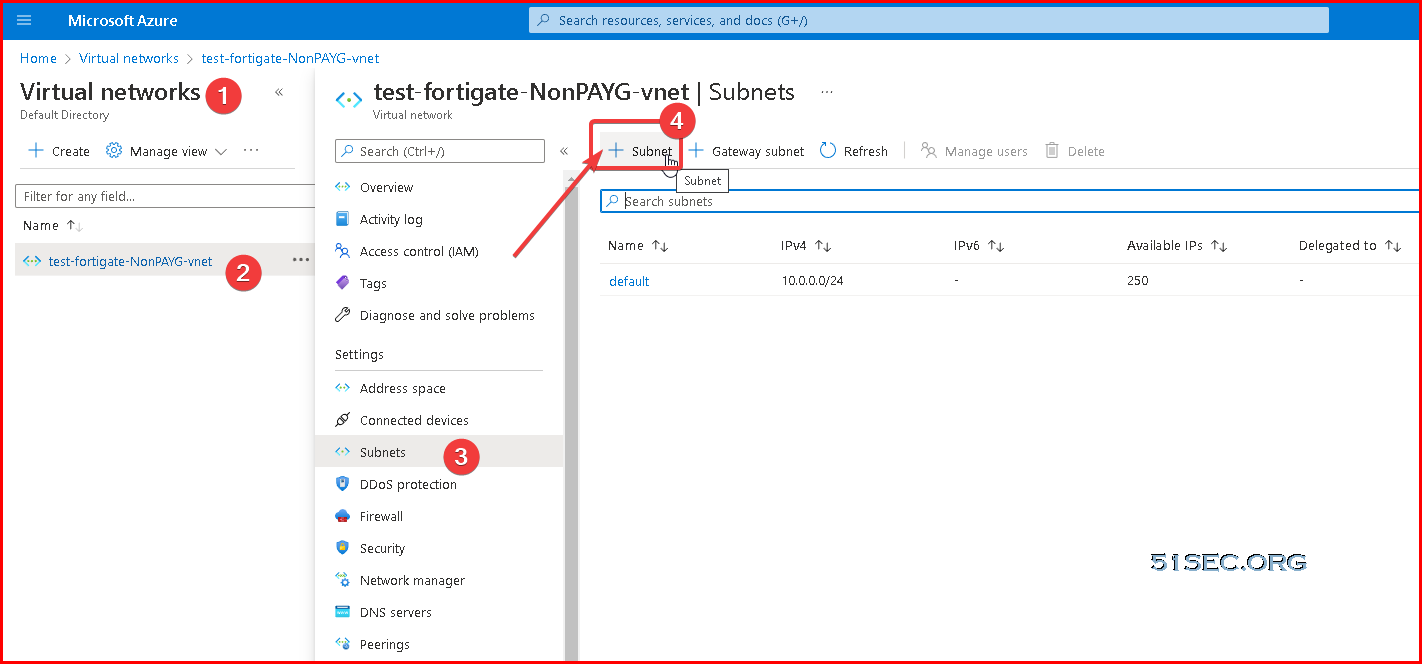
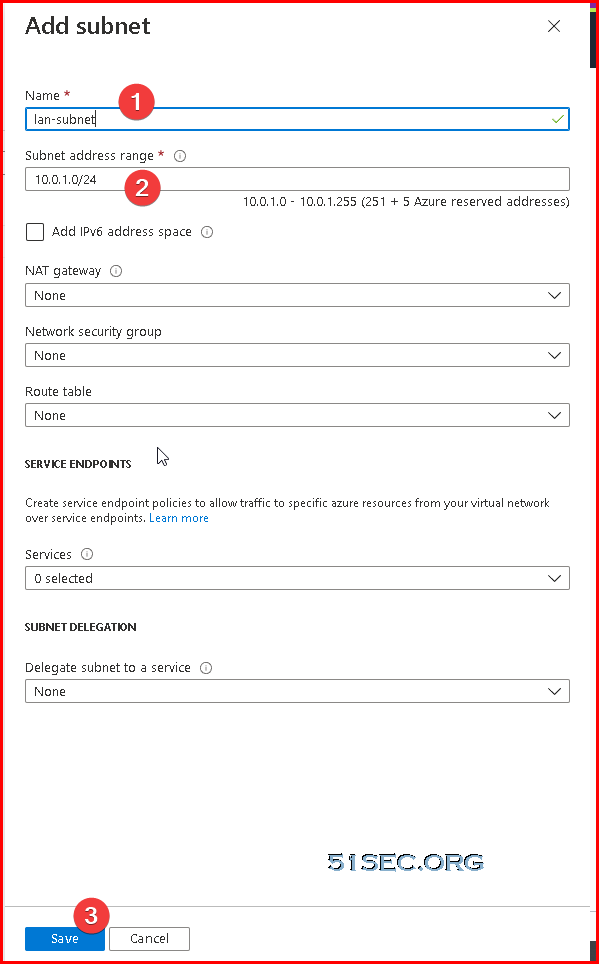
Create a new subnet for your LAN network, which will be used for your new NIC card.
To add a new network card for Fortigate VM, you will need to stop the VM.
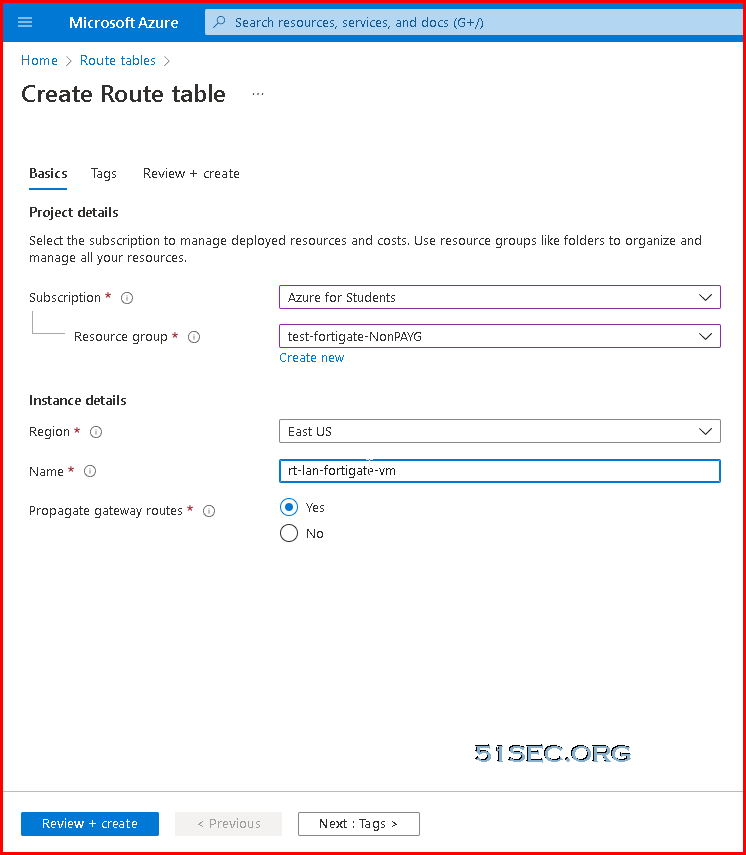
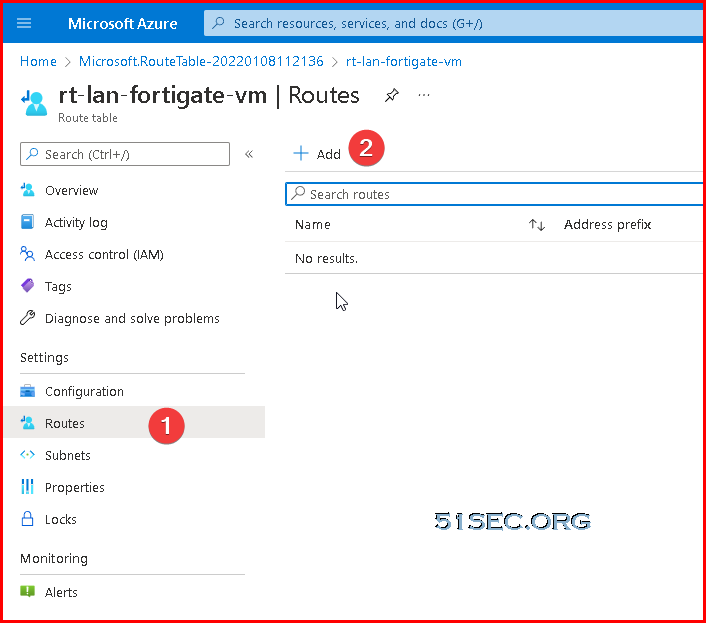
Create a new routing table for LAN network
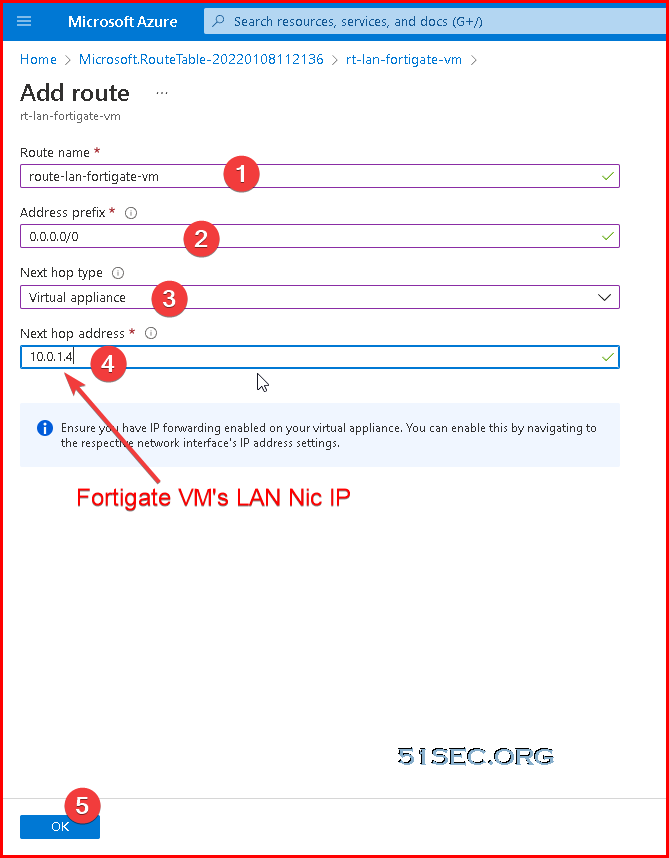
Add a new route:
This new route will route all traffic in associated subnet(s) to Fortigate’s LAN NIC IP.
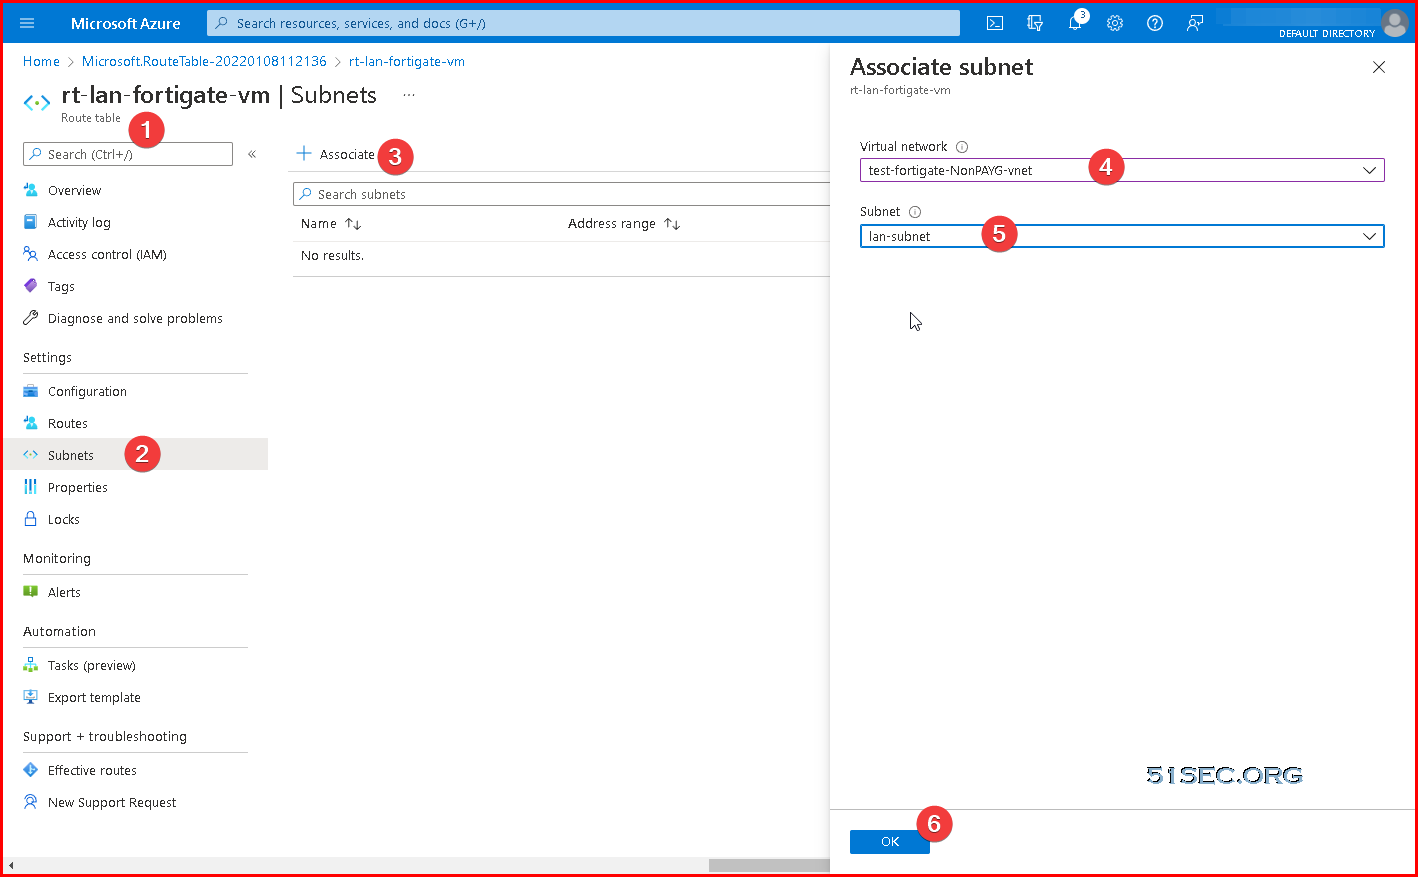
Associate the LAN subnet with this new route.
