Use Azure File Sync to centralize your organization’s file shares in Azure Files, while keeping the flexibility, performance, and compatibility of an on-premises file server. Azure File Sync transforms Windows Server into a quick cache of your Azure file share. You can use any protocol that’s available on Windows Server to access your data locally, including SMB, NFS, and FTPS. You can have as many caches as you need across the world.
Microsoft documents to read:
- Planning for an Azure Files deployment
- Planning for an Azure File Sync deployment
- Deploy Azure File Sync
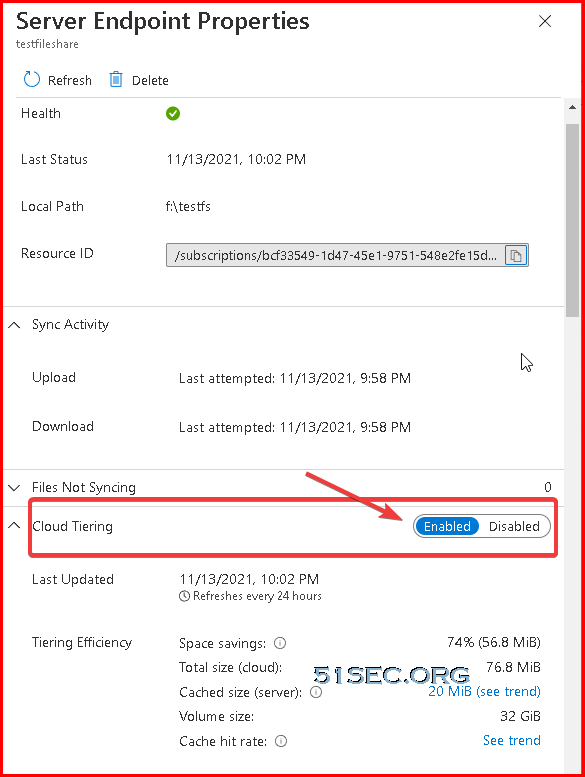
Cloud tiering, an optional feature of Azure File Sync, decreases the amount of local storage required while keeping the performance of an on-premises file server.
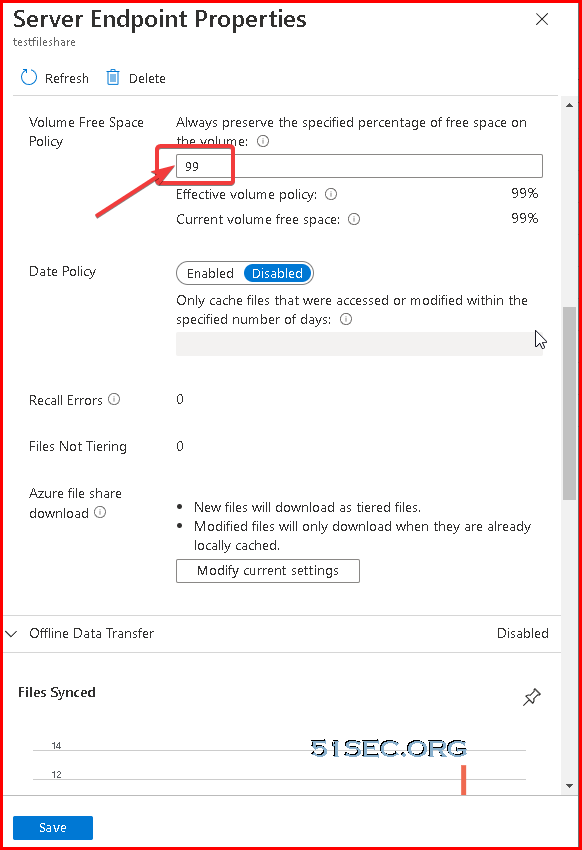
When enabled, this feature stores only frequently accessed (hot) files on your local server. Infrequently accessed (cool) files are split into namespace (file and folder structure) and file content. The namespace is stored locally and the file content stored in an Azure file share in the cloud.
When a user opens a tiered file, Azure File Sync seamlessly recalls the file data from the file share in Azure.
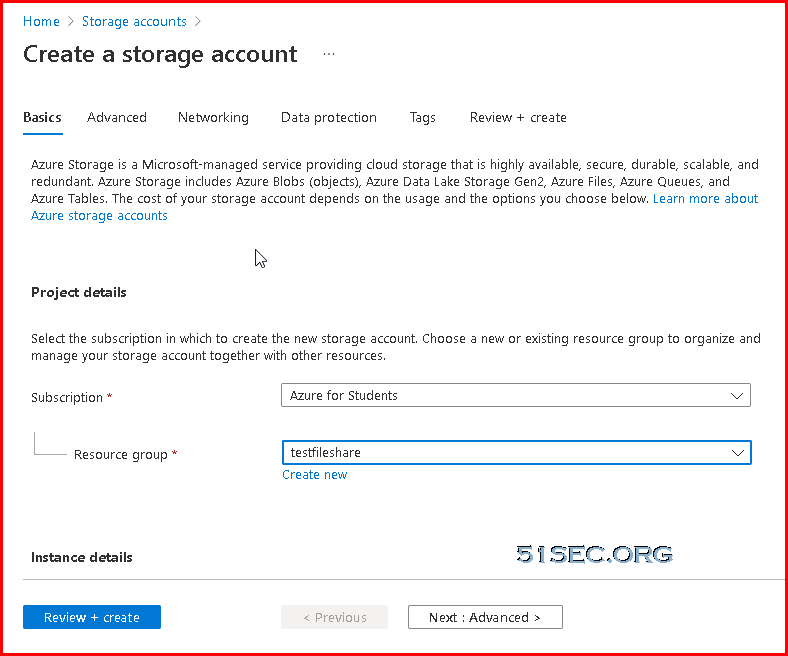
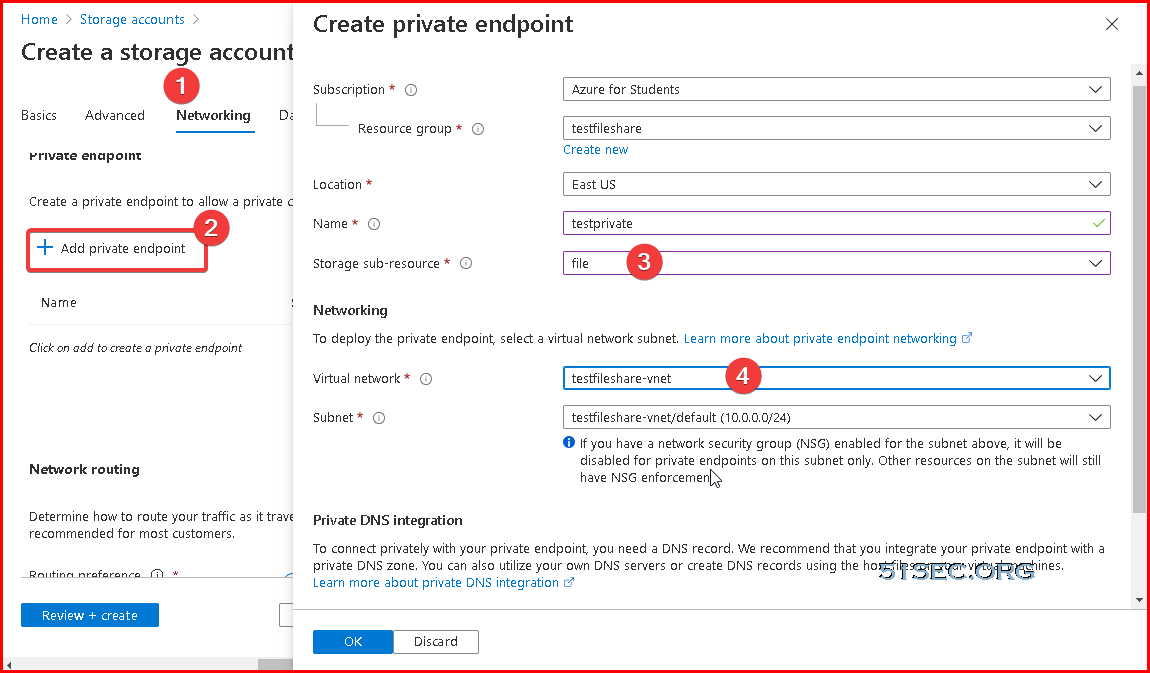
Create a Storage Account
Create a private endpoint or public restricted subnet:
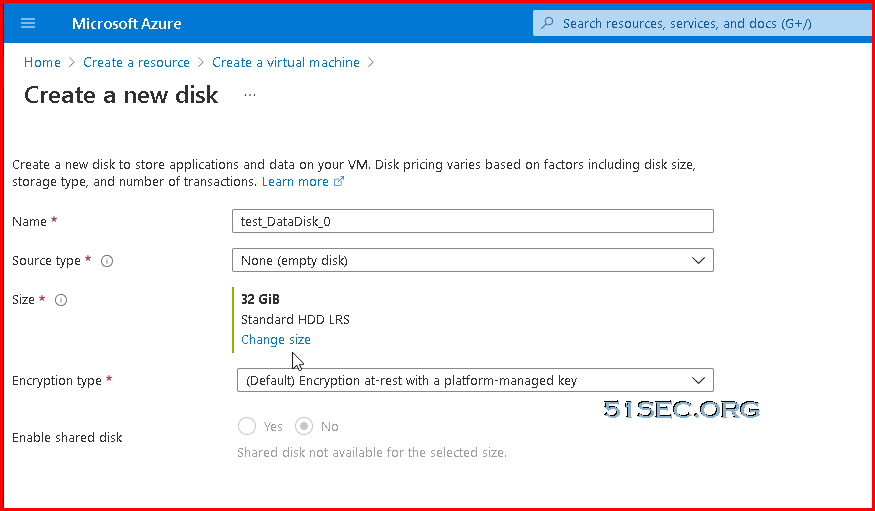
Create A VM and Add One More Hard Drive for Sync
Azure sync agent can not sync system disk’s folder.
That is why we need to add an extra disk. 32GB is enough. Standard HDD 32GB, with local redundancy.
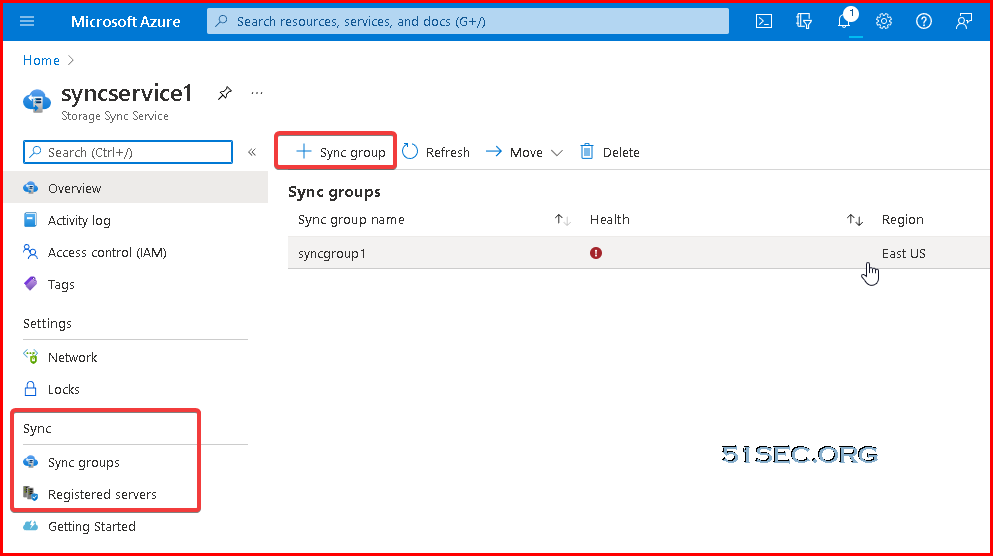
Azure Storage Sync Service
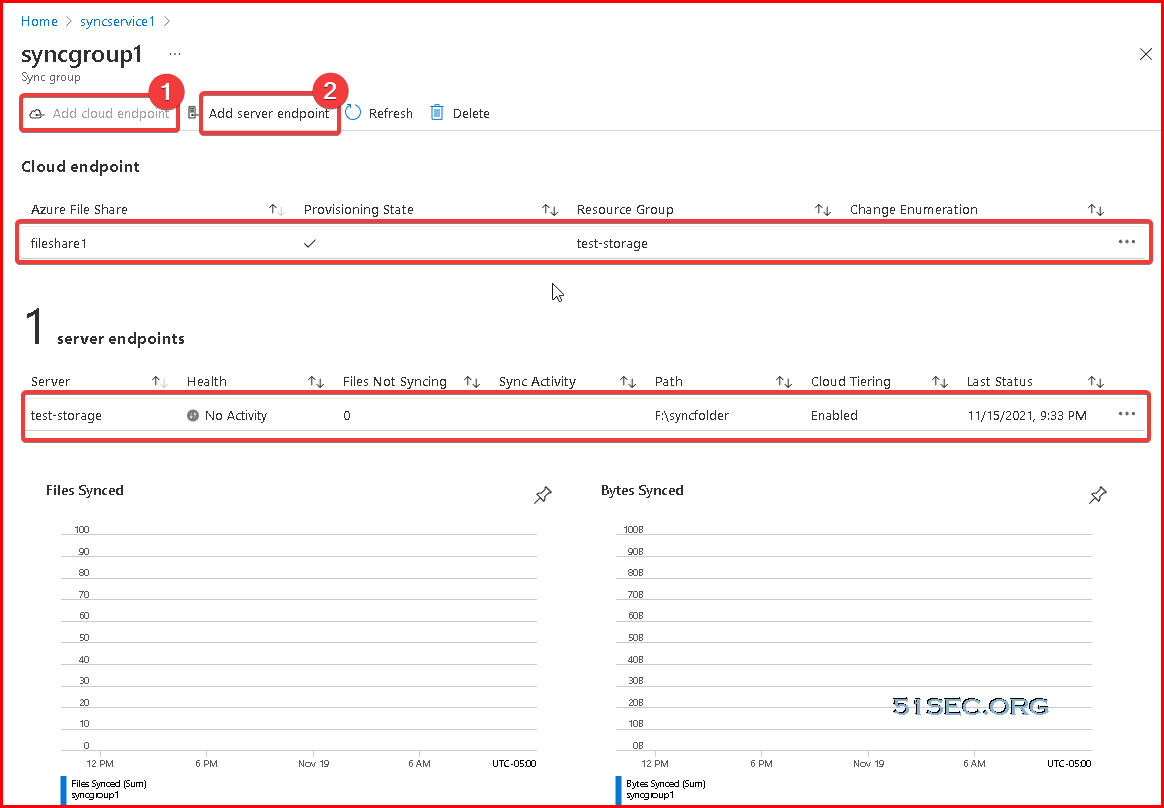
Add your cloud endpoint and server endpoint.
Server endpoint will come from the server installed Azure storage sync agent in next step.
Azure Storage Sync Agent Installation
- Open Server Manager.
- Click Local Server:

- On the Properties subpane, select the link for IE Enhanced Security Configuration.
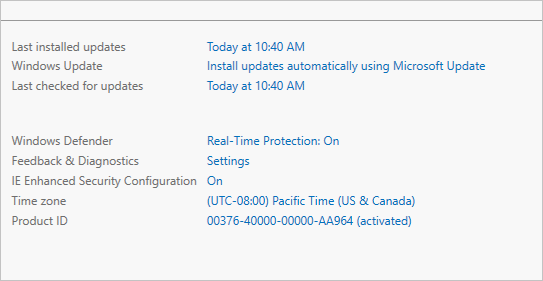
- In the Internet Explorer Enhanced Security Configuration dialog box, select Off for Administrators and Users:

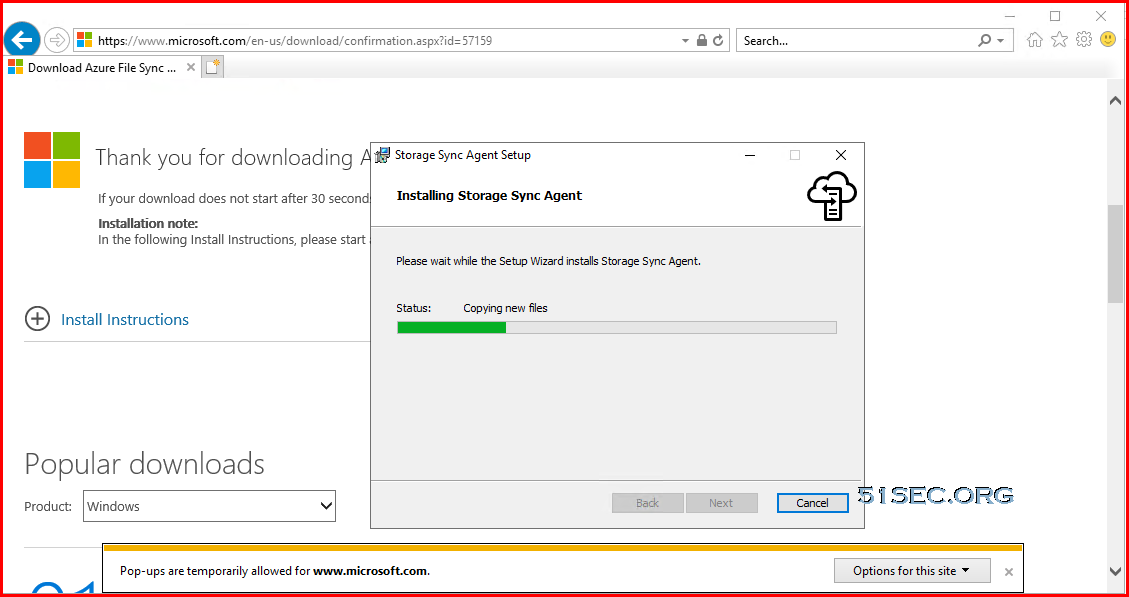
Install the Azure File Sync agent:
Download link : https://www.microsoft.com/en-us/download/details.aspx?id=57159
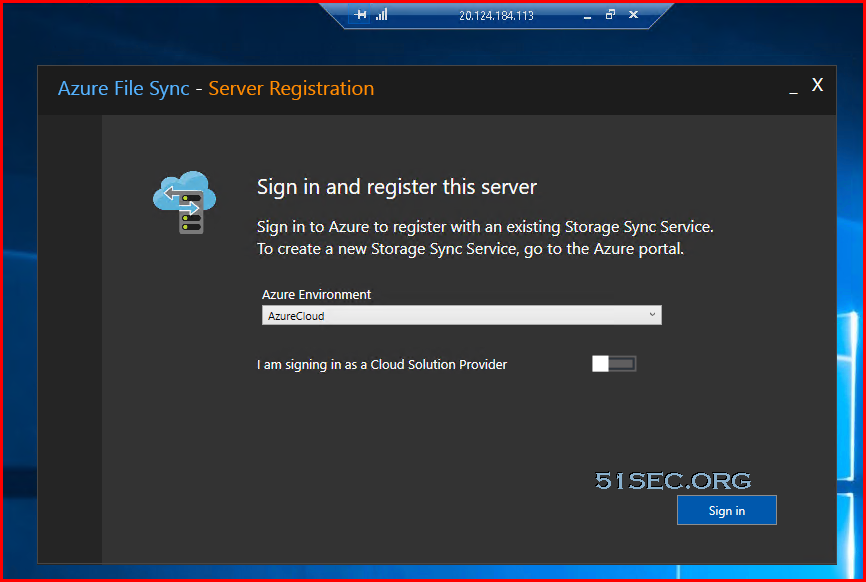
After completed installation, the Server Registration window is coming up.
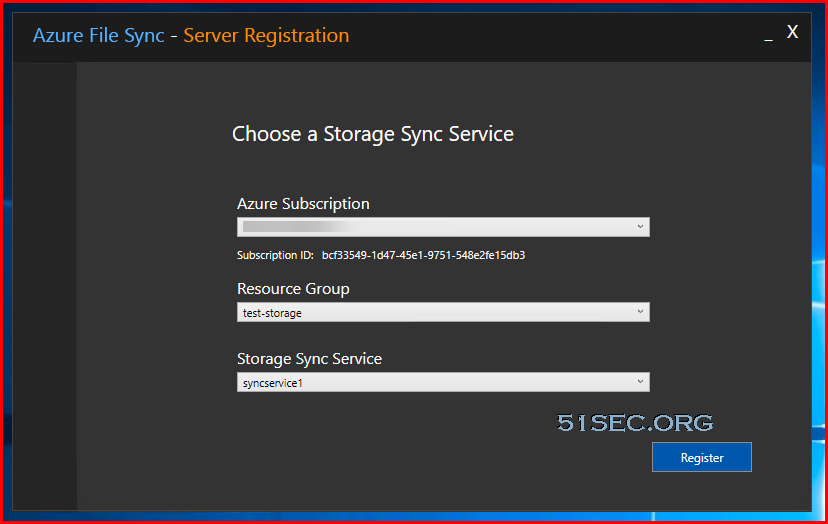
After logged in with your Azure account, you can choose your subscription, resource group and Sotrage Sync Service.
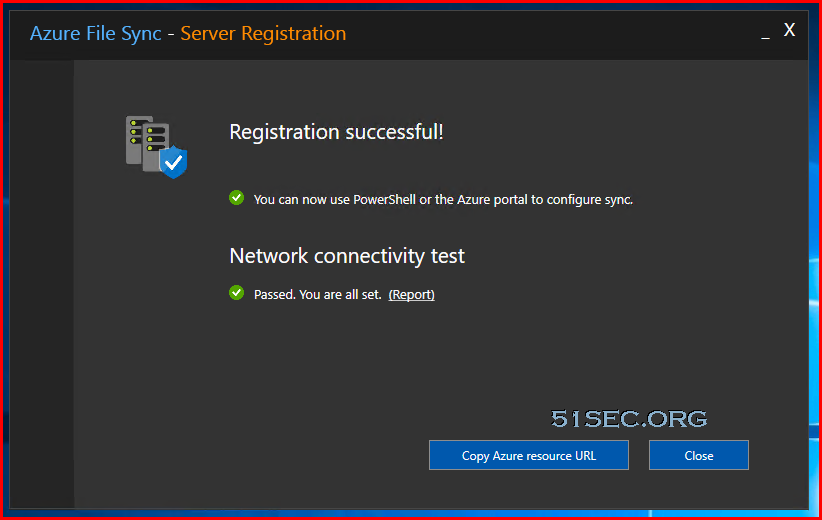
Click register, you will be good to go for next step.
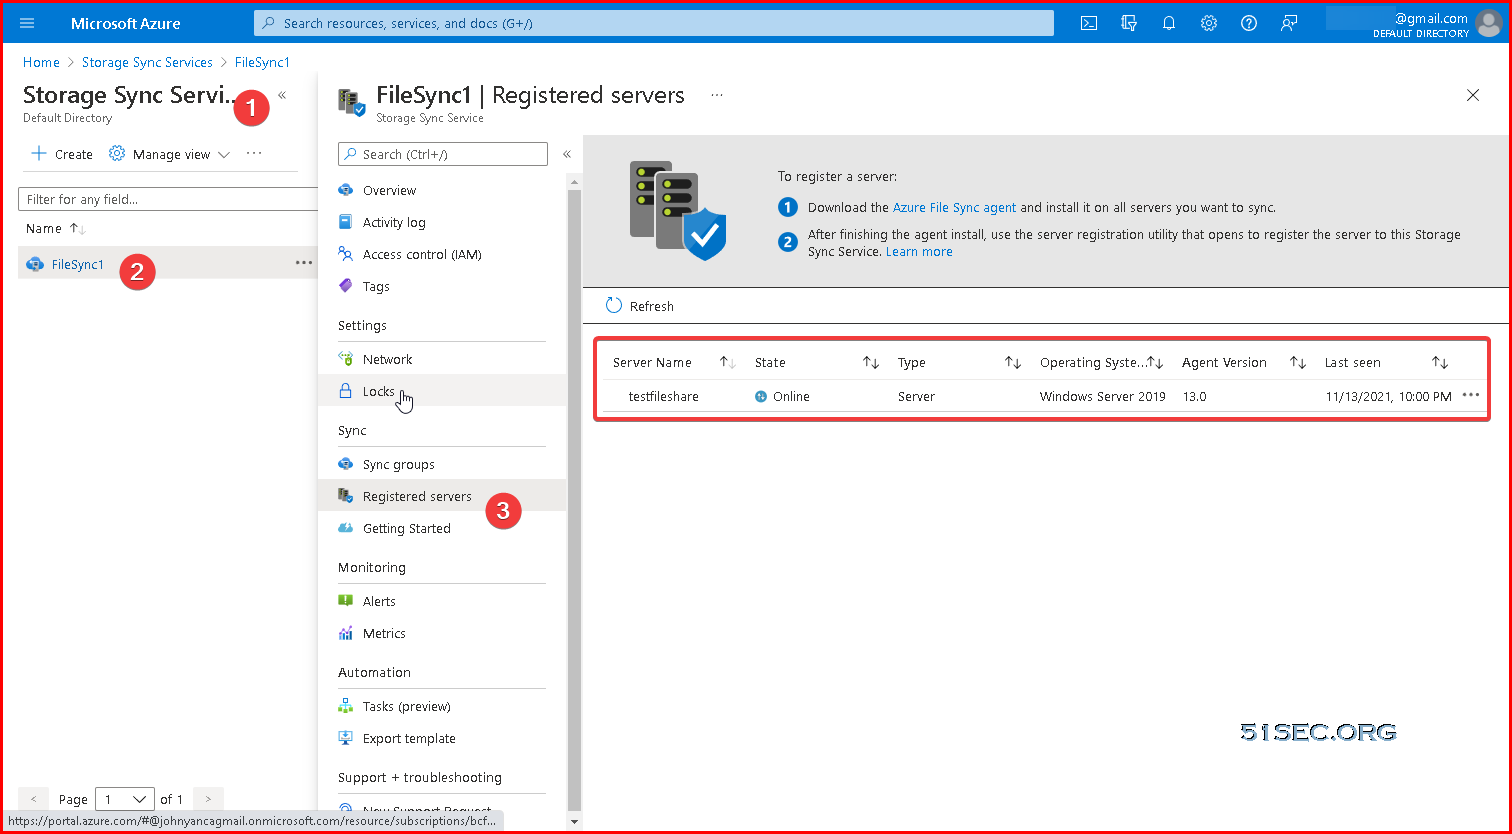
Registered Servers
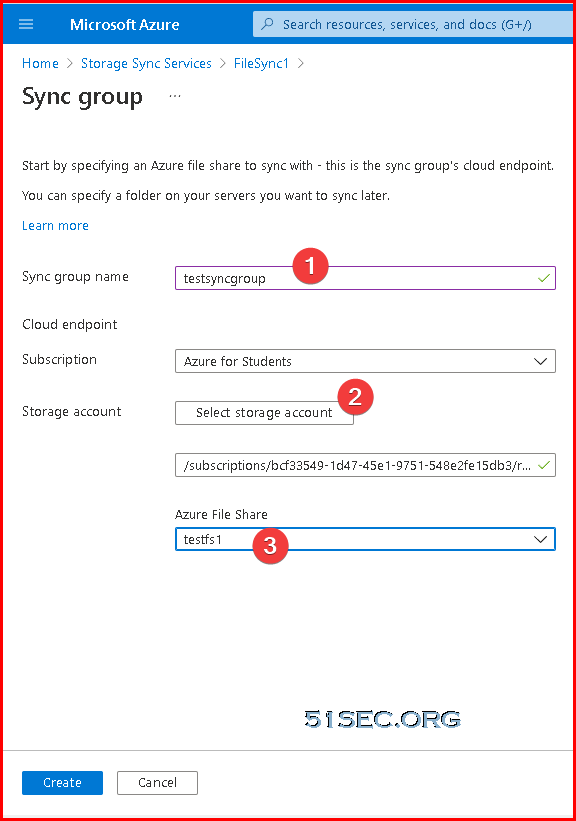
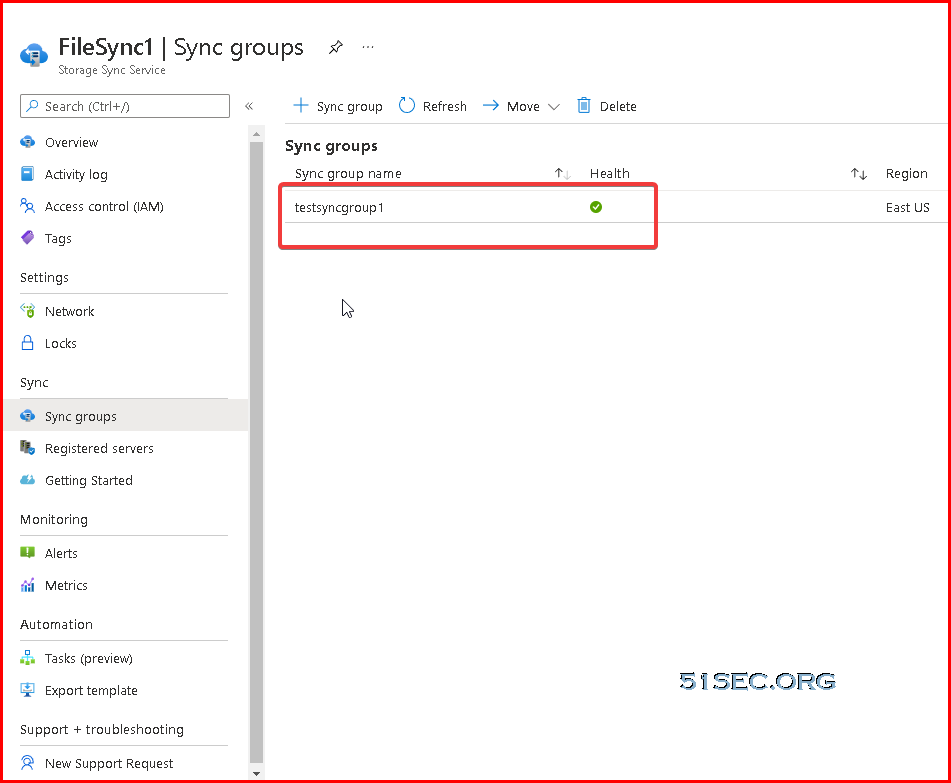
Sync Groups
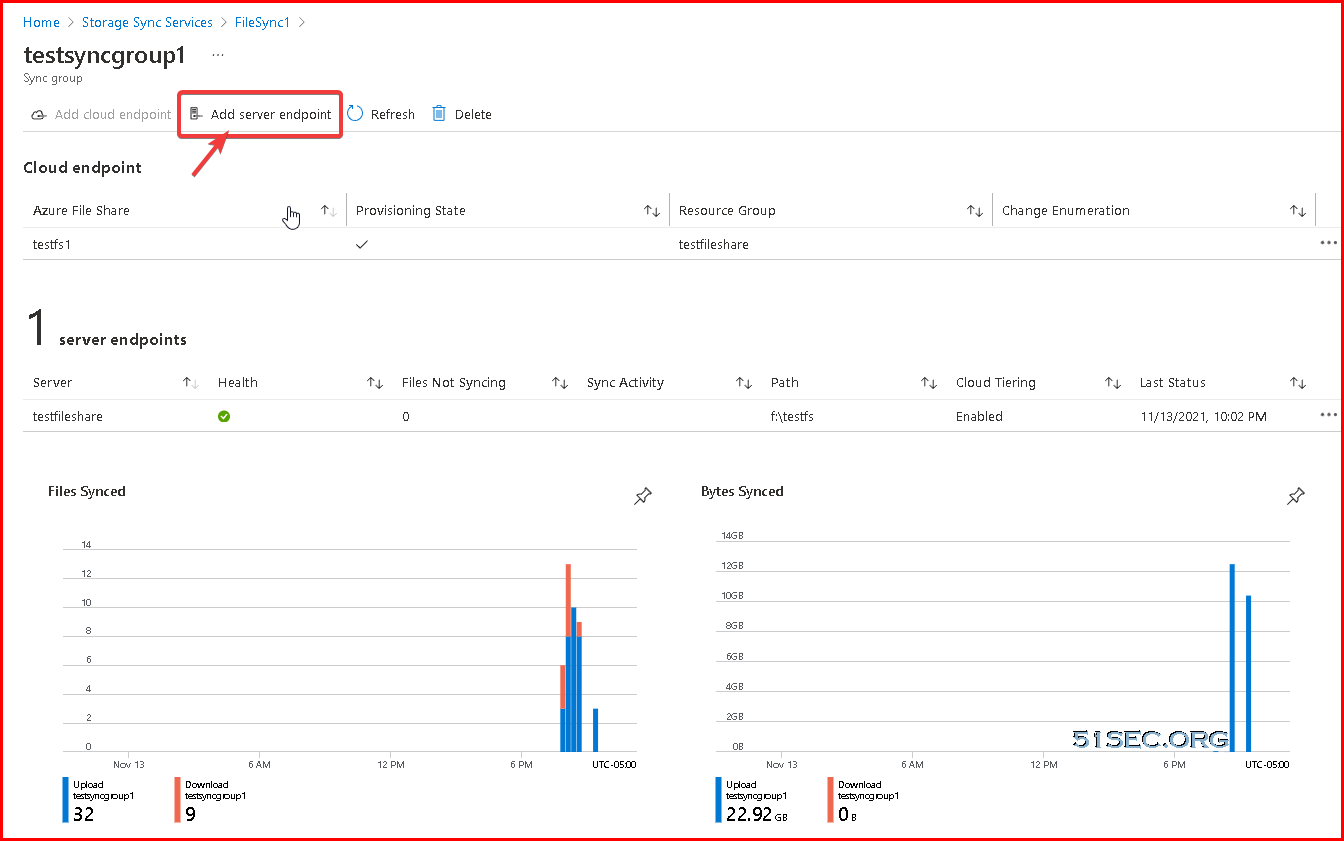
Add server endpoint
Add Cloud Endpoint which is pointing to your Azure storage account’s file share folder.
After added cloud endpoint, you can add your server endpoint:
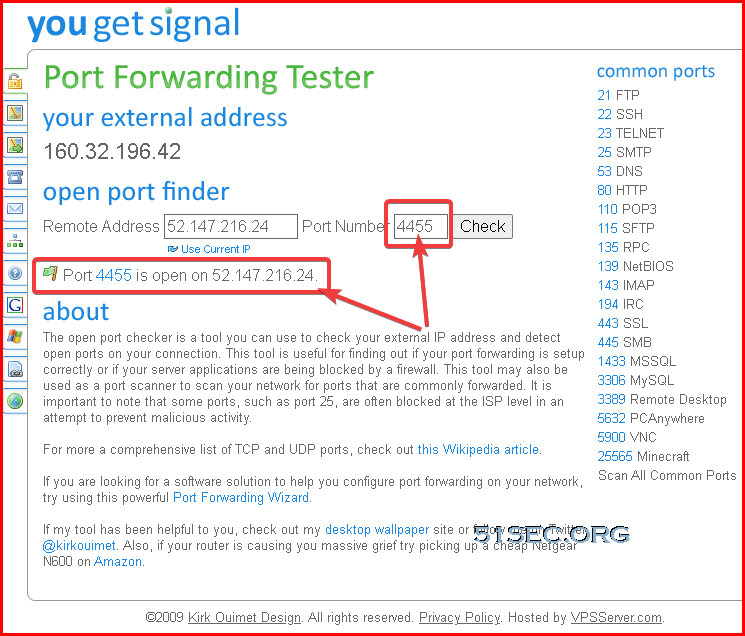
Testing Port 445 / 4455 :
Use online port forwarding tester website : https://www.
Here is an example after loadbalancer created with a inbound loadbalancing rule to convert inbound 4455 traffic to 445 traffic. Firewall has opened port 445. It will take 2-3 minutes to get firewall rule taking it into effect.
Cloud Tiering
Server endpoint creation fails, with this error: “MgmtServerJobFailed” (Error code: -2134375898 or 0x80c80226)
This error occurs if the server endpoint path is on the system volume and cloud tiering is enabled. Cloud tiering is not supported on the system volume. To create a server endpoint on the system volume, disable cloud tiering when creating the server endpoint.
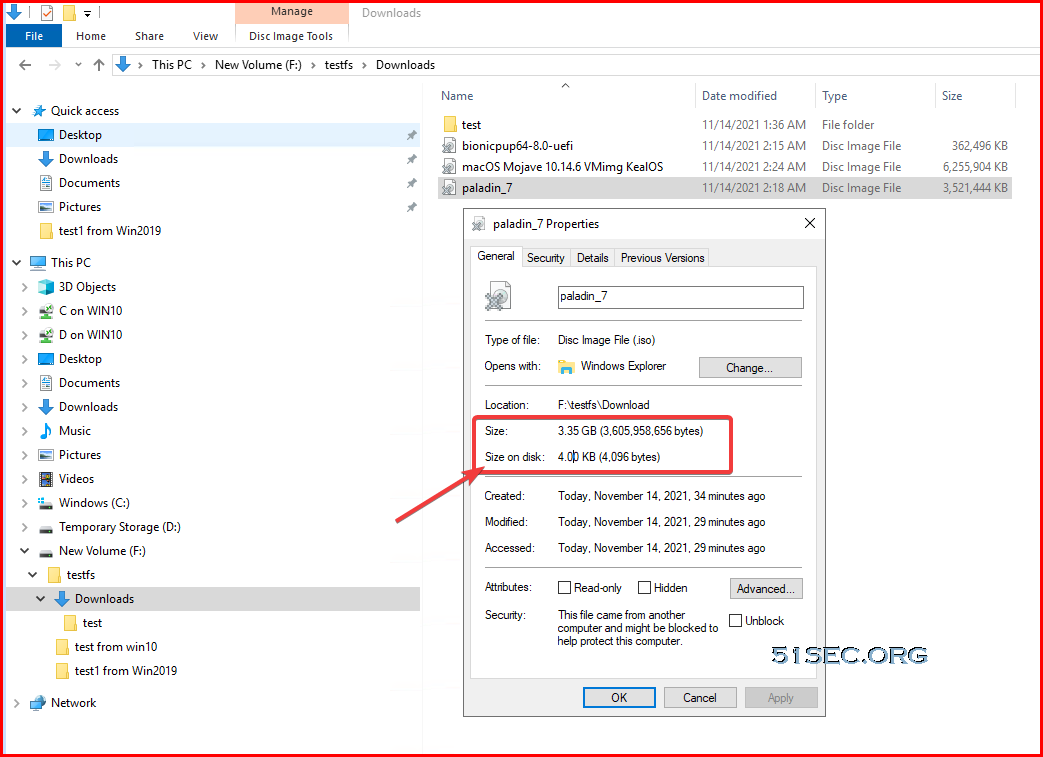
Tiered file
For tiered files, the size on disk is zero since the file content itself isn’t being stored locally. When a file is tiered, the Azure File Sync file system filter (StorageSync.sys) replaces the file locally with a pointer (reparse point). The reparse point represents a URL to the file in the Azure file share. A tiered file has both the “offline” attribute and the FILE_ATTRIBUTE_RECALL_ON_DATA_ACCESS attribute set in NTFS so that third-party applications can securely identify tiered files.
Mount Azure File Sync Folder to Local Without Port 445
                                                                                               PS C:\Users\test> Test-NetConnection -ComputerName 20.121.195.14 -Port 445                                              WARNING: TCP connect to (20.121.195.14 : 445) failed
WARNING: Ping to 20.121.195.14 failed with status: TimedOut


ComputerName           : 20.121.195.14
RemoteAddress          : 20.121.195.14
RemotePort             : 445
InterfaceAlias         : Ethernet0
SourceAddress          : 192.168.2.141
PingSucceeded          : False
PingReplyDetails (RTT) : 0 ms
TcpTestSucceeded       : False
Windows PowerShell
Copyright (C) Microsoft Corporation. All rights reserved.

Try the new cross-platform PowerShell https://aka.ms/pscore6

PS C:\WINDOWS\system32> netsh interface portproxy add v4tov4 listenaddress=10.255.255.1 listenport=445 connectaddress=52.147.216.24 connectport=4455

PS C:\WINDOWS\system32>
Microsoft Windows [Version 10.0.19042.685]
(c) 2020 Microsoft Corporation. All rights reserved.

C:\WINDOWS\system32>netsh interface portproxy delete v4tov4 listenaddress=10.255.255.1 listenport=445


C:\WINDOWS\system32>netsh interface portproxy show all


C:\WINDOWS\system32>
