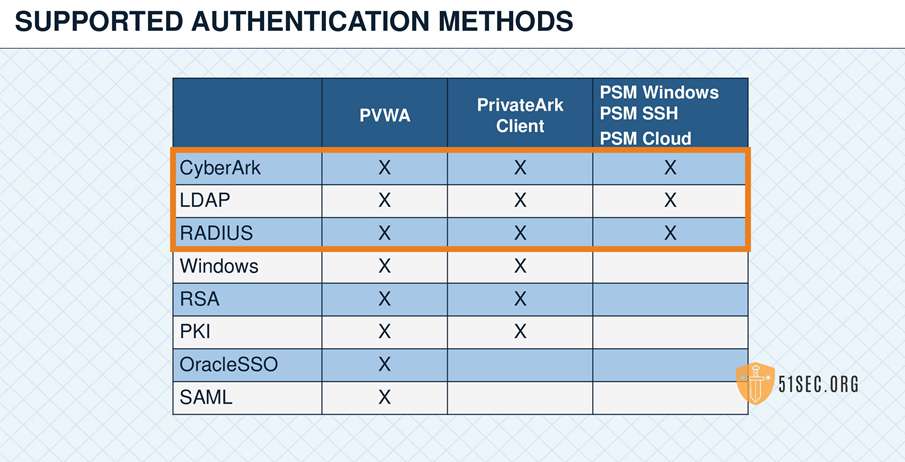
The CyberArk PAS Vault enables users to log on through RADIUS authentication (Remote Authentication Dial-In User Service) using logon credentials that are stored in the RADIUS server.
Lab Topology
Install Radius Server
You can install FreeRadius server as your Radius lab server based on steps in this post.
Configure your Radius Server
- Create a client
[root@localhost ~]# cd /etc/raddb/
[root@localhost raddb]# ls
certs  clients.conf  dictionary  hints  huntgroups  mods-available  mods-config  mods-enabled  panic.gdb  policy.d  proxy.conf  radiusd.conf  README.rst  sites-available  sites-enabled  templates.conf  trigger.conf  users
[root@localhost raddb]# vi clients.conf
client test1 {
        secret = Cyberark1
        ipaddr = 192.168.2.21
}
2. Create a user bob
[root@localhost raddb]# vi users
bob     Cleartext-Password := "hello"
        Reply-Message := "Hello, %{User-Name}"
Configure CyberArk Vault
1. Stop Vault Server and from command line, cd C:\Program Files (x86)\PrivateArk\Server
2. Run following command will encrypt the secret RADIUS/Vault password, which is Cyberark1, and store it in a file called radiusauth.dat in the current folder.
CAVaultManager SecureSecretFiles /SecretType Radius /Secret Cyberark1 /SecuredFileName radiusauth.dat |
3. In C:\Program Files (x86)\PrivateArk\Server\Conf\DBParm.ini, set the RadiusServersInfo parameter. All the details are specified in the same parameter, separated by semicolons.
In the following example, the IP address of the RADIUS server is 192.168.2.12, and its port is 1812. The name of the RADIUS client (Vault machine as entered in the RADIUS server) is ‘radius1’, and the name of the file that contains the secret password is ‘radiusauth.dat’.
RadiusServersInfo=192.168.2.12;1812;radius1;radiusauth.dat |
For high availability: You can specify more than one RADIUS server by separating the details of each server with a comma.
4. Start the Vault server
5. Create a test user bob
Change authentication method to Radius.
Change PVWA Configuration
Configure Access through the PVWA
- Log onto the PVWA as the predefined Administrator user.
- Click ADMINISTRATION to display the System Configuration page, then click Options; the main system configuration editor appears.
- Expand Authentication Methods; a list of the supported configuration methods is displayed.
- Select radius and make sure the Enabled property is set to Yes.
- Click Apply to save the new configurations and apply them immediately,

