This post is to show some quick steps for regular operation on my home CyberArk lab:
On board CyberArk End User
If you CyberArk has AD integrated, you will need to add this user into proper CybreArk AD group. Usually, you will have three types of CyberArk AD user groups:
- CyberArk Users
- CyberArk Auditors
- CyberArk Admins
Depends on what type of user you will need to add in, you might need to add them into your specific AD group first.
You can check my previous post about CyberArk AD Integration configuration.
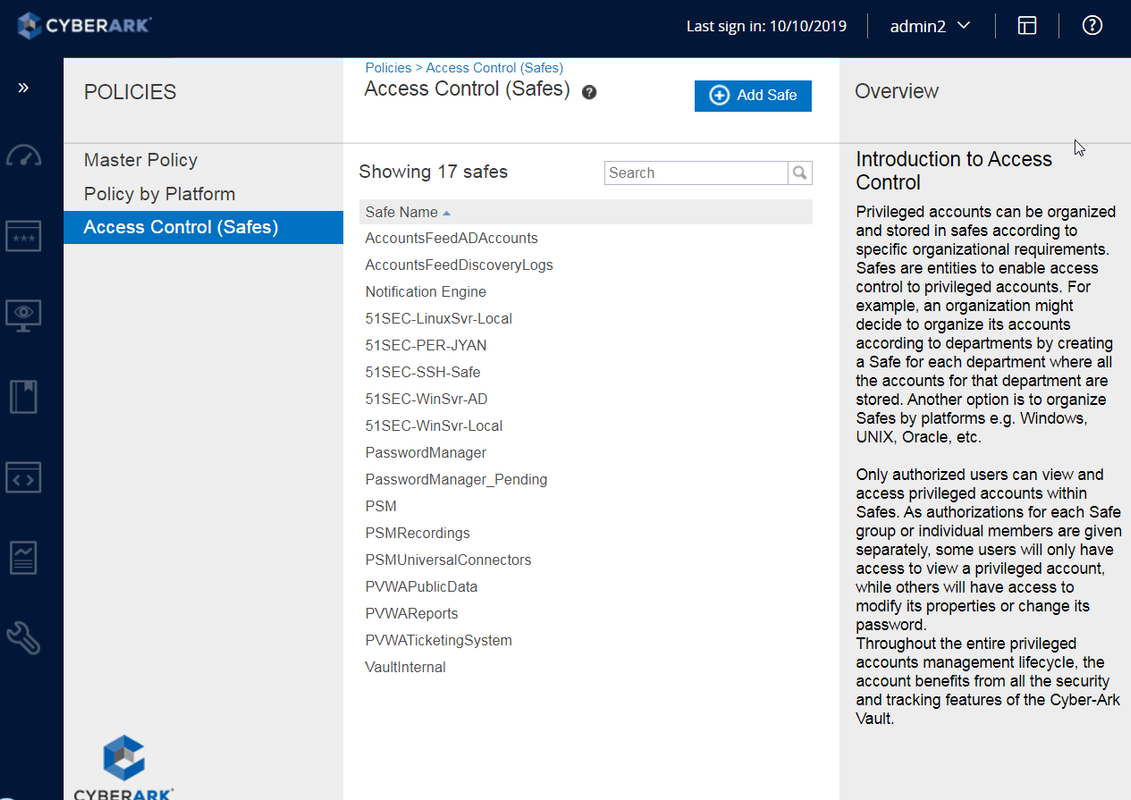
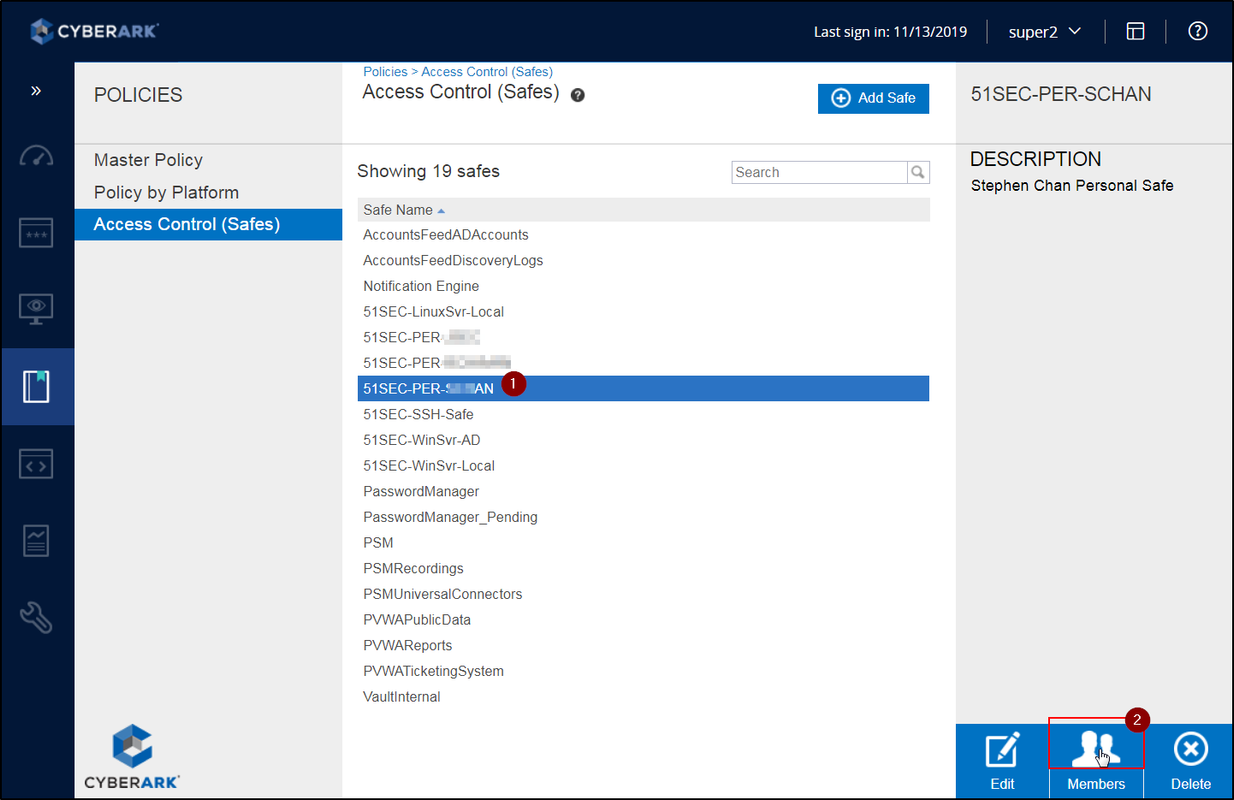
Create a safe
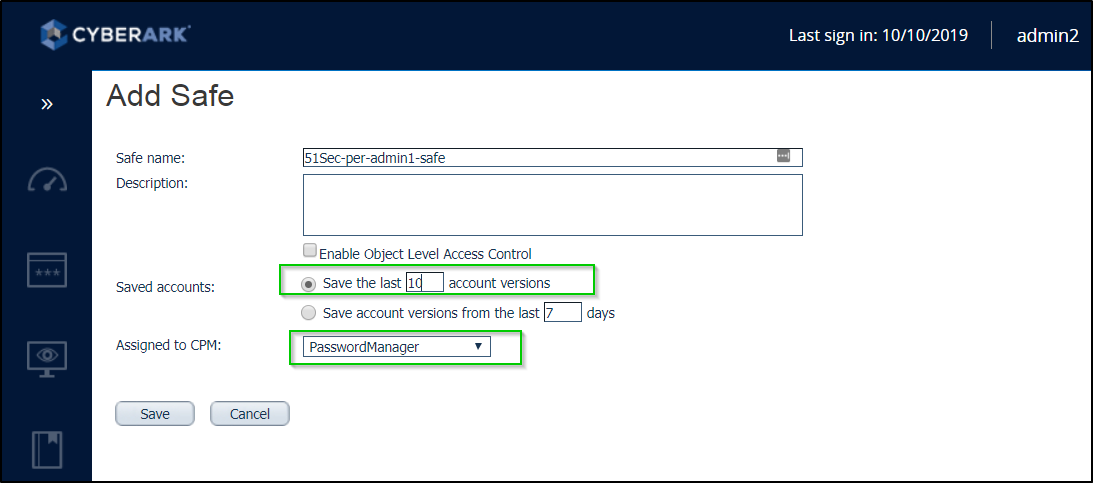
Once on board the user, you will need to create his/her personal safe, which will hold all his/her personal privileged accounts.
If you are on boarding a shared Privileged account, you will need to create/modify your shared safe.
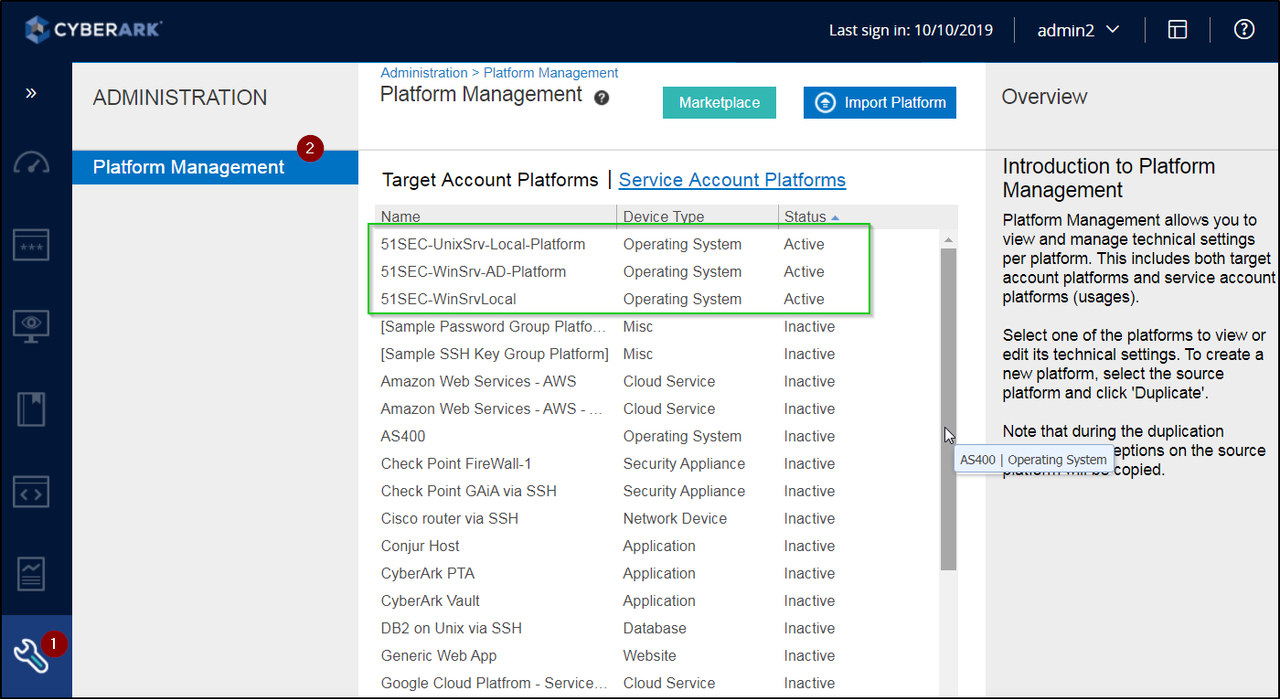
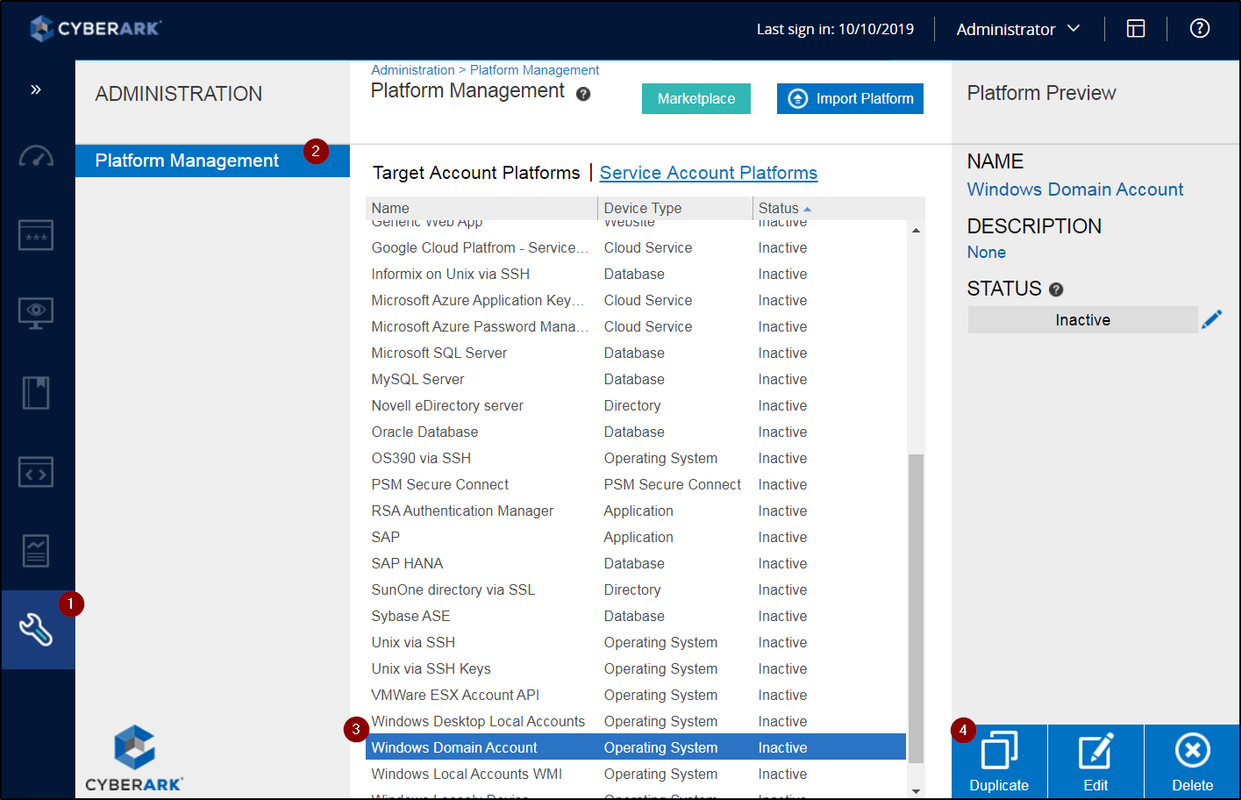
Platform Management
Create an account
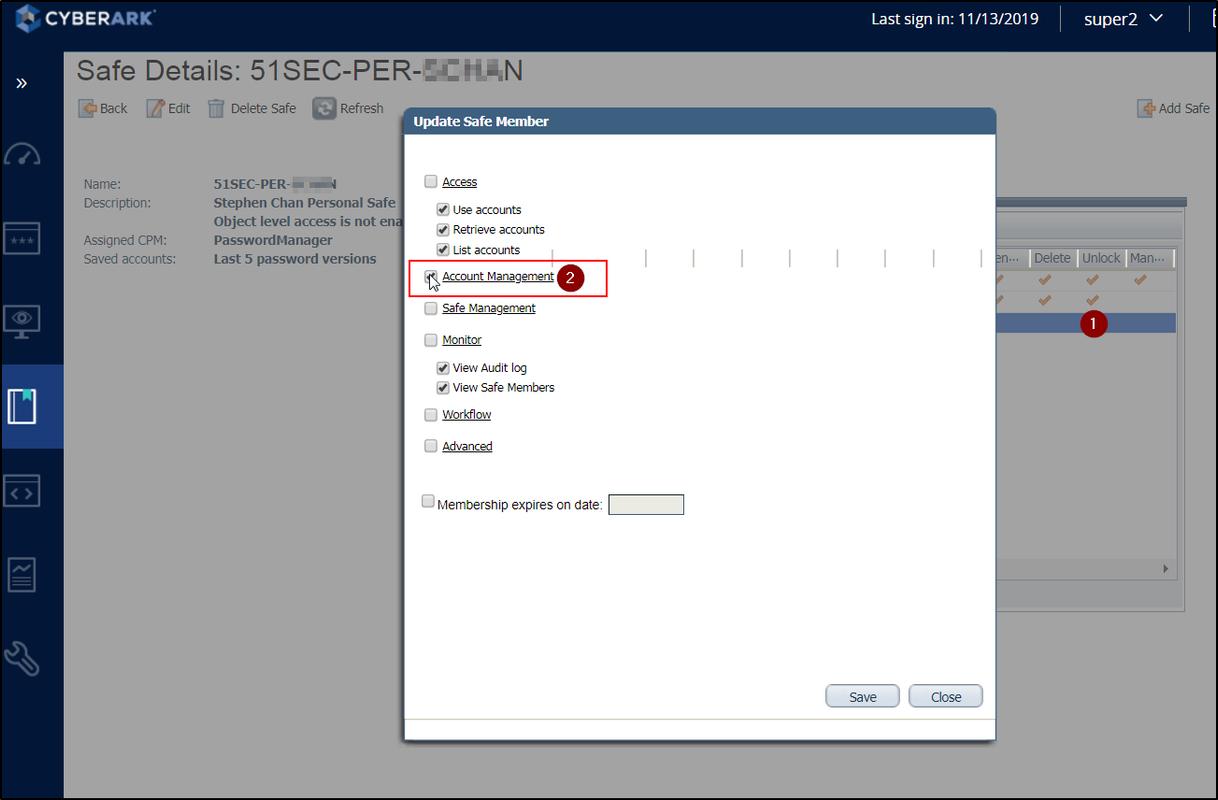
Grant User to Add New Account to their Own Safe
Grant user to account management ability.
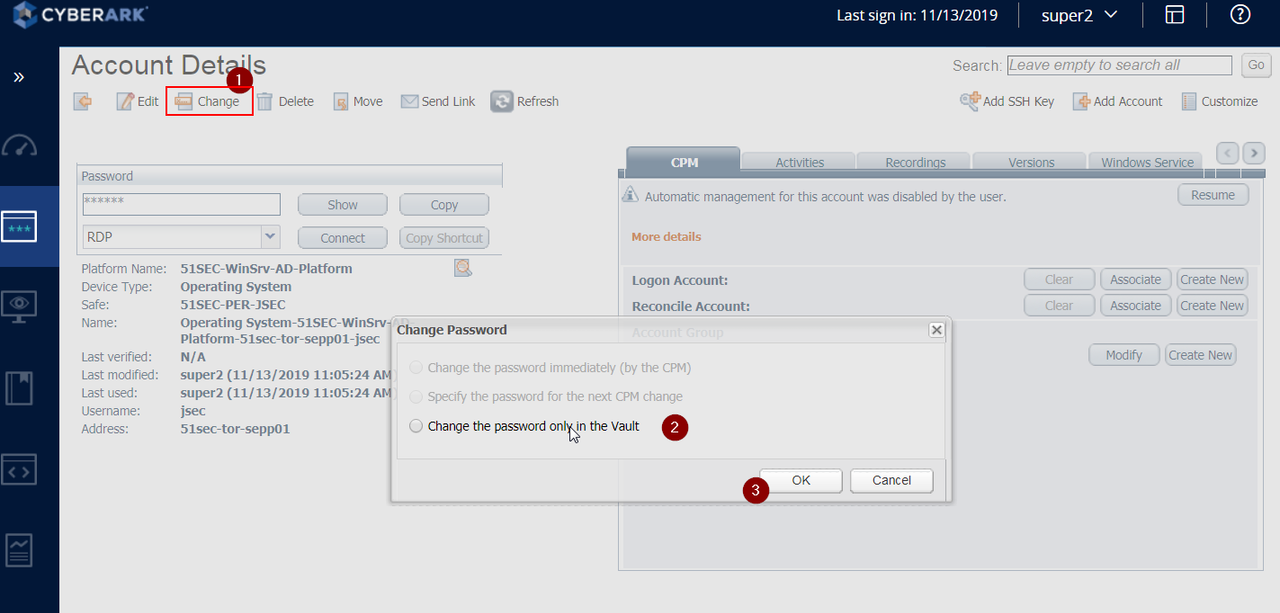
Change account password
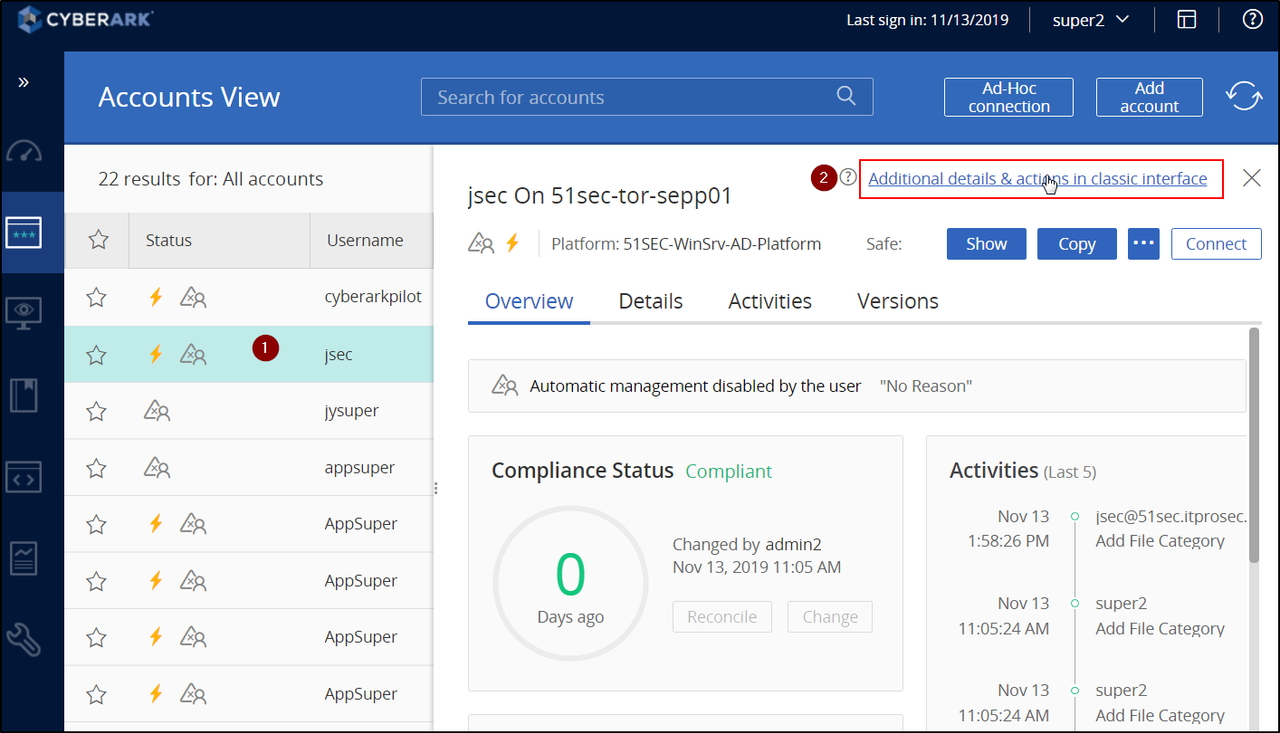
To change added account’s password, you will need to switch Web Gui to classic interface mode.
YouTube Video:
Reset CyberArk Built-in administrator Password
-
Master user is automatically added to all new safes with full rights – even safes it did not create. It requires a special configuration in order to login into it.
-
Administrator is a built-in administrative user, but unlike Master it does not get automatically assigned to all new safes created (by other users).
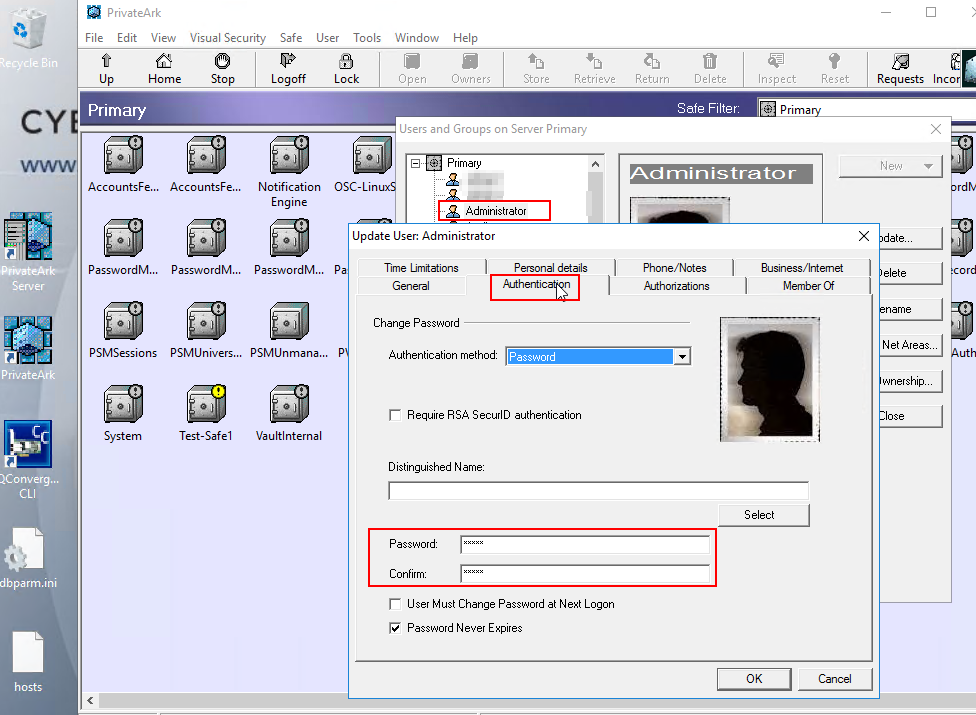
If for somehow, your CyberArk administrator account has been locked up or you want to update the password, you can follow following steps to work on:
First, you will have RDP into your PVWA which has PrivateArk installed.
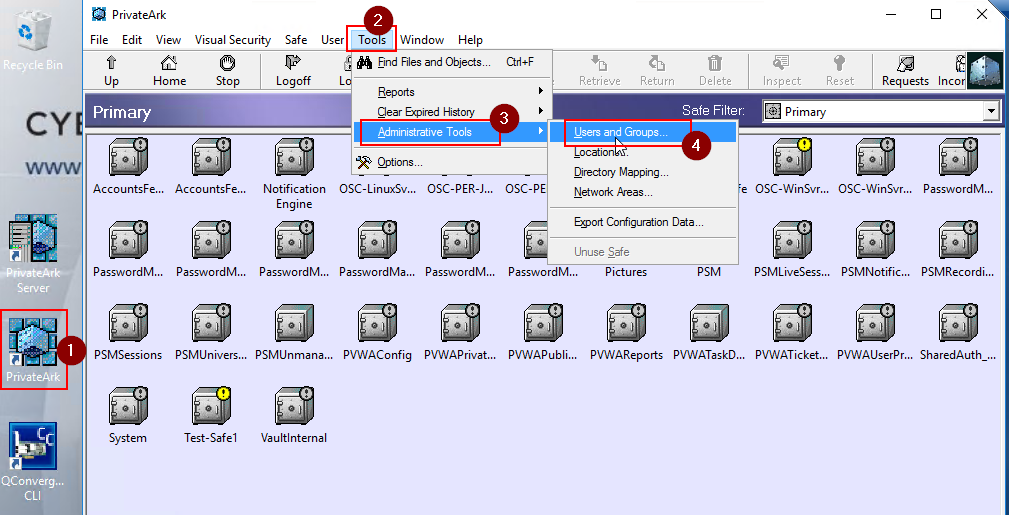
Then, Log into PrivateArk client with another account with Vault-level permissions such as Administrator2 . Click Tools > Administrative Tools > users and groups. Click on the “Administrator” account, and then “Trusted Networks Areas…” and click Activate.
If you don’t have another local account such as adminsitrator2, you’ll have to log in with the “Master” user. To log in with the “Master” user you’ll have to take a few extra steps.
Reset/Log in CyberArk Built-in Master Password
As per best practices you should always have a Backup administration account for operational stuff and shouldn’t use Administrator account. In case you got into such situation, here are some thing you can follow to help you out:
Steps to Log In with Master Account:
-
Place Master CD into server.
-
Double click Private Ark icon
-
Enter ‘Master’ as the user and enter password.
More details from CyberArk KB:
To log in as the Master user please do the following on the Vault Machine:
1. Insert the Master CD in the CD Drive
2. Verify if the dbparm.ini lists the location of the Master key in the Master CD
• dbparm.ini is located in the following location : Drive:\Program Files (x86)\PrivateArk\Server\dbparm.ini
• In v10+, the dbparm.ini is located here: Drive:\Program Files (x86)\PrivateArk\Server\conf\dbparm.ini
• The Master key parameter and value can be found as the following in the dbparm.ini file : RecoveryPrvKey=”Drive:\RecPrv.key”
• If the location needs to be changed, a restart of the PrivateArk Server service is required for changes to take effect
3. Start the PrivateArk Client Application on the Vault Machine
4. Right Click on the “<VaultName> Server” icon within the Private Ark Client and choose “Properties” > “Advanced” > “Authentication” tab > “Authentication methods” section > Choose “PrivateArk authentication” > Click OK in the advanced window > Click OK in the Properties window
5. Log into the Vault with the username as “Master”
• If you need to reset the Master password, this can be accomplished by going to User > Set password after logging in
Delete Safe / Change Safe Members
There is a KB for how to delete safe member: Delete Safe member
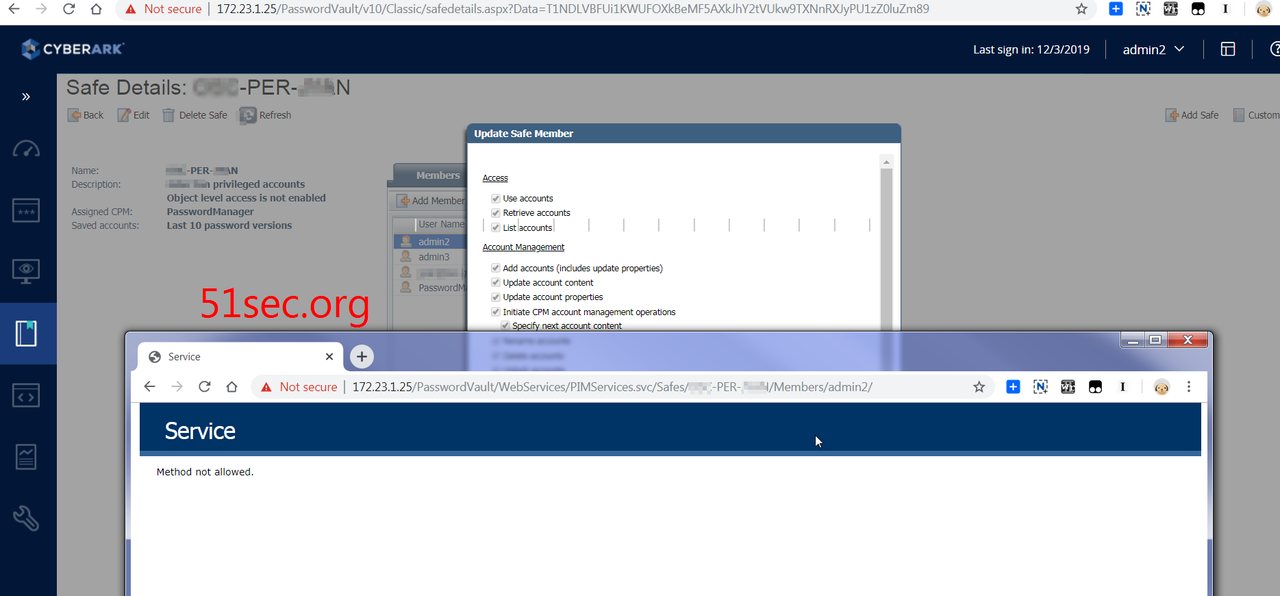
using following URL to delete a safe member.
https://<IIS_Server_Ip>/PasswordVault/WebServices/PIMServices.svc/Safes/{SafeName}/Members/{MemberName}
Unfortunately, I got following error;
References
- How to log in as the Master user (CyberArk KB)

