Azure free tier provides following free services for 12 months after one month for your free $200 credit:
- 750 hours B1S VM Windows Virtual machines
- 750 hours B1S VM Linux Virtual machines
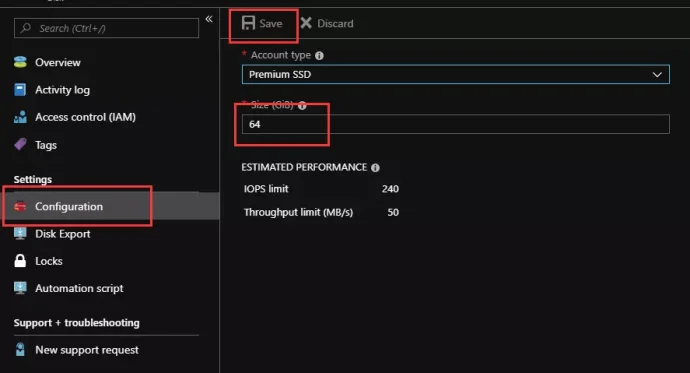
- 64GB x 1 Storage – 2 P6 SSDs
- 5 GB File Storage
- 250 GB SQL DB
- 15 GB Bandwidth (Data Transfer)
- etc
Basically, you can run two virtual machines (one for windows , one for linux) free for a year.
For Windows Machines
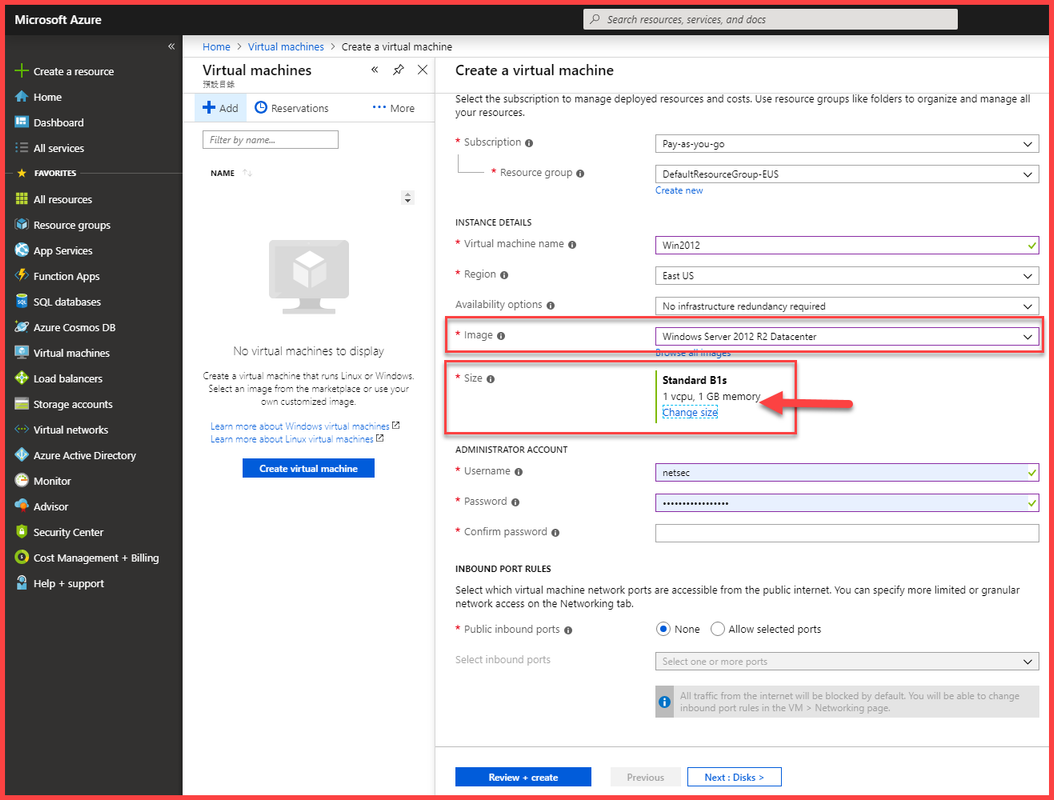
I was thinking to test free tier Windows VM to see if it is really free. And found if I am using a VM with following options, the free tier does not apply to this VM’s storage option. By default, it will give you 128 GB storage and there is not option for you to make change for your disk to P6 SDD.
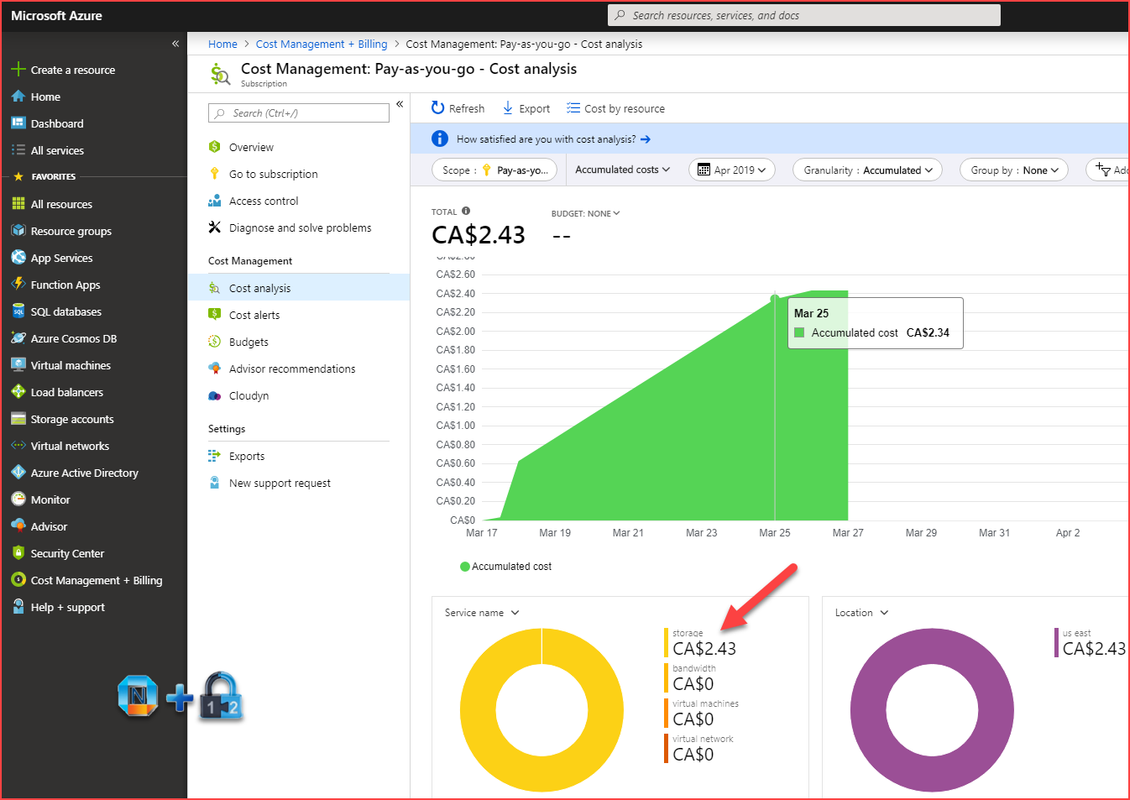
The daily charge comes from storage since this VM size is using s10 disk type . Daily charge will be around $0.25. It was not that much but I really want to find out how we can really enjoy the free tier services as much as we can.
After some research and I found that is because of the image we selected for this VM. If I am use those predefined Windows 2012 image, it will come with 128GB S10 disk.
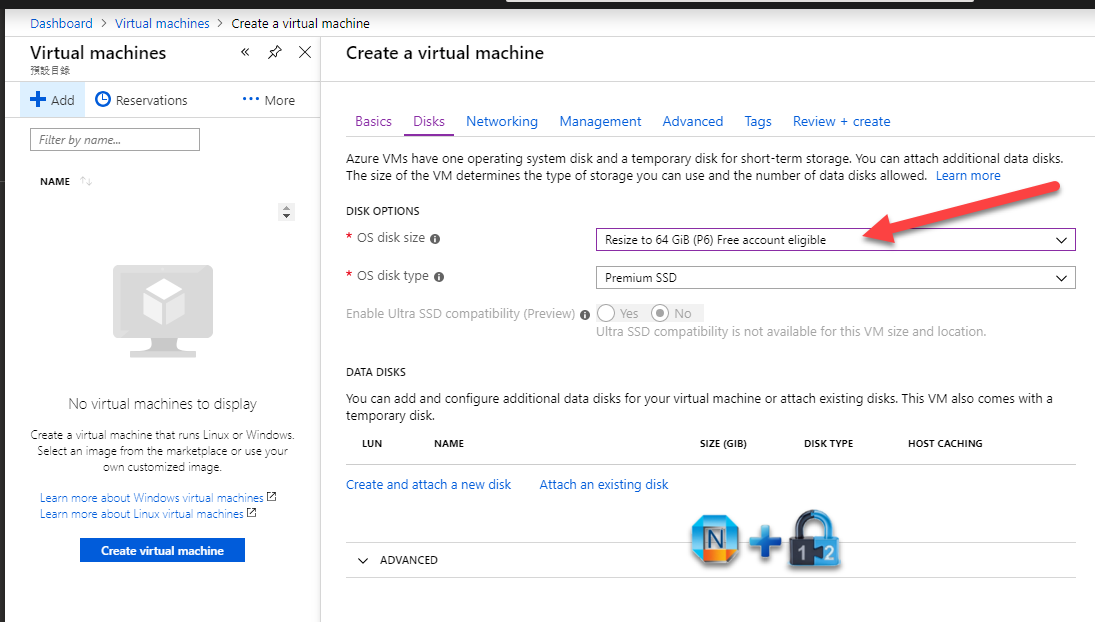
To avoid that, I will have to choose [smalldisk] image, such as [smalldisk] Windows Server 2012 Datacenter or [smalldisk] Windows Server 2012 R2 Datacenter as show from following screenshot:
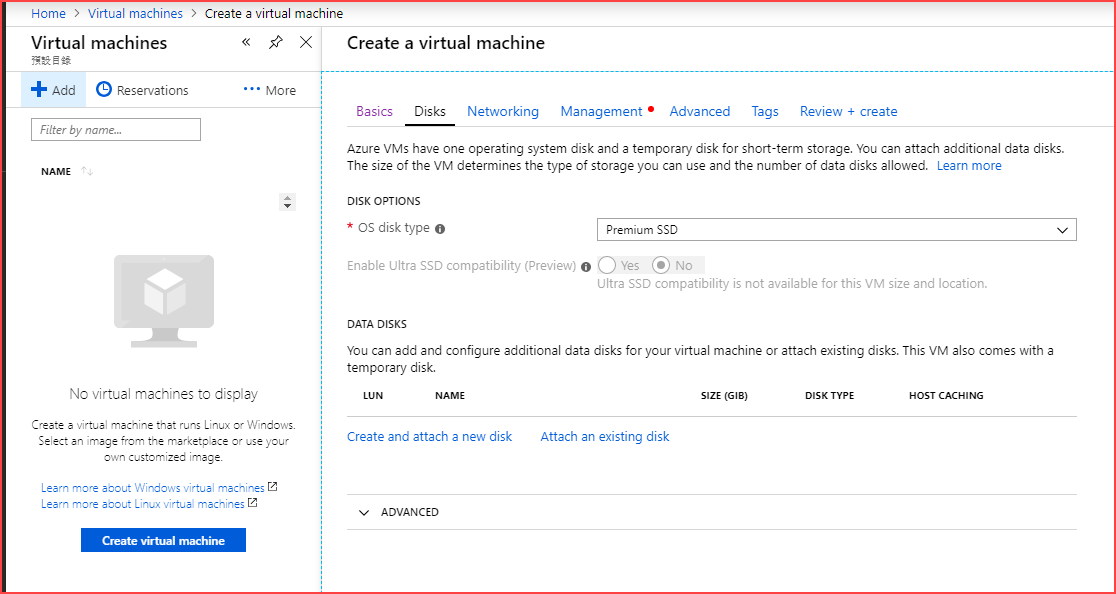
After that , in Disks window, you will have disk options available for you to choose a free account eligible P6 disk.
For Linux Machines





I have had +20 email long back and forths with Microsoft trying to understand why I was still being charged.
You fixed that in one article.
Thank you!
Thanks for feedback. Lots of people does not know this small trick which Microsoft Azure makes it not easy to find out.
This appears to not be possible anymore. An error says that it is not possible to modify the disk while it is attached or if the VM is still available. So, for OS disk:
1. Cannot change the disk type since it is attached to the VM
2. Cannot create a new VM without an OS disk (which defaults to 30GB disk)
So, if you create a new VM, it will always contain a 30Gb disk that is not in the free tier and it cannot be modified to stay within the free tier.