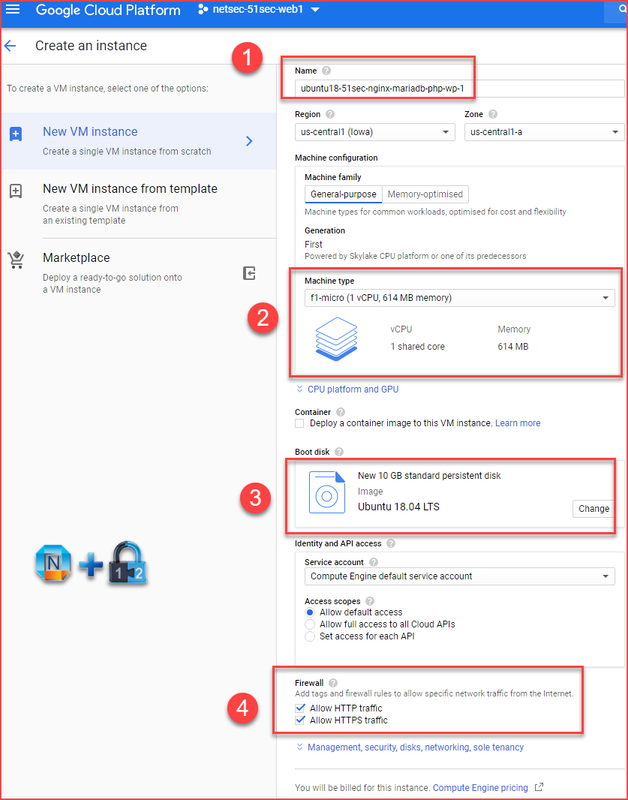
I was using LAMP for my WordPress blog for quite a few years. Because of Google Cloud Platform free tier VM’s limitation (614M Memory and 1 vCPU), my website always suffering the performance issue if put all of components into one machine. Since last year, I keep trying using a different type of technologies to help. I tried to use Docker, also I separated Mysql db into a different vm. All those changes were working for certain conditions, but not a good enough for GCP f1.micro VM until I find Nginx and MariaDB. This combination has less resource usage and also providing me a possibility to squeeze all components into one GCP free tier f1.micro VM.
This post is to record all steps and commands I used. You will find a YouTube video at the end of post to present the installation process. The whole steps will take 30 minutes to 45 minutes to complete.
1. Create Ubuntu VM and Update it to latest
sudo apt update && sudo apt dist-upgrade && sudo apt autoremove
2. Install Nginx
sudo apt install nginx
sudo systemctl stop nginx.service
sudo systemctl start nginx.service
sudo systemctl enable nginx.service
3. Install MariaDB
If you already has MariaDB installed, you might want to remove it first with command “sudo apt-get remove mariadb-server” .
Install software-properties-common:
sudo apt-get install software-properties-common
Import MariaDB gpg key:
sudo apt-key adv --recv-keys --keyserver hkp://keyserver.ubuntu.com:80 0xF1656F24C74CD1D8
Add the apt repository:
sudo add-apt-repository "deb [arch=amd64,arm64,ppc64el] http://mariadb.mirror.liquidtelecom.com/repo/10.4/ubuntu $(lsb_release -cs) main"
Install MariaDB server:
sudo apt update
sudo apt -y install mariadb-server mariadb-client
Secure MariaDB
sudo mysql_secure_installation
When prompted, answer the questions below by following the guide.
Enter current password for root (enter for none): Just press Enter
Set root password? [Y/n]: Y
New password: Enter password (yyy123456)
Re-enter new password: Repeat password (yyy123456)
Remove anonymous users? [Y/n]: Y
Disallow root login remotely? [Y/n]: Y
Remove test database and access to it? [Y/n]: Y
Reload privilege tables now? [Y/n]: Y
4. Create WordPress Database and User for Connection
Logon to the MariaDB with root account and password you enter in previous step
sudo mysql -u root -p
create a blank database wp_db;
CREATE DATABASE wp_db;
create a new db user dedicated for WordPress connection.
CREATE USER 'wp_db_user'@'localhost' IDENTIFIED BY 'password1234';
Grant this new user with full access permission to new db wp_db
GRANT ALL ON wp_db.* TO 'wp_db_user'@'localhost' IDENTIFIED BY 'password1234' WITH GRANT OPTION;
FLUSH PRIVILEGES;
EXIT;
Some other database commands to verify created db
show databases;
use wp_db;
show tables;
5. Install PHP
php7.2 will be used for this installation.
sudo apt install php-fpm php-common php-mbstring php-xmlrpc php-soap php-gd php-xml php-intl php-mysql php-cli php-ldap php-zip php-curl
If you would like to change PHP configuration, use following command to edit it:
sudo nano /etc/php/7.2/fpm/php.ini
It is not necessary to do this step to make any change.
6. Install and Configure WordPress
Download latest release to a local temp folder:
cd /tmp && wget https://wordpress.org/latest.tar.gz
tar -zxvf latest.tar.gz
sudo mv wordpress /var/www/html/wordpress
Set the right permissions for WordPress root folder
sudo chown -R www-data:www-data /var/www/html/wordpress/
sudo chmod -R 755 /var/www/html/wordpress/
Create a new WordPress wp-config.php file.
sudo mv /var/www/html/wordpress/wp-config-sample.php /var/www/html/wordpress/wp-config.php
Change configuration to connect to your local new MariaDB server:
sudo nano /var/www/html/wordpress/wp-config.php
// ** MySQL settings - You can get this info from your web host ** //
/** The name of the database for WordPress */
define('DB_NAME', 'wp_db');

/** MySQL database username */
define('DB_USER', 'wp_db_user');

/** MySQL database password */
define('DB_PASSWORD', 'password1234');

/** MySQL hostname */
define('DB_HOST', 'localhost');

/** Database Charset to use in creating database tables. */
define('DB_CHARSET', 'utf8');

/** The Database Collate type. Don't change this if in doubt. */
define('DB_COLLATE', '');
Ctrl+W to save the file.
7. Configure Nginx for this new WordPress site
Create a new configuration file called wordpress
sudo nano /etc/nginx/sites-available/wordpress
Then copy and paste the content below into the file and save it. Replace example.com with your own domain name. You might also want to add your wordpress site’s public ip into servername list for your testing before you switched to domain.
server {
    listen 80;
    listen [::]:80;
    root /var/www/html/wordpress;
    index  index.php index.html index.htm;
    server_name  54.32.104.91 51sec.org www.51sec.org;

     client_max_body_size 100M;

    location / {
        try_files $uri $uri/ /index.php?$args;
    }

    location ~ \.php$ {
    include snippets/fastcgi-php.conf;
    fastcgi_pass             unix:/var/run/php/php7.2-fpm.sock;
    fastcgi_param   SCRIPT_FILENAME $document_root$fastcgi_script_name;
    }
}
Enable the new wordpress site
sudo ln -s /etc/nginx/sites-available/wordpress /etc/nginx/sites-enabled/
Restart your Nginx and PHP-FPM to load the new settings.
sudo systemctl restart nginx.service
sudo systemctl restart php7.2-fpm.service
After the restarted those two services, you can browse to your website’s domain name or public ip to start WordPress default configuration wizard:

Then, make sure you have the details for your database name, user, and password handy. Enter them when prompted:
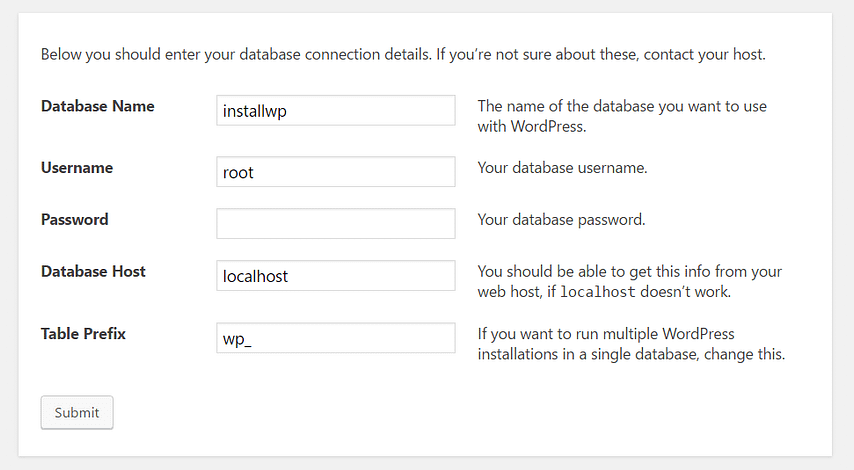
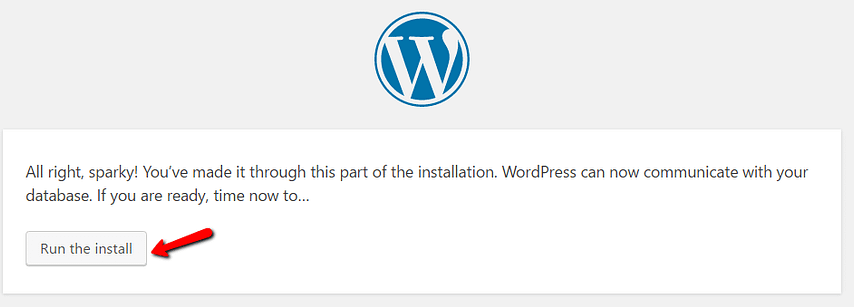
If all goes well, you should be able to run the WordPress install:
Give your WordPress site a title and enter the information necessary to create your admin account:
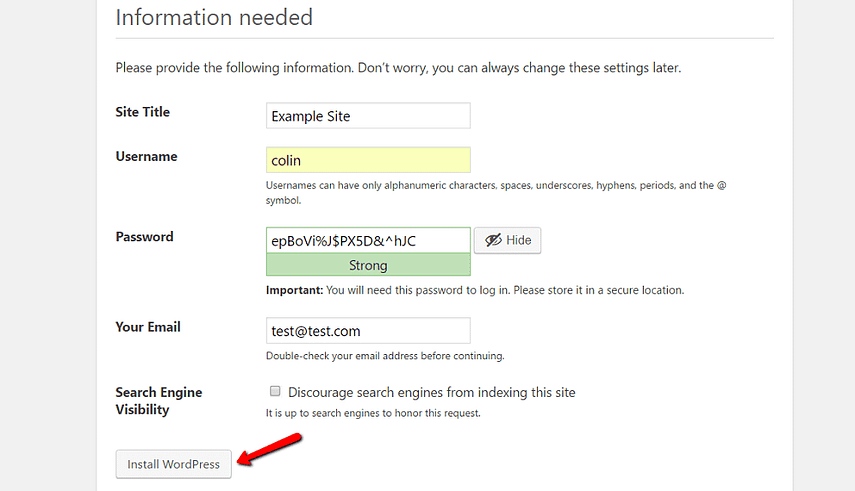
Then click Install WordPress.
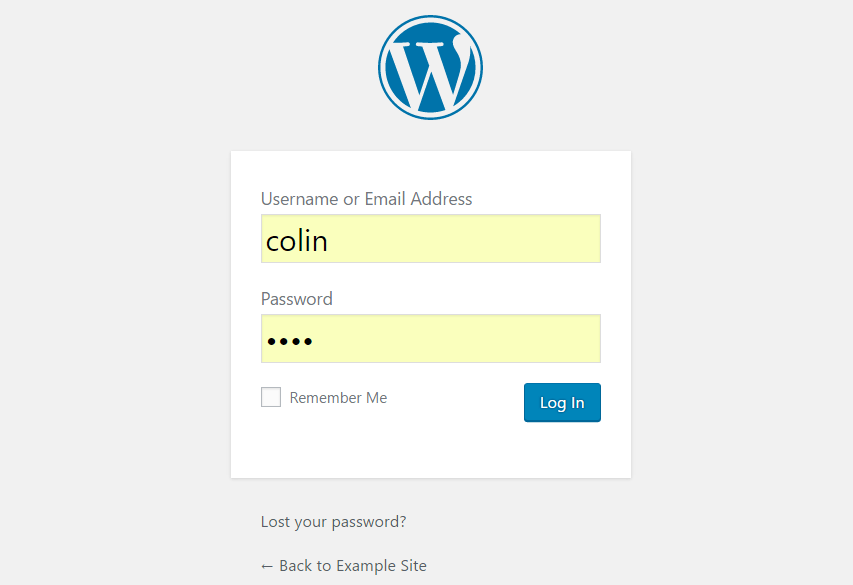
And that’s it! You just learned how to install WordPress manually. You can now log in with the account details that you entered during the install process:
8. Performance Review
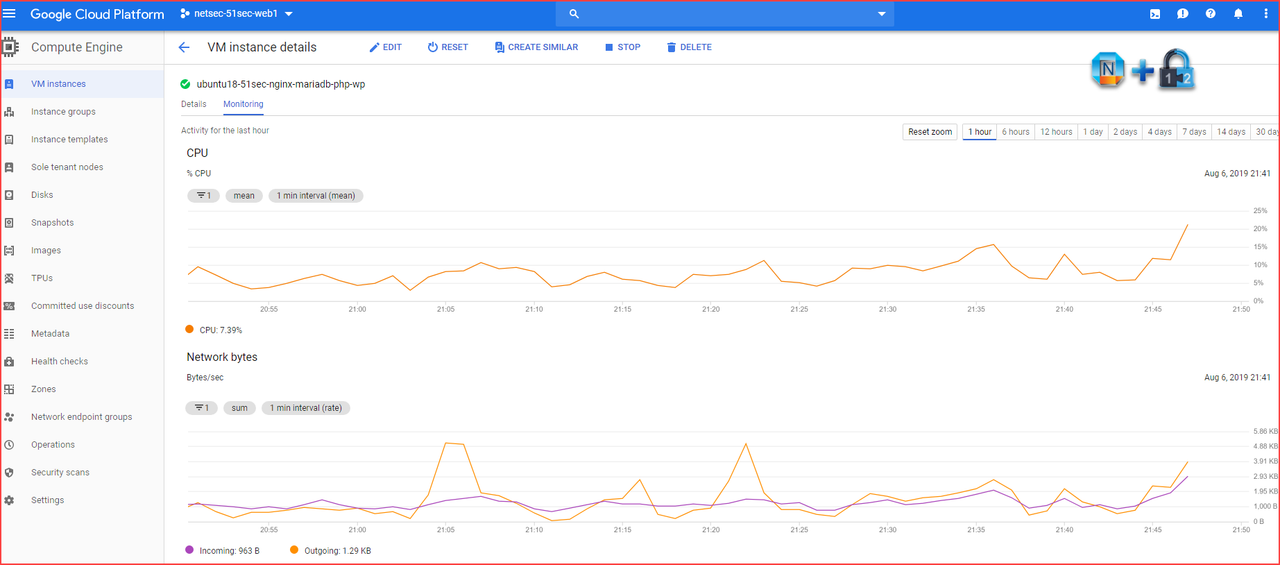
The CPU utilization was between 5% and 15% most of time in one hour diagram.
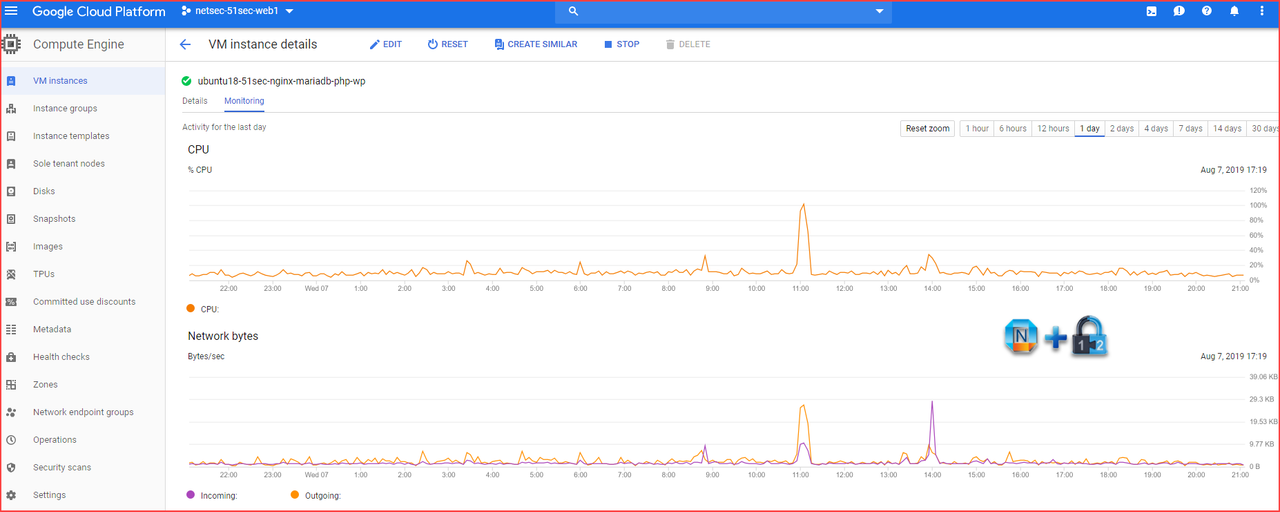
The CPU was spiked up for 10 minutes during one day’s performance diagram. Other time, CPU was mostly between 10% and 20%.
For same installation on CentOS, there are some different commands although process is same.
YouTube:
Some other steps or troubleshooting WordPress issue, please refer my another post at:
https://blog.51sec.org/2017/09/troubleshooting-wordpress-out-of-memory.html
Performance Tuning on GCP Free Tier
There were some CPU high issue when apt update task was running. I found out a couple of commands to disable those scheduled tasks, which made my GCP Free Tier VM much more stable now. On Ubuntu 18.04 (and up) there may be up to two services involved in random scheduled apt updating/upgrading. The first apt-daily.service refreshes the list of packages. However there can be a second apt-daily-upgrade.service which actually installs security critical packages.
Sep 10 06:28:28 ubuntu-min-nginx systemd[1]: Starting Daily apt upgrade and clean activities...
Sep 10 06:28:40 ubuntu-min-nginx systemd[1]: Started Daily apt upgrade and clean activities.
Sep 10 18:32:28 ubuntu-min-nginx systemd[1]: Starting Daily apt download activities...
Sep 10 18:32:28 ubuntu-min-nginx systemd[1]: Started Daily apt download activities.
Basically we can systemctl disable both services AND their associated timers (i.e. apt-daily.timer and apt-daily-upgrade.timer).
sudo systemctl stop apt-daily.timer
sudo systemctl stop apt-daily-upgrade.timer
sudo systemctl disable apt-daily.service
sudo systemctl disable apt-daily.timer
sudo systemctl disable apt-daily-upgrade.timer
sudo systemctl disable apt-daily-upgrade.servicesudo systemctl mask apt-daily.service apt-daily-upgrade.servicesudo systemctl daemon-reload mv /usr/lib/apt/apt.systemd.daily /usr/lib/apt/apt.systemd.daily.DISABLEDReferences:
