T-Pot is a honeypot platform built on Ubuntu with Dock technology. Latest version is 17.10 and OS is Ubuntu 16.04. The minimum system requirement is at least 2GB RAM and 40GB disk space.
There are some other posts online to show how to install T-Pot into cloud virtual machine instance. Unfortunately, I failed so many times and got a error message ‘could not find authrized_keys at .ssh folder’. Eventually I found issue is with the user I were using. If I create a new user and add it into sudo group, and install T-Pot after log in as that new user, the installation process is quite smooth.
Here is all steps I did. Hopefully it helps when you try this awesome honeypot.
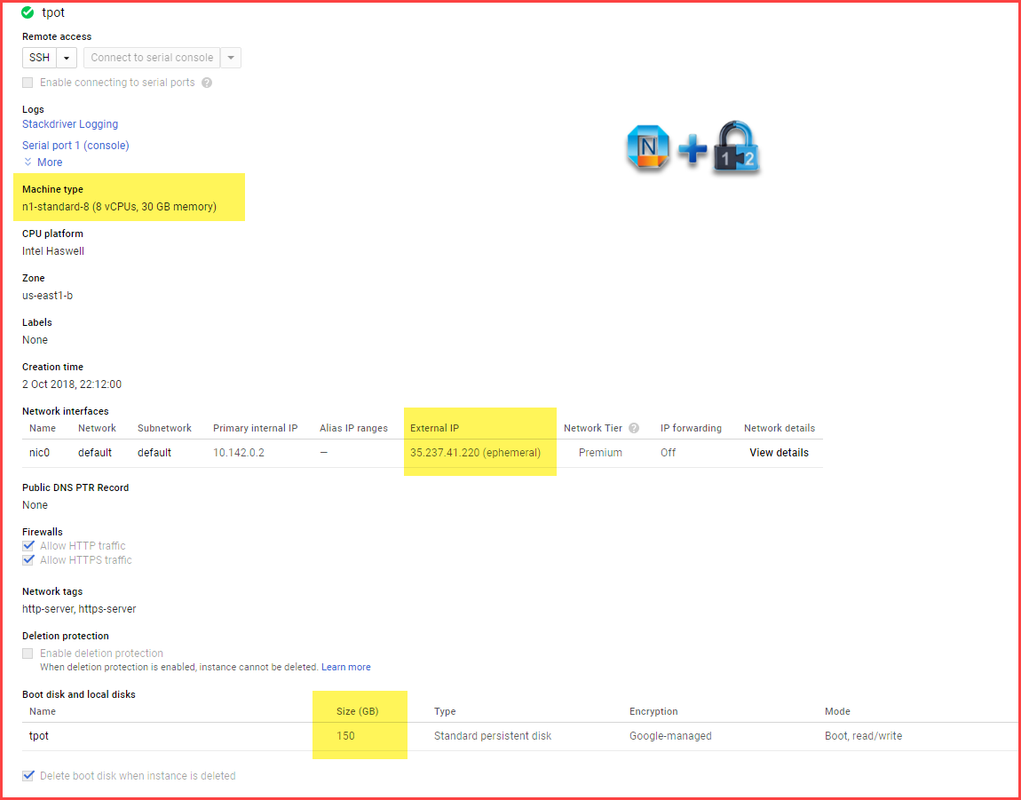
1. Create a VM
2. Update your Ubuntu instance
jon_netsec@tpot:~$ sudo apt-get update
jon_netsec@tpot:~$ sudo apt-get upgrade
jon_netsec@tpot:~$ sudo apt-get dist-upgrade
3. Add a new user into sudo
#sudo su
#adduser john
Set password prompts:
Enter new UNIX password:
Retype new UNIX password:
passwd: password updated successfully
User information prompts:
Changing the user information for username
Enter the new value, or press ENTER for the default
    Full Name []:
    Room Number []:
    Work Phone []:
    Home Phone []:
    Other []:
Is the information correct? [Y/n]


#usermod -aG sudo john

#su - john
4. Generate ssh key for user john
Once logged in as user john, stay at the same folder , which is home folder for John and type following command to generate ssh key. If it is asking a name to save your key files, type identity.
#ssh-keygen
#cd .ssh
#touch authorized_keys
#cat identity.pub >> authorized_keys
5. Install T-Pot
One done step 4, you can stay at same folder which is .ssh folder to do following steps to install T-Pot.
#git clone https://github.com/dtag-dev-sec/t-pot-autoinstall.git
#cd t-pot-autoinstall/
#sudo su
#./install.sh
##########################################################
#                                                        #
#     How do you want to proceed? Enter your choice.     #
#                                                        #
#     Required: 4GB RAM, 64GB disk                       #
#     Recommended: 8GB RAM, 128GB SSD                    #
#                                                        #
# 1 - T-Pot's STANDARD INSTALLATION                      #
#     Standard Honeypots, Suricata & ELK                 #
#                                                        #
# 2 - T-Pot's HONEYPOTS ONLY                             #
#     Honeypots only, w/o Suricata & ELK                 #
#                                                        #
# 3 - T-Pot's INDUSTRIAL EDITION                         #
#     Conpot, eMobility, Suricata & ELK                  #
#                                                        #
# 4 - T-Pot's FULL INSTALLATION                          #
#     Everything                                         #
#                                                        #
##########################################################
Your choice: 4
You will be prompted twice for inputs. One is for username which is john, and the other is the password for T-Pot user john’s access.
#
.
.
.
### Removing NGINX default website.
### Please enter a password for your user john for web access.
Password:
Repeat password:
Adding password for user john
.
.
.
.
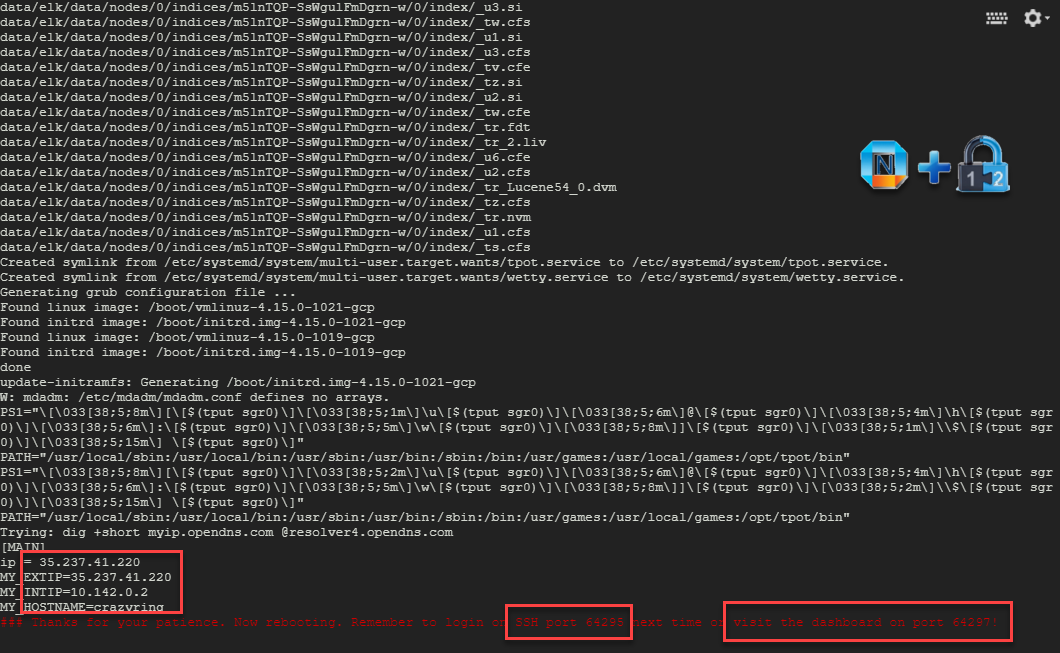
[MAIN]
ip = 35.237.41.220
MY_EXTIP=35.237.41.220
MY_INTIP=10.142.0.2
MY_HOSTNAME=crazyring
### Thanks for your patience. Now rebooting. Remember to login on SSH port 64295 next time or visit the dashboard on port 64297!
Both port numbers, 64295 and 64297, are important for you. You will need them later to log into your HoneyPot system.
6. Configure Firewall
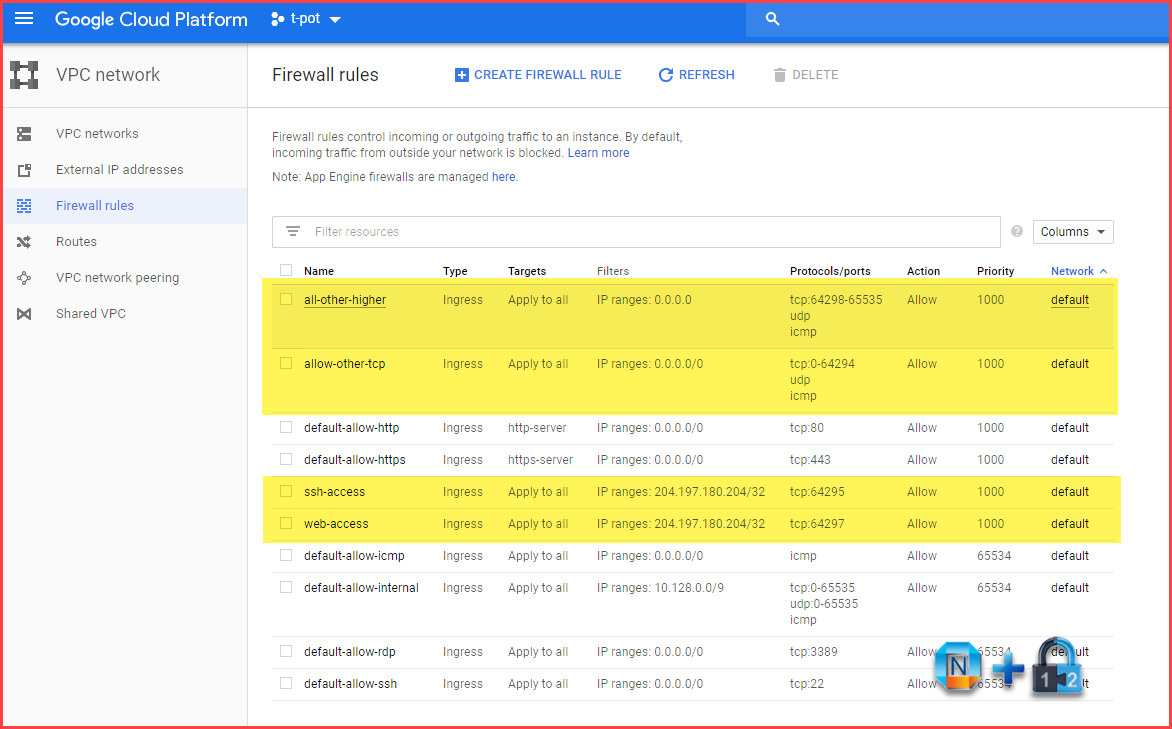
It is important to restrict the access to your ssh port 64295 and web gui admin portal 64297.
| Name | Type | Targets | Filters | Protocols/ports | Action | Priority | Network | |
|---|---|---|---|---|---|---|---|---|
|
Ingress
|
Apply to all
|
IP ranges:
|
|
Allow
|
1000
|
|
||
|
Ingress
|
Apply to all
|
IP ranges:
|
|
Allow
|
1000
|
|
||
|
Ingress
|
|
IP ranges:
|
|
Allow
|
1000
|
|
||
|
Ingress
|
|
IP ranges:
|
|
Allow
|
1000
|
|
||
|
Ingress
|
Apply to all
|
IP ranges:
|
|
Allow
|
1000
|
|
||
|
Ingress
|
Apply to all
|
IP ranges:
|
|
Allow
|
1000
|
|
||
|
Ingress
|
Apply to all
|
IP ranges:
|
|
Allow
|
65534
|
|
||
|
Ingress
|
Apply to all
|
IP ranges:
|
|
Allow
|
65534
|
|
||
|
Ingress
|
Apply to all
|
IP ranges:
|
|
Allow
|
65534
|
|
||
|
Ingress
|
Apply to all
|
IP ranges:
|
|
Allow
|
65534
|
|
7. Check Web Access from Internet
8. Videos
8.1 T-Pot Honeypot Installation through ISO file on ESXi Platform
8.2 T-pot HoneypotInstallation on GCP Ubuntu VM instance
References:


