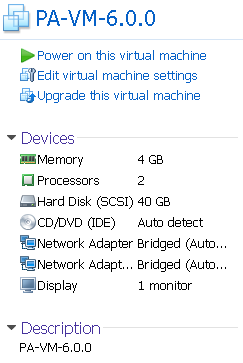
Palo Alto Networks has developed Virtualized Firewalls VM series to run in virtual environment. Here is the list for supported hypervisors from its website:
The VM-Series supports the exact same next-generation firewall and
advanced threat prevention features available in our physical form
factor appliances, allowing you to safely enable applications flowing
into, and across your private, public and hybrid cloud computing
environments.Automation
features such as VM monitoring, dynamic address groups and a REST-based
API allow you to proactively monitor VM changes dynamically feeding
that context into security policies, thereby eliminating the policy lag
that may occur when your VMs change.The VM-Series supports the following hypervisors:
- VMWare ESXi and NSX
- Citrix SDX,
- KVM (Centos/RHEL)
- Ubuntu
- Amazon Web Services
There are four models for different requirements:
- VM-100
- VM-200
- VM-300
- VM-1000-HV
I have got a VM including two files (PA-VM-6.0.0.ovf and PA-VM-6.0.0-disk1.vmdk) and deployed it into my lab environment to test. Here are some steps:
1. Imported VM into Vmware workstation
2. Deploy OVF file into ESXi lab
3. Start VM in ESXi Lab Enviroment
Type admin / admin as username and password after Login prompt shows up for 1 minute.
4. Basic configuration:
4.1. Once you got to the prompt (admin@PA-VM), type
“configure”
4.2. You are now in the config mode, type the following command in order to give an IP address for the
PAN management and Web Access,
set deviceconfig system ip-address 192.168.2.10 netmask 255.255.255.0 default-gateway 192.168.2.1 dns-setting servers primary 8.8.8.8
4.3. Hit Enter and then Type “commit”
note: Remember that we can use “?” to see all the commands and use “TAB” to complete the commands
5. Test
Now the firewall is fully up and running. Enjoy the fun from this product coming from world leading security company
Youtube Videos:
Install and Configure Palo Alto VM in ESXi
Troubleshoot issues after installed Palo Alto VM:
After installed the VM into your virtual environment, it is not usable. There are two typical issues:
1. Data Interfaces are not working. They are not reachable.
Mac address will need to copy from Palo Alto interface to ESXi VM Interface (Manual configuration)
Firewall Rule to allow Ping
Interfae mgmt Profule will need to allow ping
2. Traffic log is not showing from GUI interface. It is because of license. I am going to show some tricks to check the logs.
solution:
Log forwarding to external syslog server
session browser
or add a evaluation license


