Since 2011, Blogger is used to host my technical blog – http://51sec.blogspot.com. But during last a couple of years, wordpress is getting more and more popular and powerful. This post recorded the steps how to use Redhat Cloud Platform OpenShift with Cloud Service Company CloudFlare to build a wordpress site under your domain.
1. Register your plan at Openshift.com
 OpenShift is built on OpenStack and Red Hat’s open-source technologies. These include Red Hat
Enterprise Linux (RHEL), JBoss Enterprise Application Platform, and OpenShift Origin. OpenShift offers a choice of programming languages, frameworks, databases and development tools enabling you to get the job done, using the languages and tools you already know and trust. It provides free plan for 1G storage for each of at most three web application in the cloud at this moment.
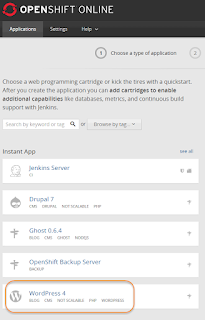
After created one free account, you can choose to install your first application WordPress 4.
In my case, I only added 51sec.info this root domain to map openshift url. If you like, you can add multiple domains on it such as www.51sec.info, blog.51sec.info. That would require multidomain plug in to support it.
At this moment, your WordPress site is up and you should be able to visit your WordPress application through Openshift RhCloud URL such as mine http://wp-51sec.rhcloud.com which you provided when you created this application.
2. Register your own domain
You can use any domain provider to get an available domain you want. Godaddy could get you a cheap domain at $3.99 for your application. The only configuration you will need is to change name servers to CloudFlare’s which will be instructed at next step.
3. CloudFlare for flexible DNS configuration
![]() CloudFlare, Inc. is a U.S. company that provides a content delivery network and distributed domain name server services, sitting between the visitor and the CloudFlare user’s hosting provider, acting as a reverse proxy for websites. Its network protects, speeds up, and improves availability for a website or mobile application with a change in DNS.
CloudFlare, Inc. is a U.S. company that provides a content delivery network and distributed domain name server services, sitting between the visitor and the CloudFlare user’s hosting provider, acting as a reverse proxy for websites. Its network protects, speeds up, and improves availability for a website or mobile application with a change in DNS.
Her is the DNS settings under my 51sec.info domain name:
4. WordPress Settings Change
You will have to tell WordPress for this change since all URL will be started with your own domain http://51sec.info/.
There are two address URL change: WordPress Address(URL) and Site Address(URL)
Site Address (URL) – Enter the address you want people to type in their browser to reach your WordPress site. This is the directory where WordPress’s main index.php file is installed. The Site address (URL) is identical to the WordPress address (URL) (above) unless you are giving WordPress its own directory.
For my configuration, the setting is :
WordPress Address(URL): http://wp-51sec.rhcloud.com
Site Address(URL): http://51sec.info
5. Troubleshooting Redirect Loop
I were getting a trouble to log into administrator page or login page when set both to http://51sec.info. It took me a couple of days to figure it out how to set it correctly and how to fix it when thing is getting wrong.
When I set both address URL to http://51sec.info, if I try to log into web admin page http://51sec.info/wp-admin , I will get redirect loop error on all browsers. There is no way for me to get it back to original settings through web admin page since it is not reachable anymore. Even original admin page url http://wp-51sec.rhcloud.com/wp-admin is redirect back to http://51sec.info/wp-admin.
There were tons of discuss how to fix this but none of them works for me. Here is what I got when this error happens.
This webpage has a redirect loop
ERR_TOO_MANY_REDIRECTS
The webpage at https://51sec.info/wp-admin/ has resulted in too many redirects. Clearing your cookies for this site or allowing third-party cookies may fix the problem. If not, it is possibly a server configuration issue and not a problem with your computer.Learn more about this problem.
Good thing is OpenShift provides PhpMyAdmin to change mysql database value directly without going through web admin page. You will have to install PhpMyAdmin first before you can use it. It can be easily found from your WordPress application page. Username and password are listing on the same page as well.
After entered into PhpMyAdmin page, you can get into wp database and wp_options table. Then you can just double click the option_value column to fix this mistake. For me, I changed site url back to http://wp-51sec.rhcloud.com, then my web admin page is available again.


DreamHost is ultimately one of the best hosting provider for any hosting services you might need.