Cisco Secure Contral Access System (ACS) has been around in the market for a long time and widely been used as the software to do network device administration with Tacacs+ protocol and network secure access with Radius protocol.
This lab is presenting how to use ACS 5.6 in a GNS3 environment.
Network Topology:
GNS3 Topology:
GNS3 is running inside of ESXi Win7 virtual machine. R1 is using cisco 2691 ios with int f0/0 connecting cloud LAN interface. F0/0 has configured a LAN ip 192.168.2.38/24. One thing I found interesting is I have to set Win7 network interface to promiscuous mode to make GNS3 to communicate with other machines in the same LAN
1. ACS 5.6 VM Configuration:
ESXi 5.5 is used to create a vm for ACS5.6. Hard drive has to be at least 60G, also 2 CPUs and 4G memory also is prerequisite based on Cisco installation guide. (In my lab, 2G memory is running well)..
2. Installation and Basic Configuration of ACS 5.6
Following the Cisco installation guide, it is quite straightforward to do a fresh installation. After rebooted, you will get into console setup steps. Please make sure your Domain Control server is alive. Cisco has a article (Installing and Configuring Cisco Secure Access Control System with CSACS-1121) to describe the whole procedures
Please type ‘setup’ to configure the appliance
localhost login: setup
Enter hostname[]: ACS56
Enter IP address[]: 192.168.2.42
Enter IP default netmask[]: 255.255.255.0
Enter IP default gateway[]: 192.168.2.1
Enter default DNS domain[]: test1.com
Enter primary nameserver[]: 192.168.2.69
Add secondary nameserver? Y/N : n
Add primary NTP server [time.nist.gov]: 192.168.2.69
Add secondary NTP server? Y/N : n
Enter system timezone[UTC]:
Enable SSH service? Y/N [N] : y
Enter username [admin]: admin
Enter password:
Enter password again:
Pinging the gateway…
Pinging the primary nameserver…
Do not use `Ctrl-C’ from this point on…
Appliance is configured
Installing applications…
Installing acs…
Generating configuration…
Rebooting…
Wait until reboot completed, you should be able to log into ACS through SSH and Web browser.
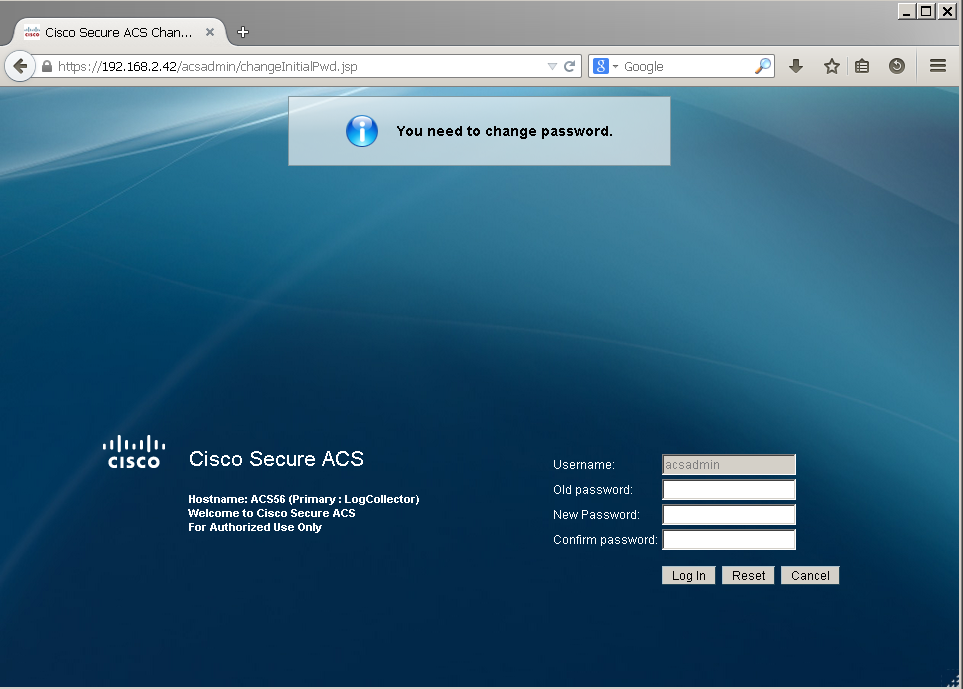
In browser window, first time log in username is ACSADMIN, and password is default. You will have to change it after first time logged in.
3. Authentication with ACS Internal User
Step1 – create a new entry at Network Devices and AAA Clients
Step2 – create Internal users (acstest1 and acstest2)
Step3 – make sure Default Device Admin – Identity is using Internal Users
Step 4 – Router’s configuration
aaa new-model
aaa authentication login default group tacacs+ enable
tacacs-server host 192.168.2.42
4. Test and Debug
Test log in with both users acstest1 and acstest2 are successful.
R1#
*Mar 2 00:21:47.249: AAA/BIND(0000000C): Bind i/f
*Mar 2 00:21:47.253: AAA/AUTHEN/LOGIN (0000000C): Pick method list ‘default’
*Mar 2 00:21:48.013: AAA/LOCAL: exec
R1#
*Mar 2 00:21:58.757: AAA: parse name=tty66 idb type=-1 tty=-1
*Mar 2 00:21:58.757: AAA: name=tty66 flags=0x11 type=5 shelf=0 slot=0 adapter=0 port=66 channel=0
*Mar 2 00:21:58.761: AAA/MEMORY: create_user (0x6440FE70) user=’acstest1′ ruser=’NULL’ ds0=0 port=’tty66′ rem_addr=’192.168.2.106′ authen_type=ASCII service=ENABLE priv=15 initial_task_id=’0′, vrf= (id=0)
*Mar 2 00:21:58.761: AAA/AUTHEN/START (3875444769): port=’tty66′ list=” action=LOGIN service=ENABLE
*Mar 2 00:21:58.761: AAA/AUTHEN/START (3875444769): non-console enable – default to enable password
*Mar 2 00:21:58.765: AAA/AUTHEN/START (3875444769): Method=ENABLE
R1#
*Mar 2 00:21:58.765: AAA/AUTHEN(3875444769): Status=GETPASS
R1#
*Mar 2 00:22:01.013: AAA/AUTHEN/CONT (3875444769): continue_login (user='(undef)’)
*Mar 2 00:22:01.013: AAA/AUTHEN(3875444769): Status=GETPASS
*Mar 2 00:22:01.013: AAA/AUTHEN/CONT (3875444769): Method=ENABLE
*Mar 2 00:22:01.017: AAA/AUTHEN(3875444769): Status=PASS
*Mar 2 00:22:01.017: AAA/MEMORY: free_user (0x6440FE70) user=’NULL’ ruser=’NULL’ port=’tty66′ rem_addr=’192.168.2.106′ authen_type=ASCII service=ENABLE priv=15 vrf= (id=0)
R1#


